

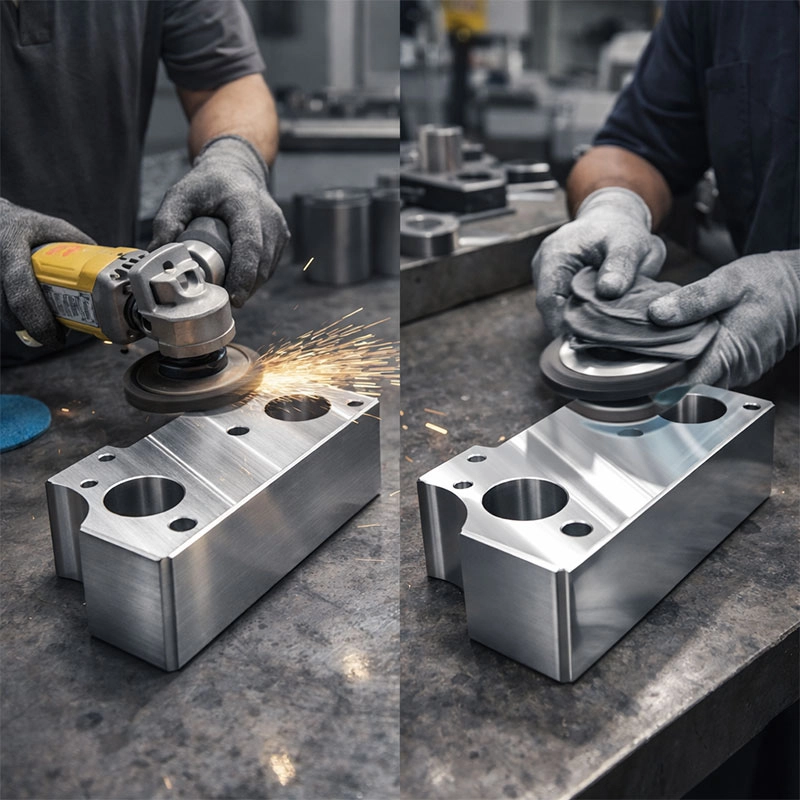
Polishing aluminum parts is a crucial finishing step in CNC machining that transforms a good part into a great one. It enhances appearance, improves corrosion resistance, and can even affect part performance. This guide walks you through five professional tips to master this skill, from preparation to final buffing, ensuring you achieve a consistent, high-quality finish every time.
Start with a Clean Slate: The Foundation of a Perfect Finish
You know that feeling when you try to clean a window but miss a spot of grime? The same principle applies to aluminum surface finishing. Any oil, coolant residue, or even fingerprints left on the part will get ground into the metal during the polishing process, creating visible imperfections. Think of it like sanding a piece of wood with dirt on it—you’ll just scratch the surface deeper. A thorough cleaning is the most important, yet often overlooked, step in achieving a mirror-like aluminum polish.
Degreasing is Non-Negotiable
After your CNC machining cycle, the part is coated with cutting fluids. We recommend you start with a dedicated degreaser or a simple solution of warm water and dish soap. Scrub gently with a soft brush, rinse completely with clean water, and then dry the part immediately with a lint-free cloth or compressed air to prevent water spots. For a deep clean before a high-luster buffing aluminum stage, some machinists use a mild solvent like isopropyl alcohol. This ensures you’re working with pure metal, ready for the next step.
Understand Your Abrasives: Grit Progression is Key
Jumping straight to a fine polish is like trying to run before you can walk—it just won’t work. The secret to a flawless finish is a disciplined, step-by-step approach to removing tool marks and scratches. This process, often called aluminum finishing, relies on a progression of abrasive materials. You might start with a 180-grit sandpaper to remove major CNC milling lines, then move to 320, 600, and finally 1000+ grits. For manual work, wet sanding helps keep the paper clean and provides a smoother cut. A great resource on material properties is the ASM International website. Remember, each stage’s job is to remove the scratches from the previous one. Don’t skip steps!
Master the Art of Buffing: Tools and Technique
Once sanding is complete, you’ve achieved a uniform satin finish. Now comes the magic of polishing aluminum components to a shine. This is where buffing wheels and compounds enter the scene. Using a bench grinder with a buffing wheel attachment or a dedicated polishing machine, you’ll apply different compounds in stages. A tripoli compound is typically used for cutting and initial shining, followed by a finer white rouge compound for that final brilliant luster. The key is to use a separate, clean wheel for each type of compound to avoid contamination.
Choosing the Right Buffing Wheel
Not all buffs are created equal. For general purpose work on aluminum, a sewn cotton wheel offers good durability and cut. For getting into tight corners or on intricate CNC machined aluminum parts, a loose-leaf cotton wheel is more forgiving and conforms better to the shape. For the final, ultra-high gloss, a soft flannel wheel can be the perfect tool. It’s like having different brushes for a painting—each one gives you a different effect.
Control Your Pressure and Speed: The Finesse Factor
Here’s a tip I learned the hard way: more pressure and speed does not equal a better polish. In fact, it often leads to burnt aluminum, uneven finishes, and even part deformation on thinner components. When how to polish aluminum, let the abrasives and the tools do the work. Apply moderate, consistent pressure and keep the part moving steadily across the wheel. For rotary tools, start at a lower speed setting. Excessive heat is the enemy—it can soften the aluminum and create a wavy, orange-peel texture. If the part gets too hot to touch, you’re going too fast. Slow down, use lighter pressure, and dip the part in water to cool it frequently.
Finish with Protection: Sealing Your Hard Work
You’ve just created a beautiful, reflective surface. But bare, polished aluminum is prone to oxidation and will start to dull and tarnish quickly when exposed to air. To protect your hard work, a final protective coating is essential. For many applications, a simple application of a high-quality automotive wax or a dedicated metal sealant will provide a barrier against moisture and fingerprints. For more durable protection, especially for parts that will be handled frequently, you might consider a clear anodizing aluminum coating. This electrochemical process creates a hard, integral oxide layer that locks in the shine. You can learn more about this process from the ASTM International standards organization. A quick protective step ensures your aluminum part polishing results last for years, not just days.