

Categories
Surface Finishing

Master Machining Surface Finish Standards: Your Ultimate Guide

Understanding machining surface finish standards is crucial for any CNC project. This guide breaks down what these specifications mean, why they matter for part performance, and how to achieve the right finish for your application, all in a friendly, easy-to-follow way.

Understanding Machining Surface Finish Specifications

Let’s start at the beginning. When we talk about machining surface finish standards, we’re really talking about the “texture” left on a part after it’s been cut, milled, or turned. It’s not just about looks—though a smooth finish is often a sign of quality—it’s a critical functional specification. Think of it like the difference between a rough, unpaved road and a freshly paved highway; each is suited for different types of “traffic,” like friction, sealing, or fatigue resistance.

In the world of CNC machining, these standards are formally called surface roughness or surface texture. They are quantified using specific parameters, the most common being Ra (Roughness Average) and Rz (Average Maximum Height). You’ll see these numbers, measured in micrometers (µm) or microinches (µin), called out on engineering drawings. Getting familiar with these terms is your first step to mastering finish specifications for machined parts.

Key Parameters: Ra and Rz

You might wonder, what’s the real difference between Ra and Rz? Let me give you a simple analogy. Ra is like the average height of all the blades of grass in your lawn. It gives you a good overall sense of smoothness. Rz, on the other hand, measures the average distance between the highest peak and the deepest valley in five sample areas. It tells you about the most extreme variations.

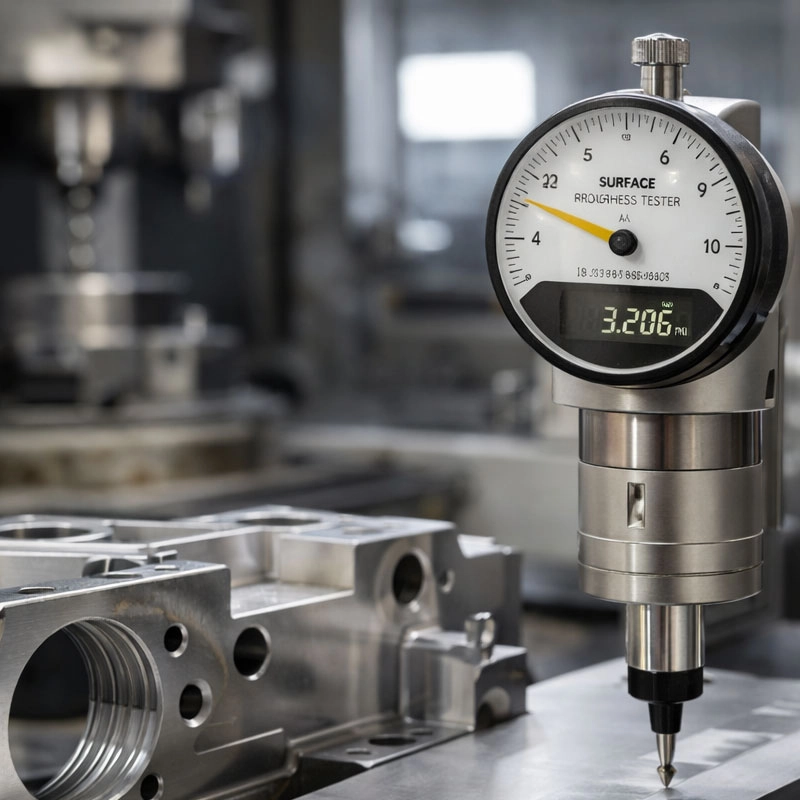
For instance, a part with an Ra 3.2 µm finish is visibly machined but relatively smooth, common for non-critical bearing surfaces. A much finer surface roughness of Ra 0.4 µm might be required for a hydraulic seal. It’s crucial to know which parameter your design calls for. The American Society of Mechanical Engineers (ASME) provides the definitive guidelines, which you can explore in their standard ASME B46.1.

Why Surface Roughness Standards Matter

So, why do we put so much emphasis on these tiny measurements? The quality of a machined surface directly impacts how a part performs in the real world. A finish that’s too rough can create stress concentrators, leading to premature cracking under load. Conversely, achieving an ultra-smooth machined surface texture can be unnecessarily expensive if the application doesn’t require it.

Here’s a practical example from a user I spoke with: they were having issues with a piston sticking in a cylinder. The blueprint called for a specific surface finish callout, but the shop was only checking Ra. When they started measuring Rz as well, they found occasional deep tool marks the Ra average had missed. Addressing this specific surface roughness standard solved the friction problem instantly. This shows how these specs ensure parts fit together correctly, wear evenly, resist corrosion, and even look professional.

How to Achieve the Right Surface Finish

Achieving your target CNC surface finish standards is a blend of art and science. It starts with choosing the right tooling, speeds, and feeds, but it doesn’t end there. We suggest you think of it as a process, not just a final step.

Toolpath and Strategy

Your CNC program’s toolpath strategy is a huge factor. A simple profile cut might leave visible cusps, while a finish machining pass with a smaller step-over will create a smoother surface. Using a tool with a larger nose radius or a dedicated finishing end mill can significantly improve results. The key is to communicate your required machining finish quality clearly to your machinist or programmer so they can select the best strategy from the start.

Post-Machining Processes

Sometimes, the desired surface roughness parameters can’t be achieved by milling or turning alone. That’s where secondary processes come in. Techniques like grinding, honing, polishing, or vibratory finishing can take a machined part to the next level of smoothness. For example, a ground surface can achieve an Ra value below 0.1 µm, which is essential for high-precision applications like optical mounts or medical implants. The International Organization for Standardization (ISO) has detailed standards for these processes, such as those found in the ISO 1302 series for surface texture indication.

Common Misconceptions About Surface Finish

Let’s clear up a few common mix-ups. First, a smoother finish is not *always* better. As I mentioned, it costs more. For a hidden internal bracket, a standard milled finish is perfectly functional. Second, Ra and Rz are not directly interchangeable; a part can have an acceptable Ra but a problematic Rz, just like in our piston example. Finally, specifying “mirror finish” on a drawing isn’t helpful—it’s subjective. Always use the standard numerical surface texture specifications to avoid confusion and ensure you get exactly what your design needs.

Putting It All Together

Mastering machining surface finish standards is about speaking the precise language of part quality. It connects your design intent to the manufacturing process and, ultimately, to a reliable, high-performing product. Start by understanding the Ra and Rz values on your drawings. Collaborate with your machining partner on the best way to achieve them, whether through toolpath optimization or a secondary process. By paying attention to these critical finish specifications for machined parts, you’ll save time, reduce costs from reworks, and build components that perform flawlessly. You’ve got this!
Categories
Surface Finishing

CNC Surface Roughness Guide: Ra Values, Finish Symbols, and Design Tips

Quick answer: CNC surface roughness describes the small peaks and valleys left on a machined surface. It is commonly specified with Ra values. Roughness affects appearance, friction, sealing, wear, coating, and how parts feel or assemble.

CNC Surface Roughness Guide

Surface roughness is not only cosmetic. For some parts it controls sliding, sealing, bearing contact, fatigue performance, or coating adhesion. For other parts, a normal machined finish is enough and tighter values only add cost.

Key Points for Buyers and Engineers

Topic What to know Practical impact
General milling Visible tool marks, practical finish Good for non-critical surfaces.
Fine finishing pass Reduced tool marks Useful for visible or mating surfaces.
Grinding or polishing Very smooth surface Used for sealing, sliding, or cosmetic areas.
Blasting or coating Texture or protective finish Can hide or change machining marks.

How This Affects CNC Machined Parts

Before quoting, identify which surfaces need specific roughness. Combine roughness notes with material selection from the CNC materials guide and finishing choices from the surface treatment page.

Design and Purchasing Checklist

  • Specify roughness only where it affects function or appearance.
  • Use drawings to mark critical faces.
  • Avoid unrealistic roughness inside deep pockets.
  • Confirm measurement direction when texture matters.
  • Plan polishing or grinding separately from normal CNC milling.

Related MTSPi Resources

FAQ

What is a normal CNC surface roughness?

Many general CNC machined surfaces are around Ra 3.2 µm or Ra 1.6 µm depending on process and requirement.

Can CNC machining make mirror finishes?

Mirror-like finishes usually require polishing, grinding, or lapping after machining.

Does material affect roughness?

Yes. Aluminum, brass, stainless steel, and plastics respond differently to tools and finishing passes.

Need help with surface roughness planning?

Send drawings, material, quantity, finish, tolerance notes, and application requirements. MTSPi can review manufacturability before quoting.

Contact MTSPi for engineering and quote support

Practical Buyer Notes

Surface roughness content should explain the engineering purpose behind finish numbers. A smoother surface is not automatically better; it can increase cost without improving function.

This page should help buyers decide where roughness matters most: sealing faces, sliding contact, bearing seats, cosmetic surfaces, fluid paths, or coating preparation.

How to Evaluate This Topic on a Real Drawing

Decision point Recommended approach Why it matters
Hidden surfaces Use practical machined finish Controls cost
Mating faces Use moderate roughness and flatness notes Improves fit and contact
Sealing faces Use controlled Ra and inspection Reduces leakage risk
Cosmetic surfaces Use finish notes, polishing, blasting, or coating Appearance may matter more than Ra alone

Common Mistakes to Avoid

  • Equating shiny surfaces with correct roughness.
  • Forgetting that bead blasting changes texture.
  • Ignoring tool marks on visible surfaces.
  • Not defining edge breaks and burr expectations.

Recommended MTSPi Review Workflow

MTSPi should map each surface to its function before quoting. Then the team can decide whether normal machining, finishing passes, polishing, grinding, or coating is appropriate.

  1. Confirm the part function, operating environment, and assembly risk.
  2. Review material, process, tolerance, surface finish, and inspection requirements together.
  3. Separate critical features from general dimensions so cost is not wasted on non-functional details.
  4. Use related resources such as CNC materials, surface treatment, and quality assurance to complete the specification.
  5. Send the final drawing package to MTSPi for quote review before production.

What to Send for a Faster Quote

Provide a drawing that marks cosmetic surfaces, sealing faces, sliding areas, and any numeric Ra requirement that must be inspected.

  • 3D CAD file and 2D drawing with revision number.
  • Material grade or acceptable alternatives.
  • Quantity, delivery target, and whether samples are required first.
  • Critical dimensions, thread callouts, finish notes, and inspection requirements.
  • Application notes when the part is used in heat, moisture, wear, vibration, or visible assemblies.

Deeper Engineering Notes

For CNC surface roughness, the strongest page is not just a definition. It should help a buyer decide what information belongs on the drawing, what questions to ask a supplier, and which details affect cost, quality, and delivery. In real RFQ work, the important details are usually toolpath strategy, tool nose radius, feed rate, material behavior, finishing passes, and post-processing. These details decide whether the supplier can quote confidently or has to return with repeated questions.

The common risk is confusing visual appearance with measured surface roughness. That risk can make the content look complete on the surface but weak in a real manufacturing situation. A stronger specification connects the topic to material behavior, machine access, tolerance control, finishing, and inspection before the order is released.

Example Specification Review

Review area Question to answer Good specification practice
Function What does this feature or part need to do? Describe the load, fit, motion, appearance, sealing, or assembly requirement.
Material Is the selected material suitable for the environment? Confirm strength, heat, corrosion, wear, chemical exposure, and cosmetic needs.
Geometry Can the feature be reached by standard tools? Review depth, corner radius, wall thickness, tool clearance, and setup direction.
Tolerance Which dimensions are truly critical? Use tight tolerances only where function requires them and keep general dimensions practical.
Verification How will acceptance be checked? Define gauges, CMM checks, roughness measurement, thread inspection, or visual standards when needed.

How This Page Should Support Ranking

This topic can attract both beginner searches and buyer searches. The beginner wants a clear answer; the buyer wants enough detail to make a manufacturing decision. A page has a better chance to rank when it answers the simple question first, then adds examples, process limits, design notes, comparison tables, and practical next steps.

That is also why internal links should be helpful rather than forced. A reader should naturally move from this page to a process page, material page, surface finish page, inspection page, or quote page only when that next step solves a real question.

Conclusion

Surface roughness should be specified with purpose. Clear surface notes help control appearance and function without adding unnecessary machining cost.

Request A Quote

We'll Send You Back with Price Immediately!

DEC 1-31

XMAS SPECEIL

Up to

40% off

CNC Surface Roughness Guide: Ra Values, Finish Symbols, and Design Tips

We'll Send You Back with Price Immediately!