

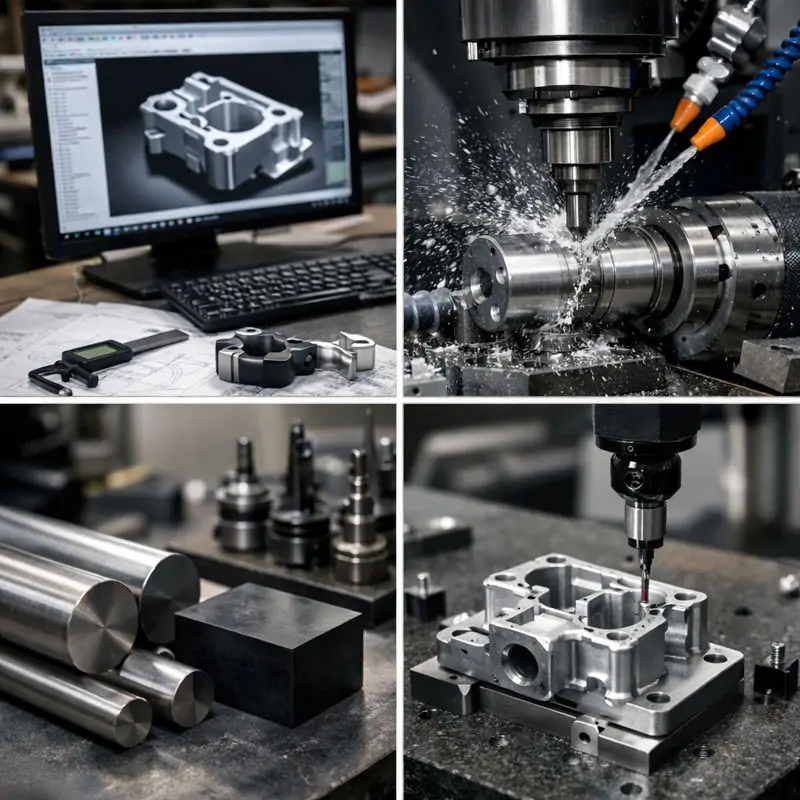
Ever wondered how those incredibly precise and durable metal or plastic parts are made? Understanding the CNC machining workflow is key to unlocking high-quality results. This guide walks you through the entire process, from digital design to the finished component, explaining how each step contributes to superior part quality.
From Blueprint to Bits: The Digital Foundation
Think of creating a top-notch part like baking a complex cake. You wouldn’t start without a detailed recipe, right? In the world of computer numerical control machining, everything begins with a perfect digital plan. This first phase is all about translating your idea into a language the machines understand, and getting this right is the single biggest factor in achieving high-precision components.
The Crucial CAD Model
It all starts with your 3D model. Using Computer-Aided Design (CAD) software, you or your designer creates a virtual blueprint of the part. This isn’t just a sketch; it’s a fully defined digital twin with exact dimensions, tolerances (how much a measurement can vary), and geometries. I always tell folks that a clear, error-free CAD file is like giving your machinist a perfect map—it prevents wrong turns and wasted material. Common formats include STEP and IGES, which are great for preserving all that intricate design data.
CAM Programming: The Machine’s Instructions
Next, that CAD model moves into Computer-Aided Manufacturing (CAM) software. Here’s where the magic happens: the software takes the 3D shape and generates the toolpaths—the precise routes the cutting tools will follow. The programmer selects the right tools, defines cutting speeds and feed rates, and plans the sequence of operations. This step, often called CNC milling and turning process planning, is crucial for efficiency and surface quality. A skilled programmer can save hours of machine time and ensure a smoother finish by optimizing every move. For a deeper dive into how G-code drives these machines, you can check out this resource from Engineering.com.
The Machining Dance: Turning, Milling, and More
With the digital instructions locked in, the physical creation begins. This is the stage most people picture: sparks flying, metal chips curling away. It’s a subtractive process, meaning we start with a solid block of material (called the workpiece or stock) and carefully remove material until the part emerges. The choice of machine—like a CNC mill or CNC lathe—depends on your part’s shape.
Material Matters: Choosing Your Stock
Your part is only as good as the material it’s made from. The process starts with selecting the right stock—aluminum for lightweight strength, stainless steel for corrosion resistance, or engineering plastics like PEEK. We secure this block firmly to the machine bed. A loose workpiece is a recipe for disaster, leading to poor accuracy or even a broken tool. Proper fixturing is a non-negotiable first step for manufacturing precision parts.
Precision in Action: The Cutting Process
Now the machine comes to life. It follows the CAM program’s G-code to the letter. A spindle spins a cutting tool at high speeds—thousands of RPMs—and moves it along multiple axes (3, 4, or 5) to carve the material. You might see roughing passes that quickly remove bulk material, followed by finishing passes that take lighter cuts to hit the exact dimensions and a fine surface. Coolant is often used to keep everything from overheating. Watching a multi-axis machining center create a complex shape in one setup is truly impressive; it eliminates errors that can come from moving and re-clamping the part.
Beyond the Cut: Finishing and Verification
The part coming off the machine isn’t always ready to ship. Often, it needs a little extra love to meet all your requirements. This post-processing phase is where we add functional and aesthetic touches, and then, most importantly, verify that everything is perfect. Skipping these steps is like building a beautiful cabinet but not sanding or checking if the doors fit.
Achieving the Perfect Surface Finish
Machining leaves tiny tool marks. For many applications, that’s fine (this is often called an “as-machined” finish). But if you need a smoother feel, better sealing, or a specific look, we apply secondary operations. This could mean bead blasting for a uniform matte texture, anodizing aluminum for color and hardness, or precision polishing to a mirror shine. These machining finishing techniques not only look great but can also improve wear resistance and performance.
The Final Check: Rigorous Quality Control
This is the gatekeeper of quality. Every single part should be inspected against your original design specifications. We use tools like digital calipers and micrometers for basic checks. For complex geometries, a Coordinate Measuring Machine (CMM) might be used to create a detailed 3D map of the part and compare it to the CAD model. This step of precision part fabrication ensures that the tenth part is identical to the first. Reputable shops often provide inspection reports, so you have documented proof of quality. Standards for these measurements are maintained by organizations like ASME.
Partnering for Success: Your Role in the Process
Getting high-quality CNC machined parts isn’t a passive act. The best results come from a partnership between you and your machining provider. Start with a clear, manufacturable design—considering factors like tool access and wall thickness. Communicate your tolerances honestly; specifying extremely tight tolerances everywhere can skyrocket cost without benefit. Ask questions and provide clear drawings with all critical dimensions called out. When you understand the steps in CNC part production, you can make smarter decisions that lead to better parts, faster turnaround, and a smoother experience for everyone involved. Remember, a little collaboration upfront goes a very long way.