

Categories
Surface Finishing

RA vs RZ Surface Finish: A Simple Guide for CNC Machinists

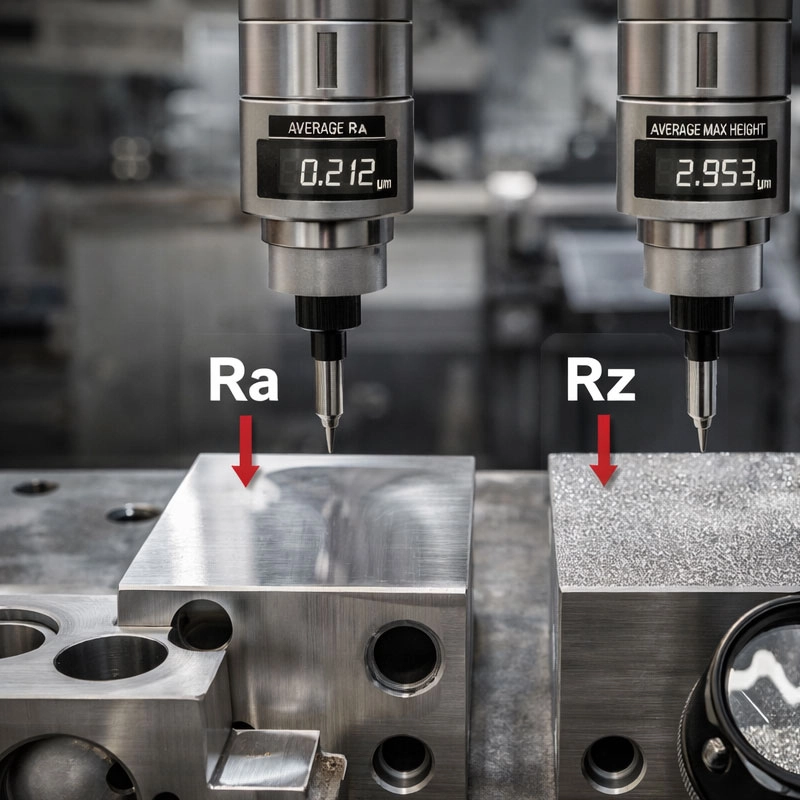
Hey there! If you’ve ever scratched your head over a drawing callout for surface roughness, you’re not alone. Today, we’re breaking down the two most common parameters: Ra and Rz. Think of them as different ways to describe the same mountain range—one gives you the average height, the other shows you the peaks and valleys. Getting this right is key for part function, cost, and quality.

Understanding the Key Differences Between Ra and Rz Roughness Measurements

Let’s start with the basics. In the world of surface texture and surface metrology, Ra and Rz are the two heavyweights. They’re both numbers that tell us about the “bumpiness” of a machined part, but they calculate it in fundamentally different ways. It’s like describing a road trip by your average speed (Ra) versus telling someone the highest and lowest speeds you hit (Rz). Both are useful, but they give you different pieces of the puzzle. Confusing them can lead to parts that don’t seal properly, wear out too fast, or simply get rejected for not meeting the spec.

What is Ra (Average Roughness)?

Ra, or Arithmetic Average Roughness, is the most common surface finish symbol you’ll see. It’s calculated by taking the average of all the absolute heights and depths of the surface profile over a sampling length. Imagine smoothing out all the peaks and valleys into a single, flat line—the average distance from that line to the actual surface is the Ra value. A lower Ra number means a smoother surface. It’s a great overall indicator and is fantastic for controlling general part quality and appearance. For more on the official definition, you can check the ASME B46.1 standard on surface texture.

What is Rz (Mean Roughness Depth)?

Rz, or Mean Roughness Depth (sometimes called Rz ISO or ten-point height), tells a different story. Instead of an average, Rz measures the average distance between the five highest peaks and the five lowest valleys within the sampling length. It’s more sensitive to extreme variations. This makes Rz incredibly valuable when the deepest scratches or highest burrs could cause problems, like in sealing surfaces or bearing seats. If you’re looking into Rz surface roughness for a specific application, resources like ISO 4287 provide the technical details.

Why Choosing the Right Parameter Matters

Picking between Ra versus Rz isn’t just academic—it hits your bottom line. Specifying a tighter (lower) Ra value when you really need a tight Rz might force you to use a slower, more expensive finishing process like grinding, when a faster milling operation could have achieved the necessary peak-to-valley control. Conversely, using Ra when Rz is critical could let a few deep troughs slip through, causing a gasket to leak or increasing friction and wear. Understanding this surface finish comparison helps you match the measurement to the part’s real-world job.

A Practical Guide for the Shop Floor

So, how do you decide in daily practice? Here’s a simple rule of thumb I like to use, based on what the part needs to do.

When to Rely on Ra

Stick with Ra surface roughness for general quality control and aesthetic surfaces. It’s perfect for parts where consistent, overall smoothness is the goal. Think about the visible face of a consumer product, a sliding surface with light loads, or a part that just needs to be clean and free of obvious tool marks. Ra is easier and faster to measure with common handheld surface roughness testers, which makes it a shop-floor favorite for quick checks.

When Rz is the Better Choice

Switch to Rz measurement when the extremes matter. This is crucial for functional surfaces. For example, if you’re machining a hydraulic cylinder bore, a single deep valley can cause leakage past the seal. For a surface that will be coated, like a paint or plating substrate, high peaks might prevent proper adhesion. If you see a callout for a maximum roughness depth or the part is for sealing, bearing, or coating, always double-check if Rz is the right call.

Common Pitfalls and How to Avoid Them

One of the biggest mistakes is assuming Ra and Rz are directly interchangeable. They aren’t! While a smoother surface (low Ra) often has a low Rz, it’s not a guaranteed rule. You could have a surface with a decent Ra but one or two catastrophic scratches, giving it a terrible Rz value. Another pitfall is not clarifying the standard (like ASME vs. ISO) on the drawing, as the calculation methods can differ slightly. Always communicate with your design engineer if a callout seems unusual. A quick chat about the difference between Ra and Rz in that specific context can save hours of rework.

Wrapping It Up: Your Go-To Checklist

Let’s keep it simple. Next time you’re programming a job or inspecting a part, run through this mental list: Is it a cosmetic or lightly loaded surface? → Ra is likely fine. Is it for sealing, heavy bearing, or coating? → Ask if Rz should be specified. Always check the drawing standard. And remember, the best tool is knowledge—understanding these two surface finish parameters makes you a more valuable machinist. You’ll make better parts, faster, and with fewer headaches. Now go make some chips!
Categories
Surface Finishing

Master Surface Finish in CNC Machining: Your Ultimate Guide

Surface finish, or surface texture, is a critical quality metric in CNC machining. It’s not just about looks; it affects how a part performs, wears, and interacts with other components. This guide will help you understand what it is, why it matters, and how to achieve the perfect finish for your project.

Understanding Surface Finish in CNC Machining

When we talk about surface finish in CNC machining, we’re really describing the texture left behind by the cutting tool. Think of it like the difference between a rough, hand-sanded piece of wood and one that’s been polished to a glass-like shine. In technical terms, it’s often called surface roughness or surface texture. It’s a tiny world of peaks and valleys that has a huge impact. Getting a handle on this concept is your first step to mastering part quality.

Key Measurements: Ra, Rz, and More

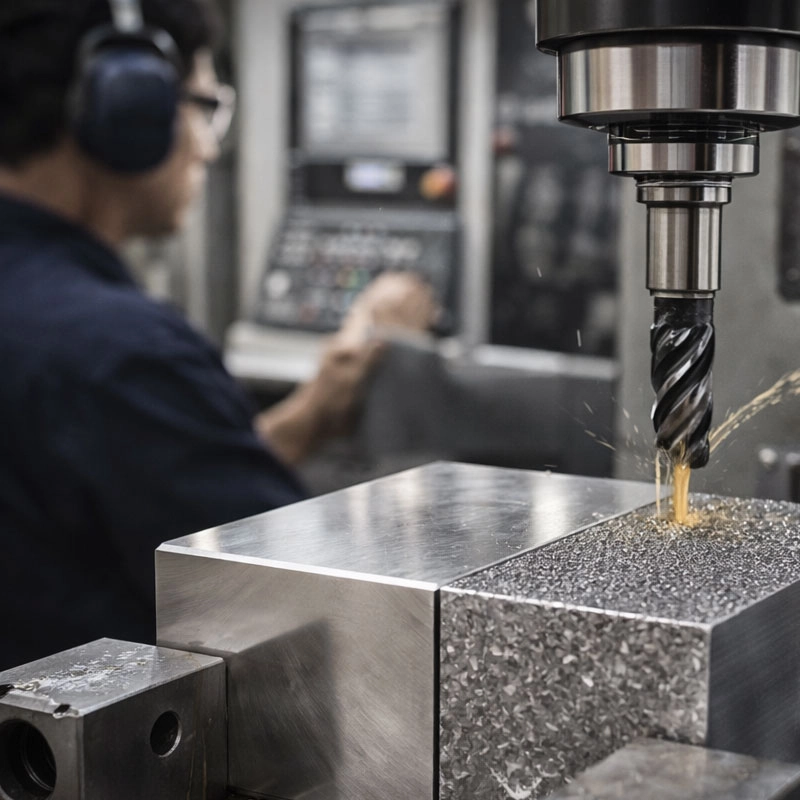
To quantify this texture, we use specific measurements. The most common one you’ll encounter is Ra (Average Roughness). It gives us a single number representing the average height of those microscopic peaks and valleys. A lower Ra number means a smoother finish. For instance, a finely polished surface might have an Ra of 0.4 µm, while a rough milled finish could be 3.2 µm or higher. Another important measure is Rz (Average Maximum Height), which looks at the distance between the highest peak and the deepest valley in a sample. Understanding these metrics helps you communicate exactly what you need, whether you’re looking for a standard machined finish or something more refined.

Why Surface Texture Matters for Your Parts

You might wonder, “Why fuss over such small details?” Well, the CNC machining surface finish directly influences your part’s life and function. A smoother finish reduces friction, which is crucial for moving parts like bearings or shafts—they’ll last longer and run quieter. It also improves fatigue resistance, meaning the part can handle repeated stress better. For components that need to seal, like fluid ports, a fine finish ensures a tight seal. Even aesthetics and ease of cleaning are important for consumer-facing products. So, specifying the right surface roughness in machining isn’t just an engineering detail; it’s a decision that affects performance, cost, and success.

How to Achieve a Better CNC Surface Finish

Achieving your desired finish is a blend of art and science in the CNC milling and turning process. It’s not just about running the machine slower. Let’s break down some of the key factors you can control. A great resource for standard definitions is the ASME website, which covers many manufacturing standards.

Toolpath Strategy is Key

The path your cutter takes matters immensely. For a superior finish, strategies like contour parallel machining or using a small stepover (the distance the tool moves sideways on each pass) are essential. A smaller stepover creates more overlap between tool paths, leaving a smoother surface. It’s like mowing a lawn with more overlapping rows for an even cut. Also, consider the direction of the tool marks—sometimes aligning them with the part’s function or final assembly can be beneficial.

The Right Tool for the Job

Your choice of cutting tool is a major player. A sharp, high-quality tool with the correct geometry will leave a cleaner surface than a worn one. Using a tool with a larger nose radius can often produce a finer finish. Furthermore, the material removal rate needs to be balanced; taking too heavy a cut can cause vibration and chatter, ruining the surface. Sometimes, the answer lies in post-machining processes like tumbling, bead blasting, or manual polishing to achieve that final, perfect look and feel.

Common Misconceptions About Machined Finishes

Let’s clear up a few things I often hear. First, a mirror finish isn’t always the best goal. It’s expensive and time-consuming to produce, and for some applications, a bit of texture is actually better for holding lubricant or paint. Second, a smoother finish doesn’t automatically mean higher part strength; in some cases, certain textures can help hide stress lines. Finally, achieving a perfect surface profile isn’t just about the machine’s capability—it’s about the entire process, including tooling, fixturing, and even the raw material itself. Don’t assume the machine will do all the work!

Putting It All Together: Your Finish Checklist

So, how do you master surface finish in CNC? Start by clearly defining your requirements using standard Ra/Rz values. Communicate early with your machining partner about the part’s function—this context is gold. Be open to their suggestions on toolpaths and processes. Remember, every additional step for a smoother machined surface texture adds cost, so aim for the “good enough” finish that meets your functional needs perfectly. For deeper dives into material science behind finishes, you can explore resources from ASTM International. By understanding the why and how, you can make informed decisions that lead to better-performing, longer-lasting, and more cost-effective parts. That’s the real mastery.

Categories
Surface Finishing

Mastering Aluminum CNC Machining: A Guide to Perfect Surface Finishes

Getting a flawless finish on aluminum parts is a common goal in CNC shops. This guide breaks down the key factors—from tool selection to post-processing—that help you achieve the exact surface texture you need, whether it’s a simple mill finish or a mirror-like polish.

Achieving Optimal Surface Quality in Aluminum CNC Machining

Hey there! If you’ve ever run an aluminum part and wondered how to get that super smooth, professional look, you’re in the right place. Mastering the surface finish on aluminum isn’t just about aesthetics; it’s crucial for part function, wear resistance, and even how well paint or anodizing sticks. Think of it like sanding a piece of wood before you varnish it—the prep work makes all the difference. In the world of CNC milling aluminum, that “prep work” happens right on the machine and in the steps that follow.

The Role of Tooling and Paths

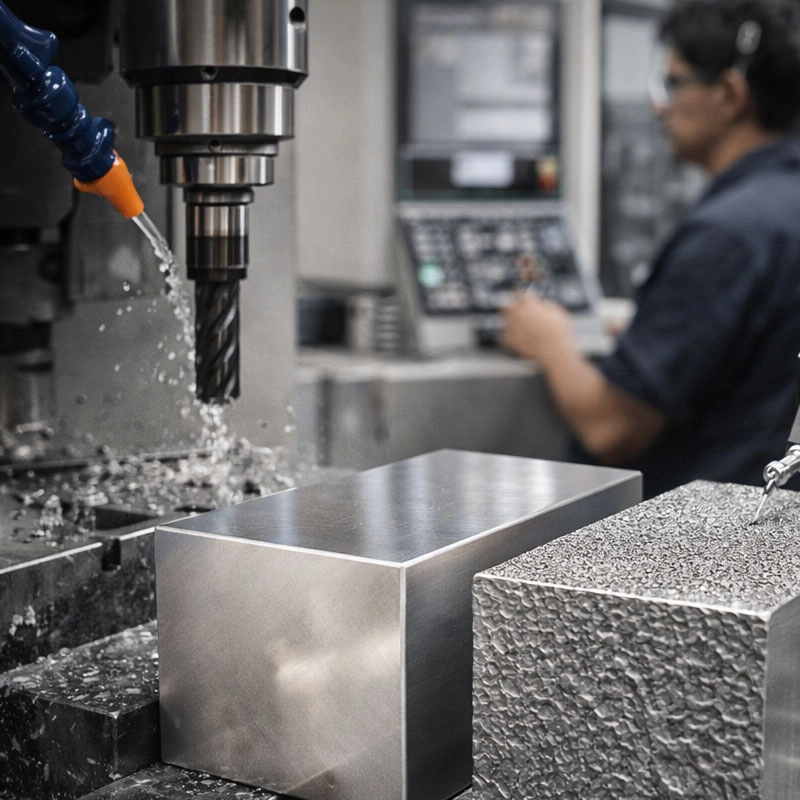
Your choice of cutter and how you program its movement are the biggest levers you can pull. For a great aluminum machining finish, sharp tools are non-negotiable. A worn tool doesn’t cut; it rubs and tears, leaving a rough surface. We recommend using tools with a high helix angle and polished flutes designed specifically for non-ferrous metals—they evacuate chips quickly, reducing the chance of re-cutting them and creating those pesky scratches.

Then there’s your toolpath strategy. A finishing pass with a small stepover (we’re talking 5-10% of the tool diameter) is your best friend for a uniform texture. Climb milling, where the cutter moves with the rotation, typically gives a cleaner cut than conventional milling in aluminum. And don’t forget about spindle speed and feed rate! Finding that sweet spot is key. Running too slow can cause rubbing, while too fast might introduce vibration. It’s a bit like finding the right rhythm.

Machine and Material Matters

A rigid machine setup is the foundation. Any vibration or chatter will telegraph directly into your part’s surface. Make sure your workpiece is clamped down securely and your tool holder is clean and true. The aluminum alloy itself also plays a part. Softer grades like 6061 are generally more forgiving and easier to get a nice finish on than harder alloys like 7075, which can be a bit more demanding on tools. For a deep dive into material properties, the ASM International handbook is an excellent resource.

Common Aluminum Surface Finishes Explained

When we talk about surface finish for CNC parts, we often use standard terms or Ra (Roughness average) values measured in micro-inches or micrometers. Let’s walk through what you can typically achieve directly from the machine and beyond.

The “As Machined” Finish

This is the texture left directly by the cutting tool. With careful programming and sharp tools, you can achieve a very respectable finish right off the bed. This is often sufficient for functional parts where looks aren’t the primary concern. The quality here is all about controlling those tool marks to be consistent and fine.

Buffed and Polished Surfaces

For parts that need to shine—think consumer electronics enclosures or decorative pieces—post-processing is essential. This starts with sanding to remove tool marks, progressing through finer grits. Buffing with a polishing compound then brings up the luster. For a true mirror finish, a process like vibratory finishing or chemical polishing might be used. It’s a labor of love, but the result is stunning.

Practical Tips for a Better Finish

Let’s get practical. Here are a few hands-on tips I’ve found make a world of difference for improving CNC surface finish on aluminum projects:

First, use plenty of coolant or air blast. Aluminum has a nasty habit of welding chips back onto the surface (built-up edge). Keeping everything cool and clear prevents this. Second, consider a dedicated finishing tool. Even if you rough with a slightly worn tool, switching to a brand-new, sharp finisher for the last pass can dramatically improve the result. Finally, don’t underestimate manual deburring. A quick pass with a fine file or sandpaper on sharp edges can make a part look and feel professionally finished. For more advanced techniques on machining best practices, check out the guides at CNC Cookbook.

Conclusion and Your Next Steps

Perfecting your aluminum part finishing process is a journey of paying attention to the details—sharp tools, smart toolpaths, a stable setup, and knowing when to hand it off for post-processing. Start by auditing one of your current jobs. Is your finishing tool sharp? Could you reduce the stepover on the final pass? Small tweaks often lead to big improvements in surface quality. Remember, a great finish not only makes your part look good but often means it will perform better and last longer, too. Happy machining!

Request A Quote

We'll Send You Back with Price Immediately!

DEC 1-31

XMAS SPECEIL

Up to

40% off

Mastering Aluminum CNC Machining: A Guide to Perfect Surface Finishes

We'll Send You Back with Price Immediately!