Categories
Surface Finishing

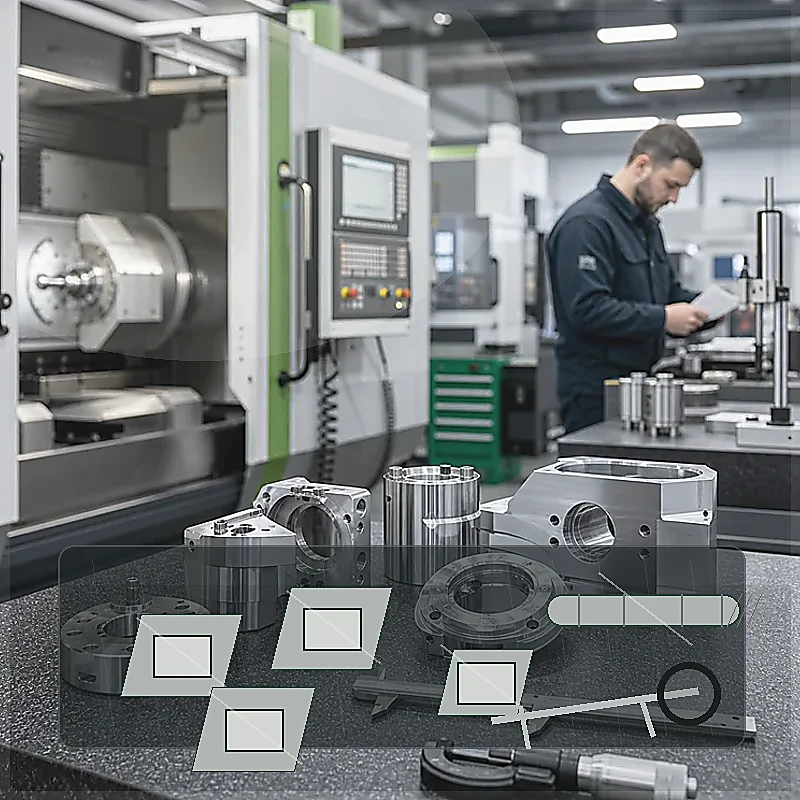
Precision Machined Parts Tolerance and Supplier Guide

Precision machined parts decisions should start with function, not with a generic machining label. Buyers get better results when they define how the part will be used, which dimensions control assembly, what material behavior matters, and how the supplier will inspect the finished work. For this topic, the important issues are tight tolerance parts, inspection planning, material selection, surface finish control, and batch consistency. A capable supplier should be able to explain the process route, likely risk points, quotation assumptions, and inspection evidence before production begins.

Quick Answer

The practical answer is to match the drawing to a manufacturing route, then confirm material, tolerance, finish, quantity, and inspection before approving the order. If the part has mostly milled faces, pockets, slots, and holes, review CNC milling service capability. If it includes round features, shafts, bushings, or threads, include CNC turning service capability in the discussion. For buyer-side risk control, ask how the shop will hold the part, which features are critical, and whether any finish or secondary process changes final dimensions.

Key Takeaways

  • Define the functional dimensions before asking suppliers to quote every feature as critical.
  • Send a 2D drawing with tolerance notes and a 3D model for programming reference.
  • Confirm material grade, heat condition, surface finish, and inspection report requirements early.
  • Ask the supplier to identify difficult features, tool access issues, and possible design changes.
  • Use sample approval or first article checks when the part is new, tight, cosmetic, or assembly-critical.

What Buyers Usually Need to Know

Most problems in custom machining come from unclear assumptions. A supplier may quote one setup while the buyer expects multiple controlled operations. A buyer may request a tight tolerance on the full drawing while only one bore or mounting face actually affects the assembly. For precision machined parts, the conversation should make those assumptions visible before the purchase order is issued.

The RFQ should include units, drawing revision, STEP file, material grade, quantity, surface finish, critical dimensions, and target delivery. When these details are missing, suppliers either pause the quote or make assumptions. A fast answer based on assumptions can look attractive, but it often creates rework later. A better supplier asks clear questions and records the answers.

Capability should be checked against the part shape. A shop with CNC metal machining capability may handle many related jobs, but the buyer still needs to know whether the part will be milled, turned, ground, cut by EDM, drilled, or finished by a partner. Process route clarity is the first sign that the quotation is built on real manufacturing thinking.

Buyer Question Why It Matters Useful Evidence
Which process will make the main features? Process choice affects setup count, accuracy, cost, and lead time Supplier explains milling, turning, EDM, grinding, drilling, or finishing route
Which dimensions are functional? Critical dimensions need better control than clearance or cosmetic areas Marked drawing, datum notes, inspection plan
Which material condition is required? Grade, temper, hardness, and stress condition change machining behavior Material certificate or written grade confirmation
What happens after machining? Deburring, anodizing, plating, polishing, or heat treatment can change size and appearance Finish specification and post-finish inspection method

Material and Process Considerations

Material changes cutting speed, tool wear, clamping force, burr behavior, and finishing results. Aluminum is usually easier to machine and finish, stainless steel needs more attention to heat and work hardening, brass and copper require careful burr and dent control, and engineering plastics can move under heat or clamping pressure. For precision machined parts, material selection should support the part’s function rather than only the lowest raw material price.

The process route should match both material and geometry. Deep pockets, small internal radii, long shafts, thin walls, fine threads, and cosmetic faces each require different planning. Buyers should ask whether the supplier sees any design feature that raises risk. If the supplier recommends a larger radius, a different stock size, or a changed tolerance, ask for the reason and the expected effect on cost and quality.

When finishing is required, discuss it before machining starts. Anodizing, plating, passivation, polishing, blasting, coating, and heat treatment may change dimensions, surface appearance, or edge condition. A controlled supplier will connect machining allowance, masking, inspection, and packaging rather than treating finishing as an afterthought. Relevant finishing choices can be checked through quality assurance process.

Tolerance, Surface Finish, and Quality Checks

Tolerance should be tied to function. A general tolerance may be enough for clearance edges, while a bearing diameter, threaded hole, sealing face, or locating surface may require a tighter limit and a clear datum. Buyers should avoid applying strict tolerance across the whole drawing unless the part truly requires it, because unnecessary precision raises cost and may increase rejection risk without improving performance.

Inspection should be planned before production. Calipers may be enough for noncritical outside dimensions, but bores, threads, flatness, profile, runout, and surface roughness often need gauges, micrometers, CMM checks, height gauges, pin gauges, or functional fit tests. For precision machined parts, ask which tool will verify each critical feature and whether the report covers first article, sampling, or full inspection.

Surface finish needs clear language. Words like smooth, clean, or nice are not enough when mating, sealing, sliding, corrosion, or appearance matters. Use Ra values where function requires them and visual notes where cosmetic faces matter. If finish follows machining, confirm whether dimensions are checked before or after finishing through surface treatment options.

Factor Typical Risk Practical Control
Tight tolerance Higher cost, slower machining, more inspection Apply tight limits only to functional features
Thin walls or deep pockets Vibration, distortion, tool reach limits Use larger radii, balanced walls, and realistic flatness notes
Cosmetic finish Color variation, handling marks, unclear acceptance Define visible faces and approve samples when needed
Repeat order Different lot, tool wear, undocumented changes Keep revision, process, and inspection records

Cost Factors and Quotation Details

Cost depends on more than part size. Setup time, programming, material stock, tooling, machine time, number of operations, inspection, finishing, packaging, and batch size all affect the final quote. A small part with deep features and tight tolerances can cost more than a larger simple plate. A large batch may justify fixture work that would not make sense for a one-off sample.

Buyers can improve quote accuracy by separating must-have requirements from preferences. State which features control assembly, which surfaces are cosmetic, which dimensions may follow general tolerance, and what report is required. If the supplier has to guess, the quote may change after technical review. Cost-focused topics can also be compared against CNC machine shop capability when drawing changes are possible.

Lead time should be broken down into material purchase, programming, setup, machining, finishing, inspection, packing, and shipment. Finishing and inspection often create delays that buyers do not see in a simple machine-time estimate. Ask for a realistic timeline and identify which step has the highest risk of delay.

Design Tips for Better Machining Results

Good design makes machining predictable. Use accessible features, practical internal radii, balanced wall thickness, clear datums, standard threads, and realistic hole depths. Avoid deep narrow pockets, very thin unsupported walls, tiny corner radii, and tight tolerances on nonfunctional features. These changes often lower cost while improving consistency.

For precision machined parts, design review should focus on tight tolerance parts, inspection planning, material selection, surface finish control, and batch consistency. If a feature is difficult but not functional, simplify it. If a feature is critical, mark it clearly and allow the supplier to plan the correct process. Tool access, clamping surface, burr direction, and finishing allowance should be considered before the drawing is released.

When the part is still being developed, use prototype or low-volume stages to learn from the design. A sample can reveal fit issues, burr problems, coating changes, or tolerance conflicts. It is cheaper to update the drawing after a controlled sample than to repair a full batch after shipment.

Common Buyer Mistakes to Avoid

One common mistake is comparing prices without comparing assumptions. If one supplier includes material certification, surface treatment, inspection report, and protective packaging while another quotes machining only, the prices are not equivalent. Ask each supplier to state what is included and what is excluded.

Another mistake is sending only a 3D model. The model helps programming, but the drawing carries tolerances, threads, material notes, finish requirements, datum references, and revision control. For precision machined parts, a missing drawing often leads to arguments about what should have been inspected or finished.

Buyers also overlook packaging. Sharp edges, polished faces, threads, thin walls, and precision bores can be damaged after inspection if parts are packed loosely. Packaging method should match the part’s risk and should be confirmed before shipment, especially for export orders.

Supplier Selection Checklist

A useful supplier review is technical and specific. Ask for the process route, material confirmation, fixture concept, inspection method, finishing plan, and lead time breakdown. The supplier does not need to expose every internal detail, but it should be able to explain how risk will be controlled.

Checklist Item Good Response Warning Sign
Drawing review Supplier identifies critical dimensions and unclear notes Supplier quotes with no technical questions
Process fit Supplier explains setups and secondary operations Supplier only lists machines generally
Inspection plan Supplier names tools and report format Supplier says quality is checked without details
Revision control Supplier confirms file version and change process Supplier relies on informal messages

Specification Sheet to Request

Before production, request a simple specification sheet covering drawing revision, 3D file name, material grade, quantity, finish, tolerance notes, critical dimensions, inspection report, packaging, and delivery terms. This sheet keeps engineering, purchasing, quality, and supplier teams aligned.

For repeat orders, the same sheet prevents silent changes. If material stock, finish partner, inspection method, or packaging changes, the buyer can review the difference before shipment. This is especially important when precision machined parts parts are used in assemblies or ordered across several batches.

Precision Machined Parts Tolerance and Supplier Deep-Dive Notes

The most important judgment for precision machined parts is knowing which requirement truly drives performance. If the part is a prototype, fast learning may matter more than cosmetic perfection. If it is a repeat production component, stable process control and inspection records may matter more than the fastest quote. If the part is visible to customers, handling and finishing should be planned with the same care as dimensions.

Suppliers should be encouraged to flag manufacturability issues. A larger internal radius, modified thread depth, adjusted wall thickness, or changed finish sequence can reduce cost and risk. The buyer should evaluate each suggestion based on function, assembly, cost, and schedule rather than accepting or rejecting changes automatically.

For higher-risk parts, use a first article approval step. Measure critical dimensions, test fit with mating parts, review burrs, check finish, and document any accepted deviations. Once the sample is approved, update the drawing or specification so production follows the approved standard. That discipline is what turns a one-time sample into a repeatable purchasing process.

Quotation review for precision machined parts should include a short risk discussion, not only a unit price. Ask the supplier which feature is most likely to drive cycle time, which tolerance is most difficult, whether the material is standard stock, and whether finishing or inspection creates a separate lead time. These answers help the buyer understand why two quotations may differ even when the drawing is the same.

Inspection planning should also separate first-piece approval from batch control. The first piece confirms that the program, fixture, material, and drawing interpretation are correct. Batch inspection confirms that the process stays stable as tools wear, operators change shifts, or material lots vary. For precision machined parts, both checks can matter when parts must fit an assembly or repeat across several orders.

Communication should be documented in a way that survives staff changes. If the buyer approves a larger corner radius, accepts a minor tool mark, changes a finish, or allows a substitute material, that decision should be written into the drawing, purchase specification, or deviation record. A message buried in a chat thread is easy to miss when the next batch is ordered.

Packaging and handling deserve a line in the purchase requirements. Precision parts can pass inspection and still arrive unusable if threads rub together, cosmetic faces are scratched, thin walls are bent, or moisture reaches bare steel. Ask for trays, separators, oil paper, caps, bags, or carton reinforcement where the part geometry justifies it. The right packaging method is part of the delivered quality, not an optional extra.

If the design is still changing, buyers should avoid locking a large batch too early. A small sample or pilot run can expose burrs, assembly interference, coating thickness issues, tolerance conflicts, or unexpected cost drivers. Once those details are corrected, the production batch becomes less risky. This staged approach is especially useful when precision machined parts parts combine tight dimensions with visible surfaces or secondary finishing.

Supplier capability should be judged by the questions the supplier asks. A useful supplier will ask about datums, mating parts, finish class, inspection reports, material grade, and delivery constraints. A weak supplier may simply agree to every requirement without explaining how it will be controlled. Buyers should prefer the partner who makes hidden risk visible before production starts.

Finally, keep a record of what worked. After an accepted order, save the final drawing, approved sample notes, inspection report, finish reference, packing photos, and supplier comments. The next order can then start from a known standard instead of repeating the same technical discussion. This habit improves repeatability and makes precision machined parts purchasing easier over time.

For acceptance, define what happens if only a noncritical feature is outside the drawing while the functional areas pass. Some buyers allow a documented deviation for prototypes or internal fixtures, while production parts may require rework or remake. Agreeing on this decision path before shipment makes precision machined parts projects easier to manage when small issues appear.

For scheduling, ask the supplier to identify the latest date for drawing freeze, material purchase, machining start, finishing release, inspection, and packing. A clear timeline helps the buyer understand which change requests are still practical and which ones will reset delivery. That clarity is often the difference between a controlled order and a rushed recovery.

Conclusion

Precision machined parts sourcing works best when buyers define function, material, tolerance, finish, inspection, and delivery expectations before production. The strongest supplier is not simply the one with the fastest quote; it is the one that can explain the manufacturing route, identify risks, and provide evidence that the finished parts match the drawing. Clear RFQ data and practical design decisions reduce cost, delays, and rework.

FAQ

What information should I send for precision machined parts?

Send a 2D drawing, STEP file, material grade, quantity, finish requirement, tolerance notes, critical dimensions, inspection report needs, and target delivery date.

How can I reduce cost without weakening the part?

Use practical tolerances, larger internal radii, accessible features, standard materials, and clear finish notes. Ask the supplier which design details add the most machine time.

When should I request a first article report?

Request it when the part is new, tight tolerance, cosmetic, assembly-critical, or used for repeat production. The report should focus on the dimensions and features that affect function.
Categories
Surface Finishing

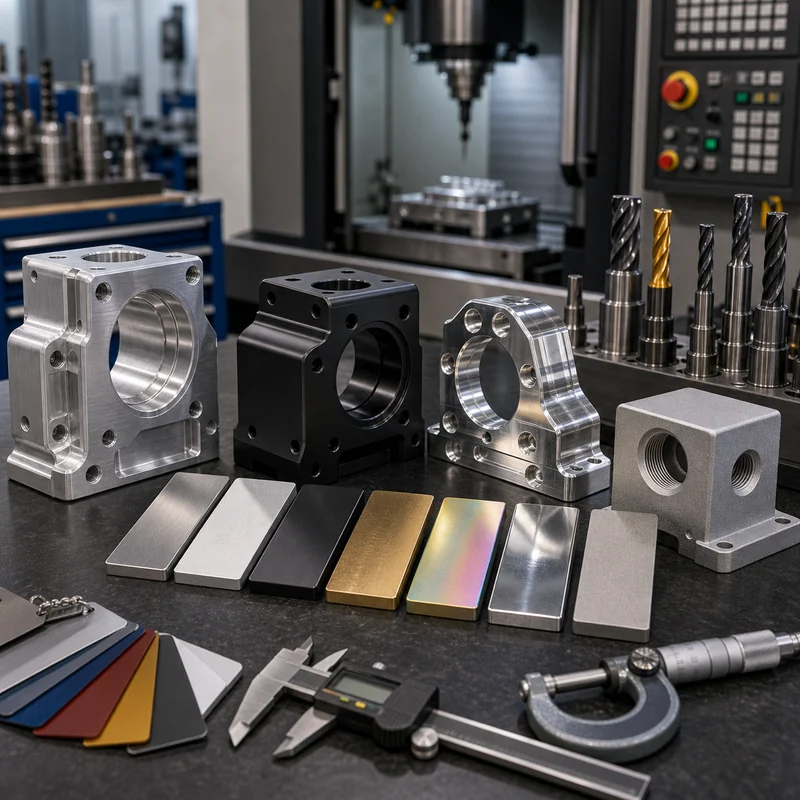
CNC Machining Surface Finishes: Anodizing, Plating, Polishing and More

CNC machining surface finishes is a key search topic for buyers who need reliable custom parts, accurate dimensions, practical material advice, and clear supplier communication. Before sending a drawing or placing an order, buyers should understand the process, cost drivers, tolerance requirements, material options, lead time, inspection needs, and the questions that separate a capable machine shop from a weak supplier.

As-Machined Finish

As-machined parts keep the tool marks and surface texture created during machining. This finish is often fastest and most economical.

Buyer Notes

For a smoother quote, prepare a 3D model, 2D drawing, target material, order quantity, surface finish, tolerance requirements, and any critical assembly information. Clear specifications reduce delays and help the supplier identify manufacturability risks early.

Anodizing and Plating

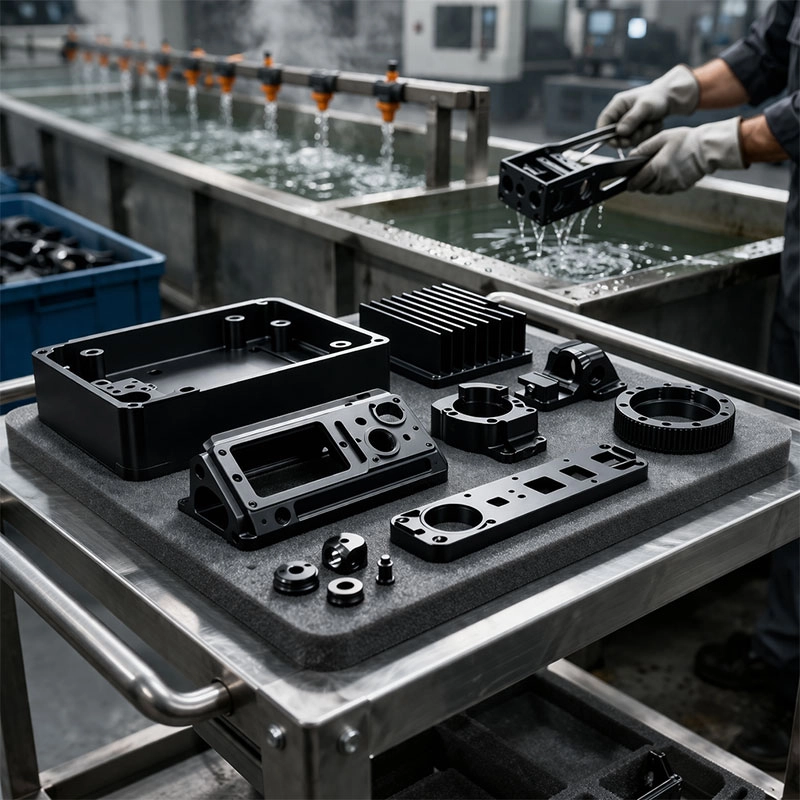
Anodizing is common for aluminum. Plating can improve corrosion resistance, conductivity, wear, or appearance depending on the material and coating.

Buyer Notes

For a smoother quote, prepare a 3D model, 2D drawing, target material, order quantity, surface finish, tolerance requirements, and any critical assembly information. Clear specifications reduce delays and help the supplier identify manufacturability risks early.

Bead Blasting, Brushing, and Polishing

Mechanical finishes can improve appearance and texture. They may also change edge feel and surface consistency.

Buyer Notes

For a smoother quote, prepare a 3D model, 2D drawing, target material, order quantity, surface finish, tolerance requirements, and any critical assembly information. Clear specifications reduce delays and help the supplier identify manufacturability risks early.

Choosing a Finish

Choose by function first, then appearance. Corrosion resistance, wear resistance, color, conductivity, and brand appearance can all matter.

Buyer Notes

For a smoother quote, prepare a 3D model, 2D drawing, target material, order quantity, surface finish, tolerance requirements, and any critical assembly information. Clear specifications reduce delays and help the supplier identify manufacturability risks early.

FAQ

What surface finishes are available for CNC machined parts?

For CNC machining surface finishes, the right answer depends on part geometry, material, tolerance, surface finish, quantity, and end-use requirements. A complete RFQ helps the supplier give a useful recommendation.

What is as-machined finish?

For CNC machining surface finishes, the right answer depends on part geometry, material, tolerance, surface finish, quantity, and end-use requirements. A complete RFQ helps the supplier give a useful recommendation.

Can CNC parts be anodized or plated?

For CNC machining surface finishes, the right answer depends on part geometry, material, tolerance, surface finish, quantity, and end-use requirements. A complete RFQ helps the supplier give a useful recommendation.

How do surface finishes affect cost?

The cost depends on material, complexity, tolerance, setup time, machine time, finish, inspection, and quantity. For CNC machining surface finishes, a clear drawing and realistic tolerances help suppliers quote accurately.

Practical Checklist Before Ordering

  • Confirm material grade, dimensions, tolerance, and surface finish.
  • Share both 3D files and 2D drawings when possible.
  • Identify critical features that affect fit, sealing, strength, or assembly.
  • Ask about sample lead time, MOQ, inspection reports, and packaging.
  • Compare quotes by specification, not only by unit price.

Conclusion

A good CNC machining decision balances design, material, tolerance, cost, lead time, and supplier capability. Buyers who prepare complete files and ask the right technical questions usually receive more accurate quotes, better parts, and fewer production surprises.

Categories
Surface Finishing

Unlock 5 CNC Machining Cosmetic Finishes for Flawless Parts

Choosing the right cosmetic finish for your CNC machined parts is about more than just looks. It impacts durability, feel, and performance. This guide explores five key surface finishing techniques that can transform your components from functional to flawless.

Why Cosmetic Finishing is a Game-Changer

Hey there! So you’ve got a beautifully CNC machined part, but it just doesn’t feel “finished,” right? That’s where cosmetic surface finishing comes in. Think of it like the final polish on a piece of furniture—it’s what takes a part from being merely functional to looking and feeling professionally made. A great machined surface finish isn’t just about vanity; it can hide minor tool marks, improve corrosion resistance, make parts easier to clean, and even provide a better grip. Whether you’re aiming for a sleek, reflective look or a durable, matte texture, the right CNC finishing process makes all the difference.

Finish: As-Machined

Let’s start with the most straightforward option: the as-machined finish. This is the part exactly as it comes off the CNC mill or lathe, with visible tool paths. It has a raw, industrial charm. The surface texture can range from quite smooth to having noticeable ridges, depending on the tooling and stepover used during the precision machining process. It’s the fastest and most cost-effective option since it requires no post-processing.

Best For & Practical Tips

This finish is perfect for internal components, prototypes, or parts where aesthetics are a low priority. If you choose this route, talk to your machinist! You can request a finer toolpath for a smoother machined cosmetic finish straight off the machine. For more on achieving specific surface textures directly from machining, resources like Engineering.com offer great insights into toolpath strategies.

Finish: Bead Blasting

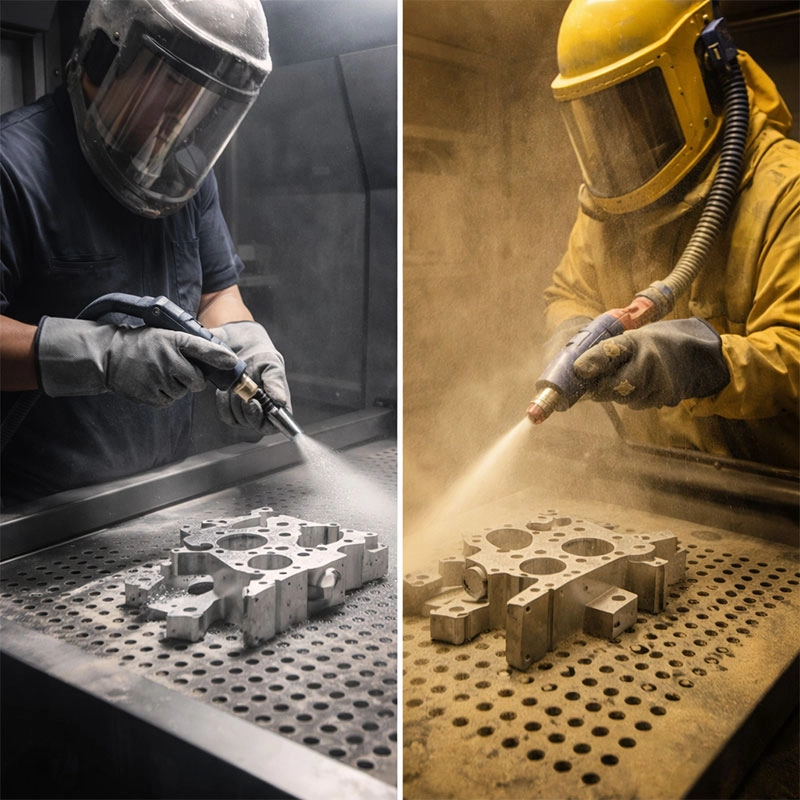
Want to erase those tool marks for a uniform, matte look? Bead blasting is your friend. In this process, tiny glass beads are propelled at high pressure against the part’s surface. It’s like a gentle but thorough sanding that creates a smooth, satin-like texture. It’s excellent for preparing surfaces for painting or anodizing, as it provides a consistent “tooth” for coatings to adhere to.

Best For & Practical Tips

Ideal for consumer electronics enclosures, automotive parts, or any item where you want a soft, non-reflective surface. A quick tip: bead blasting can slightly round sharp edges. If you need crisp, defined edges, make sure to communicate that clearly to your finishing provider. It’s a popular choice for achieving a high-quality CNC part finish on aluminum and stainless steel.

Finish: Brushing

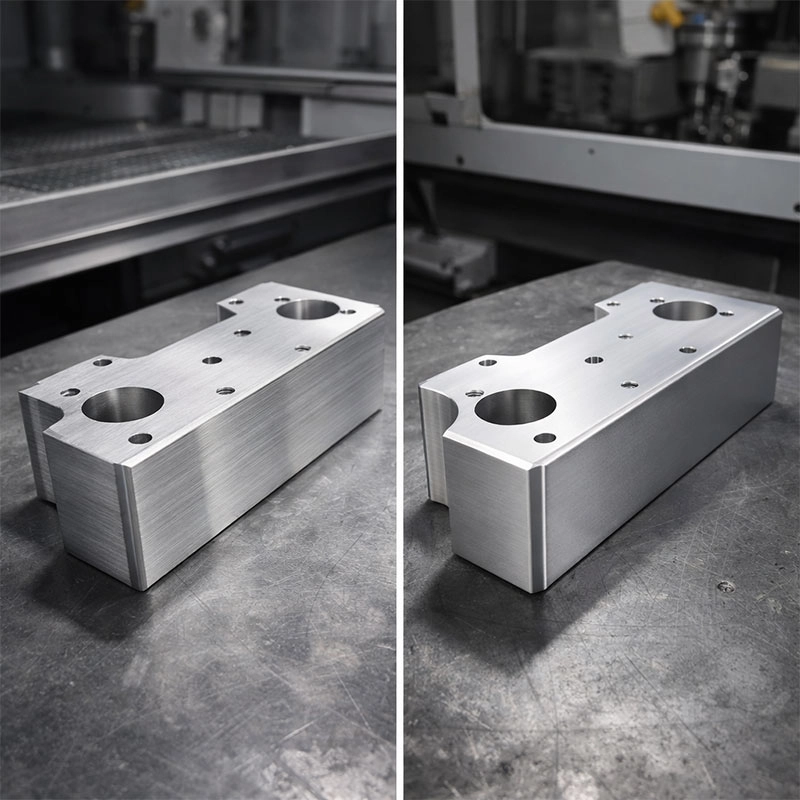
For a classic, sophisticated look with visible linear grain, consider a brushed finish. This is achieved by abrading the surface with a fine abrasive belt or wheel in one consistent direction. It creates those distinctive, parallel lines you see on many appliances and architectural metalwork. It’s a great way to hide fingerprints and minor scratches compared to a polished finish.

Best For & Practical Tips

Perfect for faceplates, control panels, kitchen hardware, and decorative trim. You can specify the direction of the brush—say, vertical for a door handle or horizontal for a panel. Remember, a brushed metal finish will highlight any dents or deep scratches, so the base part needs to be in good shape. It’s a key technique in surface treatment for machined parts.

Finish: Powder Coating

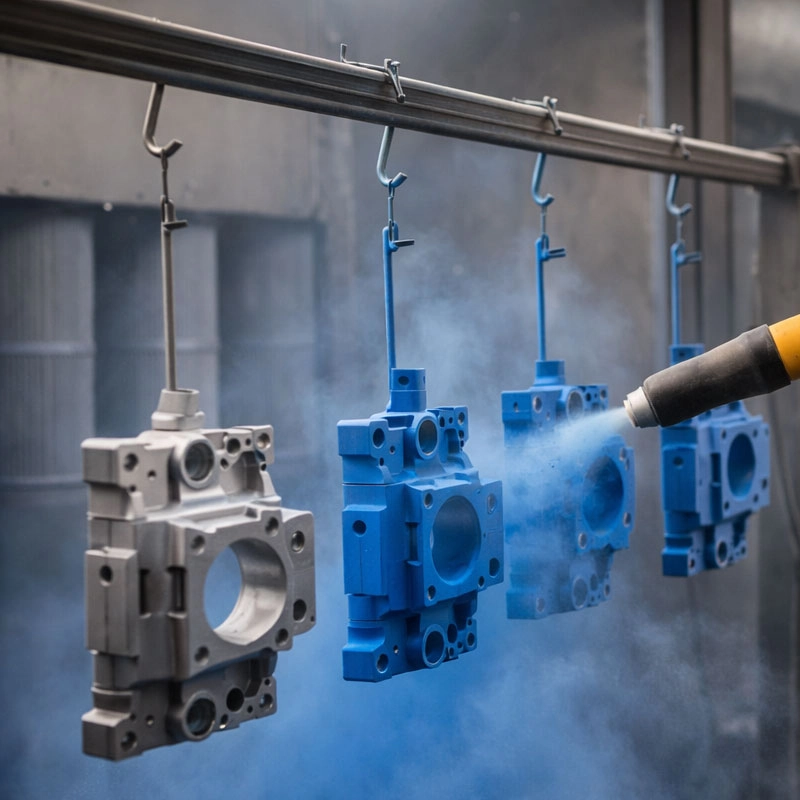
When you need color and extreme durability, powder coating is a superstar. A dry powder (made of polymer resins) is electrostatically sprayed onto the part and then baked in an oven. It melts and forms a hard, continuous coating that is much thicker and more resistant to chipping than traditional paint. The range of colors and textures (gloss, matte, metallic, wrinkled) is virtually endless.

Best For & Practical Tips

Excellent for outdoor equipment, automotive wheels, furniture, and industrial machinery. For the best adhesion, parts usually need a preparatory finish like bead blasting first. If you’re curious about the science behind this durable post machining finish, check out the overview from The Powder Coating Institute.

Finish: Anodizing

For aluminum parts, anodizing is a transformative electrochemical process. It grows a thick, porous oxide layer on the surface, which is then sealed. This layer is incredibly hard, corrosion-resistant, and can be dyed in a variety of colors before sealing. The result is a beautiful, integral colored finish that won’t peel or flake because it’s part of the metal itself.

Best For & Practical Tips

The go-to finish for aerospace components, high-end consumer tech (like laptops and phones), and architectural details. Type II anodizing offers good color and corrosion resistance, while Type III (hard coat) provides exceptional wear resistance. Note that anodizing can affect tight tolerances by adding a few microns to dimensions—something crucial for precision machined components.

How to Choose Your Perfect Finish

Choosing isn’t just about picking the prettiest option. Ask yourself these friendly questions: What’s the part’s application and environment? (Outdoor? High-touch? Sterile?) What aesthetic are you going for? (Industrial, sleek, colorful?) And of course, what’s the budget and timeline? A simple bead blast is faster and cheaper than a multi-color anodize. My best advice? Have an early conversation with your CNC machining partner. They can guide you on the best cosmetic machining finishes for your material, design, and goals, helping you unlock the full potential of your parts.

Categories
Surface Finishing

Bead Blasting vs Sand Blasting: Which CNC Finish is Right for You?

Choosing the right surface finish for your CNC machined parts can be tricky. Bead blasting and sand blasting are two popular abrasive blasting methods, but they create very different results. This guide breaks down their key differences in material removal, surface texture, and cost to help you select the perfect finish for your project’s needs.

What is Abrasive Blasting?

Let’s start with the basics. When we talk about media blasting or grit blasting, we’re referring to a family of surface treatment processes. Think of it like a high-powered cleaning and texturing tool. It propels tiny abrasive particles at high speed against a part’s surface. This isn’t just for cleaning rust off old tools; in CNC machining, it’s a crucial step to achieve specific aesthetic and functional properties on precision components.

How the Process Works

The core principle is simple: force, media, and control. Compressed air or a centrifugal wheel shoots the chosen abrasive—whether it’s glass beads, aluminum oxide, or something else—toward the workpiece. The impact cleans, peens, or textures the surface. It’s amazing how this one technique, abrasive finishing, can be tailored by just changing the media. For instance, switching from a harsh angular grit to a soft spherical bead completely transforms the outcome, which is exactly where our main comparison comes in.

Bead Blasting Explained

Now, let’s zoom in on bead blasting. This method typically uses small, spherical media made of glass. Imagine tiny, smooth ball bearings being gently sprayed onto the metal. Because the beads are round, they don’t cut into the material like sharp sand would. Instead, they peen the surface. What does that mean for your part? You get a smooth, satin-like, matte finish that feels uniform to the touch. It’s fantastic for removing light tool marks from milling or turning without altering critical dimensions. I often recommend it for consumer electronics enclosures, medical devices, or any part where a consistent, non-reflective, and fingerprint-resistant surface is the goal.

Sand Blasting Explained

On the other side, we have sand blasting—though these days, “sand” is a bit of a misnomer. For safety and consistency, industrial shops use materials like angular aluminum oxide, silicon carbide, or even crushed glass grit. These particles have sharp edges. When they hit the surface, they act like microscopic chisels, aggressively cutting and etching. This process, sometimes called grit blasting, is your go-to for heavy-duty cleaning, removing thick scale or oxidation, or creating a pronounced, rough texture for better paint or coating adhesion. It’s more aggressive, so it does remove a small amount of material, which is something you need to account for in your design.

Head-to-Head Comparison

Okay, so we know what each one does. But how do you decide? Let’s put them side-by-side and look at the key factors. It’s not just about which one is “better,” but which one is better *for your specific part*.

Surface Finish and Appearance

This is the most visual difference. Bead blasting gives you that refined, uniform matte finish. It diffuses light beautifully, hiding minor imperfections. Sand blasting creates a rougher, more textured surface. It can look more industrial. A great analogy is comparing a fine-grit sandpaper finish (bead) to a coarse-grit one (sand). The choice here is purely driven by your aesthetic and tactile requirements.

Material Removal and Impact

Here’s a critical technical point. Bead blasting is a non-aggressive abrasive process. It peens the surface, which can even work-harden it slightly without significant dimensional change. Sand blasting is an aggressive abrasive process. It cuts and will remove material. If you’re working with tight-tolerance parts where every micron counts, bead blasting is the safer choice. For more on material properties and finishing, resources like the ASM International handbook can provide deeper insights.

Cost and Operational Factors

Generally, the media for sand blasting (like aluminum oxide) is less expensive than glass beads. However, bead media is more durable and can often be recycled and reused more times, potentially balancing the cost over many cycles. The operational cost also depends on the desired outcome—a heavy cleaning job with sand might be faster, while achieving a precise satin finish with beads might require more controlled time.

Choosing the Right Finish for Your Project

So, which CNC surface finish is right for you? Let’s make it simple. Ask yourself these questions:

Choose Bead Blasting if: You need a smooth, matte, cosmetic finish; you’re working with thin walls or tight tolerances and can’t afford material loss; your part is aluminum or stainless steel for a consumer product; or you need a clean surface for subsequent anodizing or powder coating.

Choose Sand Blasting if: You need to remove rust, scale, or old coatings; you require a rough surface profile for paint to stick permanently; you’re preparing a part for bonding and need maximum surface area; or the part is a heavy-duty tool or component where a rugged texture is acceptable or desired.

My best advice? If you’re unsure, talk to your CNC machining partner. Send them a sample or a detailed description of your end-use. A good machinist can look at your design and say, “Ah, for that application, you’ll probably want the bead blast to get that smooth feel,” or “This part will be painted, so let’s use a light grit blast for adhesion.” It’s this collaboration that ensures your parts not only look great but also perform perfectly in their final job.

Categories
Surface Finishing

Brushed vs Anodized Aluminum: Which Finish is Best for Your CNC Project?

Choosing the right surface finish for your aluminum CNC parts is a crucial step. This guide breaks down the key differences between brushed and anodized aluminum finishes, helping you decide which one aligns best with your project’s needs for aesthetics, durability, and function.

Understanding the Finishes

Let’s start by getting to know our two contenders. When we talk about aluminum surface treatments, brushed and anodized are two of the most popular choices, but they achieve their look and feel in very different ways. Think of it like this: one is a cosmetic makeover, and the other is a protective suit of armor.

What is Brushed Aluminum?

Brushed aluminum, sometimes called satin finish aluminum, is all about texture. It’s created by physically abrading the metal surface with abrasive brushes or belts. This process creates fine, parallel lines that give the metal a distinctive, non-reflective matte look. It’s a purely mechanical finish that doesn’t change the metal’s chemistry. You might find this finish, also known as a linear brushed finish, on everything from appliance panels to sleek laptop casings. It’s loved for its subtle, sophisticated appearance that hides fingerprints and minor scratches better than a polished surface.

What is Anodized Aluminum?

Anodizing is an electrochemical process. The aluminum part is submerged in an acid bath and an electrical current is applied. This causes a controlled oxidation, growing a thick, hard layer of aluminum oxide right from the base metal. This anodized coating is integral to the part, not just a layer on top. The real magic? This porous layer can be dyed in a rainbow of colors before being sealed, offering incredible design flexibility. More than just looks, the anodic oxide layer provides superior corrosion resistance and hardness. For a deep dive into the science, the Aluminum Anodizers Council is a fantastic resource.

Head-to-Head Comparison

Now that we know what they are, let’s put them side-by-side. Deciding between a brushed aluminum finish vs anodized often comes down to three main factors: how it looks, how tough it is, and what it costs. Let’s break it down.

Aesthetics & Appearance

This is where personal taste really comes into play. Brushed aluminum offers a classic, industrial-chic vibe. It has a soft, directional grain that plays with light beautifully without being glossy. It’s perfect for projects where you want a modern but understated look. Anodized aluminum, on the other hand, wins on versatility. You’re not limited to silver! You can have black anodized aluminum, red, blue, or even custom-matched colors. The finish is uniform, can be matte or slightly satin, and has a very consistent, high-quality feel. So, if color is key, anodizing is your go-to.

Durability & Protection

Here’s a major differentiator. Brushing is a surface texture; it doesn’t significantly enhance the aluminum’s inherent properties. It can hide small scuffs well, but it doesn’t add extra protection against corrosion or wear. Anodizing is a champion in this category. That grown oxide layer is extremely hard (comparable to sapphire!) and provides excellent wear resistance. It also makes the part much more resistant to corrosion from weather and chemicals. For parts that will be handled frequently, exposed to the elements, or need to maintain their appearance for years, the durability of anodized aluminum is a huge advantage.

Cost & Process

Generally, the brushing process is simpler and faster, often making it a more cost-effective option for CNC machined parts, especially for prototypes or smaller batches. Anodizing involves more steps—cleaning, etching, anodizing, dyeing (optional), and sealing—which adds to the time and cost. However, for production runs, the cost difference can become less significant. It’s also worth noting that anodizing adds a tiny amount of dimensional change to the part, which our machinists carefully account for in the design phase.

Choosing the Best Finish for Your Project

So, which aluminum finish for CNC parts is right for you? Let’s make it simple with some friendly advice. Think about your project’s priority. Is it purely about that cool, textured look on a budget? A brushed finish might be your perfect match. I’ve seen it work wonders for interior brackets, faceplates, and consumer electronics where a soft sheen is desired.

But if your part will live outdoors, be subject to fingerprints, chemicals, or just needs to be super tough and colorful, then anodizing is undoubtedly the best choice. It’s the standard for aerospace components, medical devices, and high-end architectural fittings for a reason. When in doubt, consider this: brushing is often a final, aesthetic step, while anodizing is both a finish and a functional enhancement. Don’t hesitate to ask your machining partner for samples—seeing and feeling the difference in person is always the best way to decide!

Categories
Surface Finishing

Master Machining Surface Finish Standards: Your Ultimate Guide

Understanding machining surface finish standards is crucial for any CNC project. This guide breaks down what these specifications mean, why they matter for part performance, and how to achieve the right finish for your application, all in a friendly, easy-to-follow way.

Understanding Machining Surface Finish Specifications

Let’s start at the beginning. When we talk about machining surface finish standards, we’re really talking about the “texture” left on a part after it’s been cut, milled, or turned. It’s not just about looks—though a smooth finish is often a sign of quality—it’s a critical functional specification. Think of it like the difference between a rough, unpaved road and a freshly paved highway; each is suited for different types of “traffic,” like friction, sealing, or fatigue resistance.

In the world of CNC machining, these standards are formally called surface roughness or surface texture. They are quantified using specific parameters, the most common being Ra (Roughness Average) and Rz (Average Maximum Height). You’ll see these numbers, measured in micrometers (µm) or microinches (µin), called out on engineering drawings. Getting familiar with these terms is your first step to mastering finish specifications for machined parts.

Key Parameters: Ra and Rz

You might wonder, what’s the real difference between Ra and Rz? Let me give you a simple analogy. Ra is like the average height of all the blades of grass in your lawn. It gives you a good overall sense of smoothness. Rz, on the other hand, measures the average distance between the highest peak and the deepest valley in five sample areas. It tells you about the most extreme variations.

For instance, a part with an Ra 3.2 µm finish is visibly machined but relatively smooth, common for non-critical bearing surfaces. A much finer surface roughness of Ra 0.4 µm might be required for a hydraulic seal. It’s crucial to know which parameter your design calls for. The American Society of Mechanical Engineers (ASME) provides the definitive guidelines, which you can explore in their standard ASME B46.1.

Why Surface Roughness Standards Matter

So, why do we put so much emphasis on these tiny measurements? The quality of a machined surface directly impacts how a part performs in the real world. A finish that’s too rough can create stress concentrators, leading to premature cracking under load. Conversely, achieving an ultra-smooth machined surface texture can be unnecessarily expensive if the application doesn’t require it.

Here’s a practical example from a user I spoke with: they were having issues with a piston sticking in a cylinder. The blueprint called for a specific surface finish callout, but the shop was only checking Ra. When they started measuring Rz as well, they found occasional deep tool marks the Ra average had missed. Addressing this specific surface roughness standard solved the friction problem instantly. This shows how these specs ensure parts fit together correctly, wear evenly, resist corrosion, and even look professional.

How to Achieve the Right Surface Finish

Achieving your target CNC surface finish standards is a blend of art and science. It starts with choosing the right tooling, speeds, and feeds, but it doesn’t end there. We suggest you think of it as a process, not just a final step.

Toolpath and Strategy

Your CNC program’s toolpath strategy is a huge factor. A simple profile cut might leave visible cusps, while a finish machining pass with a smaller step-over will create a smoother surface. Using a tool with a larger nose radius or a dedicated finishing end mill can significantly improve results. The key is to communicate your required machining finish quality clearly to your machinist or programmer so they can select the best strategy from the start.

Post-Machining Processes

Sometimes, the desired surface roughness parameters can’t be achieved by milling or turning alone. That’s where secondary processes come in. Techniques like grinding, honing, polishing, or vibratory finishing can take a machined part to the next level of smoothness. For example, a ground surface can achieve an Ra value below 0.1 µm, which is essential for high-precision applications like optical mounts or medical implants. The International Organization for Standardization (ISO) has detailed standards for these processes, such as those found in the ISO 1302 series for surface texture indication.

Common Misconceptions About Surface Finish

Let’s clear up a few common mix-ups. First, a smoother finish is not *always* better. As I mentioned, it costs more. For a hidden internal bracket, a standard milled finish is perfectly functional. Second, Ra and Rz are not directly interchangeable; a part can have an acceptable Ra but a problematic Rz, just like in our piston example. Finally, specifying “mirror finish” on a drawing isn’t helpful—it’s subjective. Always use the standard numerical surface texture specifications to avoid confusion and ensure you get exactly what your design needs.

Putting It All Together

Mastering machining surface finish standards is about speaking the precise language of part quality. It connects your design intent to the manufacturing process and, ultimately, to a reliable, high-performing product. Start by understanding the Ra and Rz values on your drawings. Collaborate with your machining partner on the best way to achieve them, whether through toolpath optimization or a secondary process. By paying attention to these critical finish specifications for machined parts, you’ll save time, reduce costs from reworks, and build components that perform flawlessly. You’ve got this!

Categories
Surface Finishing

Master Polishing Aluminum Parts: 5 Pro Tips for CNC Machinists

Polishing aluminum parts is a crucial finishing step in CNC machining that transforms a good part into a great one. It enhances appearance, improves corrosion resistance, and can even affect part performance. This guide walks you through five professional tips to master this skill, from preparation to final buffing, ensuring you achieve a consistent, high-quality finish every time.

Start with a Clean Slate: The Foundation of a Perfect Finish

You know that feeling when you try to clean a window but miss a spot of grime? The same principle applies to aluminum surface finishing. Any oil, coolant residue, or even fingerprints left on the part will get ground into the metal during the polishing process, creating visible imperfections. Think of it like sanding a piece of wood with dirt on it—you’ll just scratch the surface deeper. A thorough cleaning is the most important, yet often overlooked, step in achieving a mirror-like aluminum polish.

Degreasing is Non-Negotiable

After your CNC machining cycle, the part is coated with cutting fluids. We recommend you start with a dedicated degreaser or a simple solution of warm water and dish soap. Scrub gently with a soft brush, rinse completely with clean water, and then dry the part immediately with a lint-free cloth or compressed air to prevent water spots. For a deep clean before a high-luster buffing aluminum stage, some machinists use a mild solvent like isopropyl alcohol. This ensures you’re working with pure metal, ready for the next step.

Understand Your Abrasives: Grit Progression is Key

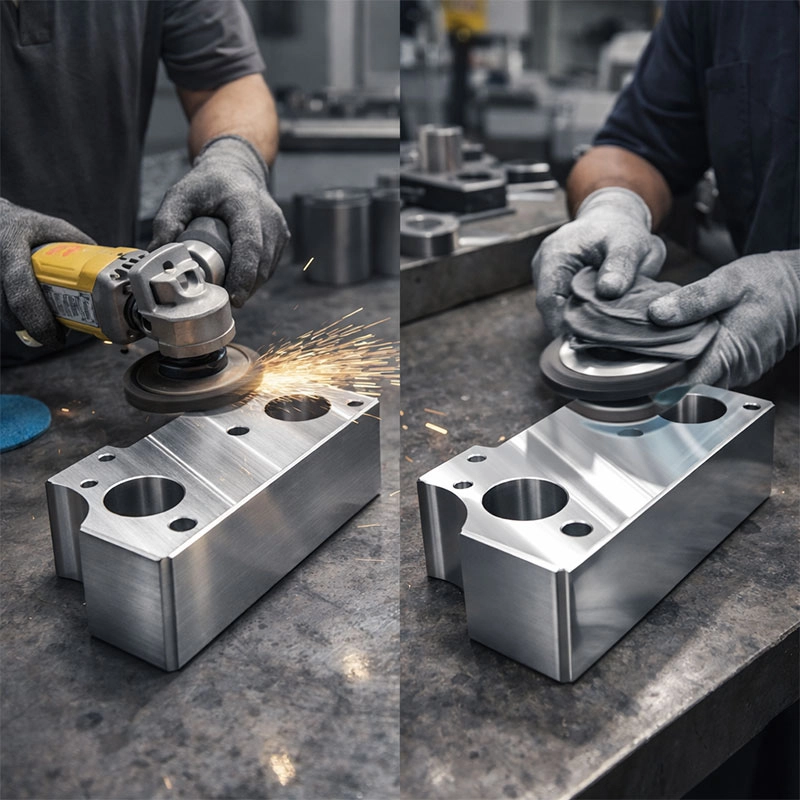
Jumping straight to a fine polish is like trying to run before you can walk—it just won’t work. The secret to a flawless finish is a disciplined, step-by-step approach to removing tool marks and scratches. This process, often called aluminum finishing, relies on a progression of abrasive materials. You might start with a 180-grit sandpaper to remove major CNC milling lines, then move to 320, 600, and finally 1000+ grits. For manual work, wet sanding helps keep the paper clean and provides a smoother cut. A great resource on material properties is the ASM International website. Remember, each stage’s job is to remove the scratches from the previous one. Don’t skip steps!

Master the Art of Buffing: Tools and Technique

Once sanding is complete, you’ve achieved a uniform satin finish. Now comes the magic of polishing aluminum components to a shine. This is where buffing wheels and compounds enter the scene. Using a bench grinder with a buffing wheel attachment or a dedicated polishing machine, you’ll apply different compounds in stages. A tripoli compound is typically used for cutting and initial shining, followed by a finer white rouge compound for that final brilliant luster. The key is to use a separate, clean wheel for each type of compound to avoid contamination.

Choosing the Right Buffing Wheel

Not all buffs are created equal. For general purpose work on aluminum, a sewn cotton wheel offers good durability and cut. For getting into tight corners or on intricate CNC machined aluminum parts, a loose-leaf cotton wheel is more forgiving and conforms better to the shape. For the final, ultra-high gloss, a soft flannel wheel can be the perfect tool. It’s like having different brushes for a painting—each one gives you a different effect.

Control Your Pressure and Speed: The Finesse Factor

Here’s a tip I learned the hard way: more pressure and speed does not equal a better polish. In fact, it often leads to burnt aluminum, uneven finishes, and even part deformation on thinner components. When how to polish aluminum, let the abrasives and the tools do the work. Apply moderate, consistent pressure and keep the part moving steadily across the wheel. For rotary tools, start at a lower speed setting. Excessive heat is the enemy—it can soften the aluminum and create a wavy, orange-peel texture. If the part gets too hot to touch, you’re going too fast. Slow down, use lighter pressure, and dip the part in water to cool it frequently.

Finish with Protection: Sealing Your Hard Work

You’ve just created a beautiful, reflective surface. But bare, polished aluminum is prone to oxidation and will start to dull and tarnish quickly when exposed to air. To protect your hard work, a final protective coating is essential. For many applications, a simple application of a high-quality automotive wax or a dedicated metal sealant will provide a barrier against moisture and fingerprints. For more durable protection, especially for parts that will be handled frequently, you might consider a clear anodizing aluminum coating. This electrochemical process creates a hard, integral oxide layer that locks in the shine. You can learn more about this process from the ASTM International standards organization. A quick protective step ensures your aluminum part polishing results last for years, not just days.

Categories
Surface Finishing

Discover 5 Essential Plating Options for Your Machined Parts

Choosing the right metal plating for your CNC machined parts is a crucial step. It’s not just about looks; it’s about adding a protective layer that fights corrosion, reduces wear, and can even improve electrical conductivity. Let’s explore why surface finishing is so valuable and how to pick the best option for your project’s needs.

Why Plating Matters for Your Machined Components

When you get a beautifully machined part off the CNC machine, your work isn’t always done. Think of surface finishing for machined parts like putting a clear coat on a car or seasoning a cast-iron skillet. It’s that essential final step that locks in performance. Without it, even the most precise component can succumb to rust, wear out quickly, or fail to conduct electricity properly. The right metal finish for CNC parts transforms a raw piece of metal into a reliable, long-lasting product. It’s the difference between a part that works and one that excels for years.

Zinc Plating: The Cost-Effective Protector

If you’re looking for a reliable and budget-friendly way to guard against rust, zinc plating is often the first stop. It’s one of the most common electroplating options for steel parts. The process involves immersing the part in a zinc solution and using an electric current to bond the zinc to the surface. The result? A protective barrier that sacrificially corrodes before the base metal does. You’ll often see this on brackets, fasteners, and automotive components. For an even more robust finish, many opt for zinc plating with a yellow or black chromate conversion coating, which adds extra corrosion resistance and a distinctive color.

Pros and Cons of Zinc Coatings

Zinc is fantastic for general-purpose protection, but it’s not perfect for every situation. On the plus side, it’s highly affordable and offers good corrosion resistance for many applications. A common question we hear is, “What is the best plating for corrosion resistance on a budget?” Zinc is a strong contender. However, its limitations include a relatively lower hardness, making it less ideal for high-wear environments, and it’s not suitable for parts that will face continuous high temperatures above 120°C (250°F).

Nickel Plating: For Durability and Shine

When you need a tougher, more decorative finish, nickel plating steps up. This process deposits a layer of nickel onto the part, creating a surface that’s hard, wear-resistant, and has a bright, silvery appearance. It’s a superb choice for parts that need to look good while enduring friction, like shafts, valves, or consumer product housings. Nickel also provides a great base layer for subsequent chrome plating. You can learn more about the science of this bond from resources like the National Association for Surface Finishing.

A Closer Look at Electroless Nickel

A standout variant is electroless nickel plating (ENP). Unlike electroplating, ENP uses a chemical reaction to deposit the coating, resulting in a perfectly uniform layer even on complex geometries with deep holes or threads. This makes it a top-tier corrosion resistant coating for precision components. It also offers consistent hardness and excellent lubricity. If you have a part with intricate details, electroless nickel should be on your shortlist.

Chrome Plating: The Classic Hard Coat

Chrome is the king of hardness and that iconic mirror shine. There are two main types: decorative chrome (a thin layer over nickel for looks) and hard chrome (a thick, direct deposit for engineering applications). Hard chrome is incredibly tough, providing exceptional resistance to wear and galling. It’s the go-to finish for machined parts like hydraulic rods, mold surfaces, and cutting tools that face extreme abrasion. While it offers good corrosion resistance, its primary superpower is definitely durability.

Anodizing: The Go-To for Aluminum Parts

While technically an electrochemical conversion coating rather than a plated layer, anodizing is a must-know surface treatment for aluminum components. It grows a thick, porous aluminum oxide layer from the base metal itself, which is then often sealed with dye for color. This coating is integral to the part, making it highly durable, corrosion-resistant, and electrically insulating. It’s perfect for aerospace components, electronic enclosures, and consumer gadgets. When someone asks about how to protect aluminum machined parts, anodizing is almost always the answer.

Gold & Silver Plating: Specialized Performance

For specialized applications, precious metal platings like gold and silver are unbeatable. Gold (and its cousin, gold flash) provides superior corrosion resistance, excellent electrical conductivity, and is solderable. It’s essential for finishing options for electrical connectors and RF shielding. Silver also offers fantastic conductivity and is often used in high-frequency applications. While costlier, their performance in specific roles makes them a critical part of the machined part coating selection toolkit for electronics and aerospace.

How to Choose the Right Surface Finish

So, with all these great plating and coating services available, how do you pick? Start by asking a few key questions about your part: What is its primary operating environment (indoors, marine, chemical exposure)? Will it experience sliding wear or impact? Does it need to conduct electricity? What aesthetic is required? Your answers will guide you. For instance, a steel outdoor bracket might need zinc, while an aluminum internal engine component demands anodizing. Don’t hesitate to consult with your machining partner early in the design phase—they can offer invaluable advice on the most practical and cost-effective post machining processes for your specific project.

Categories
Surface Finishing

Unlock 5 Key Benefits of Powder Coating for CNC Parts

Powder coating is a popular finishing process for CNC machined components, offering a durable and attractive layer. This article explores the five main advantages of this technique, from enhanced durability to environmental benefits, helping you understand why it’s a top choice for protecting your precision parts.

Superior Durability and Wear Resistance

When you invest in precision CNC machining services, you want that investment to last. That’s where the toughness of a powder coat finish really shines. Think of it like a high-tech shield for your metal parts. Unlike liquid paint that can chip or scratch easily, the thermoset polymer layer created through electrostatic spray deposition bonds on a molecular level. This results in a surface that stands up to impacts, abrasion, and general handling much better. For parts that will see action on a factory floor or inside a moving assembly, this resilience is a game-changer.

How the Powder Coating Process Works

It’s a fascinating process! First, the CNC machined part is thoroughly cleaned and pre-treated. Then, a dry powder—which can be polyester, epoxy, or a hybrid—is electrostatically charged and sprayed onto the grounded part. The charged particles cling evenly to every surface, even complex geometries common in machined components. Finally, the part is cured in an oven. The heat causes the powder to melt, flow, and chemically cross-link into that smooth, hard, uniform coating we all love. It’s this curing step that gives it such great adhesion and strength.

Exceptional Corrosion Protection

Rust is the enemy of metal, but a powder coated surface is one of your best defenses. This finish creates a continuous, non-porous barrier that seals the underlying metal from moisture, chemicals, and salts. Whether your part is for marine applications, outdoor equipment, or just in a humid environment, this protection is invaluable. It’s a more robust solution than many traditional liquid paints for metal fabrication projects. You might find that parts which used to show signs of wear in months now look pristine for years, saving you on replacements and maintenance.

Aesthetic Versatility and Consistent Finish

Who says protection can’t be beautiful? One of the joys of specifying powder coating for precision parts is the sheer range of options. You’re not limited to a few standard colors. We’re talking about thousands of shades, along with textures like wrinkled, matte, or metallic. Plus, you get fantastic color consistency from part to part and batch to batch—something that can be tricky with wet paint. This is perfect for branding, creating visually appealing consumer products, or just ensuring all the components in an assembly match perfectly. It’s the ideal marriage of form and function for your CNC finished parts.

Cost-Effectiveness and Efficiency

Let’s talk practical benefits. In the long run, opting for a dry finishing process like this can be very economical. First, the application process is highly efficient. Overspray can often be collected and reused, minimizing material waste. The curing time is also relatively fast, speeding up production cycles. More importantly, because the finish is so durable, your parts last longer and require less touch-up or refinishing down the line. When you calculate the total cost of ownership—including less downtime and fewer replacements—the value of a high-quality surface coating for machined parts becomes clear.

An Environmentally Friendlier Choice

Many manufacturers today are looking for ways to reduce their environmental footprint, and powder coating aligns well with that goal. Traditional liquid paints often contain volatile organic compounds (VOCs), which are harmful solvents that evaporate into the air. Powder coatings are typically VOC-free. There are also no hazardous waste disposal issues from solvents or thinners. As the Powder Coating Institute notes, this makes it a cleaner technology. Choosing this method for your post-processing for CNC is a responsible step that doesn’t force you to compromise on performance. You can learn more about the environmental standards from the Powder Coating Institute.

Making the Right Choice for Your Project

So, is powder coating the right finish for your next batch of CNC aluminum parts or steel components? We suggest you consider the part’s end-use. If it needs to be tough, look great, resist the elements, and be produced efficiently, then the answer is often a resounding yes. It’s a versatile solution that has become a standard in industries from aerospace to consumer electronics. When discussing your project with your machining partner, be sure to ask about their powder coating capabilities—it could be the key to unlocking a longer life and better performance for your designs.

Categories
Surface Finishing

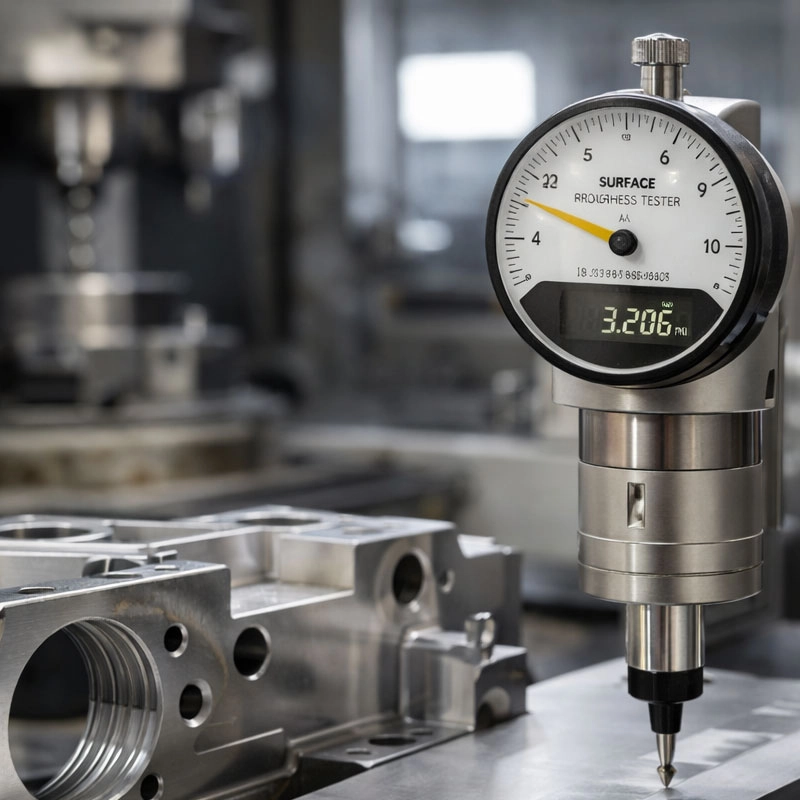
CNC Surface Roughness Guide: Ra Values, Finish Symbols, and Design Tips

Quick answer: CNC surface roughness describes the small peaks and valleys left on a machined surface. It is commonly specified with Ra values. Roughness affects appearance, friction, sealing, wear, coating, and how parts feel or assemble.

CNC Surface Roughness Guide

Surface roughness is not only cosmetic. For some parts it controls sliding, sealing, bearing contact, fatigue performance, or coating adhesion. For other parts, a normal machined finish is enough and tighter values only add cost.

Key Points for Buyers and Engineers

Topic What to know Practical impact
General milling Visible tool marks, practical finish Good for non-critical surfaces.
Fine finishing pass Reduced tool marks Useful for visible or mating surfaces.
Grinding or polishing Very smooth surface Used for sealing, sliding, or cosmetic areas.
Blasting or coating Texture or protective finish Can hide or change machining marks.

How This Affects CNC Machined Parts

Before quoting, identify which surfaces need specific roughness. Combine roughness notes with material selection from the CNC materials guide and finishing choices from the surface treatment page.

Design and Purchasing Checklist

  • Specify roughness only where it affects function or appearance.
  • Use drawings to mark critical faces.
  • Avoid unrealistic roughness inside deep pockets.
  • Confirm measurement direction when texture matters.
  • Plan polishing or grinding separately from normal CNC milling.

Related MTSPi Resources

FAQ

What is a normal CNC surface roughness?

Many general CNC machined surfaces are around Ra 3.2 µm or Ra 1.6 µm depending on process and requirement.

Can CNC machining make mirror finishes?

Mirror-like finishes usually require polishing, grinding, or lapping after machining.

Does material affect roughness?

Yes. Aluminum, brass, stainless steel, and plastics respond differently to tools and finishing passes.

Need help with surface roughness planning?

Send drawings, material, quantity, finish, tolerance notes, and application requirements. MTSPi can review manufacturability before quoting.

Contact MTSPi for engineering and quote support

Practical Buyer Notes

Surface roughness content should explain the engineering purpose behind finish numbers. A smoother surface is not automatically better; it can increase cost without improving function.

This page should help buyers decide where roughness matters most: sealing faces, sliding contact, bearing seats, cosmetic surfaces, fluid paths, or coating preparation.

How to Evaluate This Topic on a Real Drawing

Decision point Recommended approach Why it matters
Hidden surfaces Use practical machined finish Controls cost
Mating faces Use moderate roughness and flatness notes Improves fit and contact
Sealing faces Use controlled Ra and inspection Reduces leakage risk
Cosmetic surfaces Use finish notes, polishing, blasting, or coating Appearance may matter more than Ra alone

Common Mistakes to Avoid

  • Equating shiny surfaces with correct roughness.
  • Forgetting that bead blasting changes texture.
  • Ignoring tool marks on visible surfaces.
  • Not defining edge breaks and burr expectations.

Recommended MTSPi Review Workflow

MTSPi should map each surface to its function before quoting. Then the team can decide whether normal machining, finishing passes, polishing, grinding, or coating is appropriate.

  1. Confirm the part function, operating environment, and assembly risk.
  2. Review material, process, tolerance, surface finish, and inspection requirements together.
  3. Separate critical features from general dimensions so cost is not wasted on non-functional details.
  4. Use related resources such as CNC materials, surface treatment, and quality assurance to complete the specification.
  5. Send the final drawing package to MTSPi for quote review before production.

What to Send for a Faster Quote

Provide a drawing that marks cosmetic surfaces, sealing faces, sliding areas, and any numeric Ra requirement that must be inspected.

  • 3D CAD file and 2D drawing with revision number.
  • Material grade or acceptable alternatives.
  • Quantity, delivery target, and whether samples are required first.
  • Critical dimensions, thread callouts, finish notes, and inspection requirements.
  • Application notes when the part is used in heat, moisture, wear, vibration, or visible assemblies.

Deeper Engineering Notes

For CNC surface roughness, the strongest page is not just a definition. It should help a buyer decide what information belongs on the drawing, what questions to ask a supplier, and which details affect cost, quality, and delivery. In real RFQ work, the important details are usually toolpath strategy, tool nose radius, feed rate, material behavior, finishing passes, and post-processing. These details decide whether the supplier can quote confidently or has to return with repeated questions.

The common risk is confusing visual appearance with measured surface roughness. That risk can make the content look complete on the surface but weak in a real manufacturing situation. A stronger specification connects the topic to material behavior, machine access, tolerance control, finishing, and inspection before the order is released.

Example Specification Review

Review area Question to answer Good specification practice
Function What does this feature or part need to do? Describe the load, fit, motion, appearance, sealing, or assembly requirement.
Material Is the selected material suitable for the environment? Confirm strength, heat, corrosion, wear, chemical exposure, and cosmetic needs.
Geometry Can the feature be reached by standard tools? Review depth, corner radius, wall thickness, tool clearance, and setup direction.
Tolerance Which dimensions are truly critical? Use tight tolerances only where function requires them and keep general dimensions practical.
Verification How will acceptance be checked? Define gauges, CMM checks, roughness measurement, thread inspection, or visual standards when needed.

How This Page Should Support Ranking

This topic can attract both beginner searches and buyer searches. The beginner wants a clear answer; the buyer wants enough detail to make a manufacturing decision. A page has a better chance to rank when it answers the simple question first, then adds examples, process limits, design notes, comparison tables, and practical next steps.

That is also why internal links should be helpful rather than forced. A reader should naturally move from this page to a process page, material page, surface finish page, inspection page, or quote page only when that next step solves a real question.

Conclusion

Surface roughness should be specified with purpose. Clear surface notes help control appearance and function without adding unnecessary machining cost.

Request A Quote

We'll Send You Back with Price Immediately!

DEC 1-31

XMAS SPECEIL

Up to

40% off

CNC Surface Roughness Guide: Ra Values, Finish Symbols, and Design Tips

We'll Send You Back with Price Immediately!