Categories
Blog CNC Milling & Turning Design, Cost & Sourcing

Counterbore vs Countersink Holes: Design Differences, Uses, and CNC Machining Notes

Counterbore vs Countersink Holes: Design Differences, Uses, and CNC Machining Notes is a practical manufacturing question because the answer affects cost, lead time, material behavior, inspection, and the path from prototype to production. For MTSPi CNC customers, the key is not simply naming a process, but understanding how the process connects with machined parts, fixtures, tolerances, surface requirements, and final assembly.

This guide explains counterbore vs countersink from an engineering and purchasing point of view. It is written for product developers, mechanical engineers, sourcing teams, and buyers who need clear decisions rather than generic process descriptions.

Quick Answer

Use a counterbore for socket head cap screws, washers, and flat bearing seats. Use a countersink for flat-head screws where the conical head must sit flush with the surface.

Key Differences at a Glance

Point Option A Option B
Shape Cylindrical recess with flat floor Conical recess
Fastener Socket head cap screw, bolt head, washer Flat-head screw
Seat contact Flat bearing surface Angled bearing surface
Common angle Not angle-based 82, 90, or 100 degrees depending on standard
Inspection Diameter and depth Angle, major diameter, flushness

How the Process Choice Affects Real Parts

A manufacturing method should be selected around the feature that actually controls function. Cosmetic surfaces, hidden support features, threads, bores, sealing faces, heat-transfer areas, and assembly datums do not carry the same risk. When those requirements are mixed together without priority, quotes become inconsistent and production becomes harder to control.

The safest workflow is to define the part requirement first, then match the process. A printed prototype may answer shape questions, a molded sample may answer appearance questions, and a CNC machined sample may answer tolerance, material, and functional questions. Many successful projects use more than one method before the final design is locked.

Design and Manufacturing Considerations

  • Specify pilot hole diameter, counterbore diameter, counterbore depth, and tolerance where needed.
  • For countersinks, specify included angle and acceptable flushness if appearance matters.
  • Leave enough wall thickness around recessed holes to prevent breakout.
  • Avoid placing counterbores too close to edges, ribs, or deep pocket walls.
  • Match the hole callout to the actual fastener standard.

Cost, Lead Time, and Risk Factors

Cost is driven by setup, tooling, material, machine time, inspection, finishing, and revision risk. A low unit price is not always the lowest project cost if it creates rework later. For prototypes and low-volume orders, flexibility can be more valuable than a process with a lower theoretical unit cost.

  • Use standard materials and standard feature sizes when they do not weaken the design.
  • Separate critical tolerances from general dimensions so the supplier knows where to focus.
  • Confirm surface finish and cosmetic requirements before production begins.
  • Avoid late changes to mounting holes, connector openings, datum faces, and threaded features.
  • Send CAD files and 2D drawings together when tolerances, threads, or finishes matter.

Quality Checks Before Production

A good quality plan checks the features that influence assembly and performance. Depending on the part, this may include dimensional inspection, thread gauges, surface roughness, flatness, perpendicularity, burr control, coating thickness, visual appearance, and fit with mating parts.

When This Topic Matters for CNC Buyers

counterbore vs countersink matters when a team is comparing prototype routes, validating a design, replacing a weak supplier, or trying to reduce manufacturing cost without damaging function. The best choice is usually the process that answers the current engineering question with the least unnecessary risk.

MTSPi CNC Engineering Notes

MTSPi CNC supports precision CNC milling, turning, rapid prototyping, low-volume production, finishing, and inspection for custom parts. If your project uses molding, casting, welding, PCB assemblies, or 3D printing, CNC machining can still be important for datums, holes, threads, sealing faces, fixtures, and production-ready prototypes.

Frequently Asked Questions

Can this process replace CNC machining?

Sometimes it can replace CNC for non-critical geometry, but CNC is often still needed when tight tolerances, real engineering material, threads, flat sealing faces, or precise mating features are required.

What files help MTSPi CNC review a project?

STEP or STP files are useful for geometry. A 2D drawing is important for tolerances, materials, threads, surface finish, inspection requirements, and notes that are not obvious from the CAD model.

How do I reduce manufacturing risk?

Define critical features, avoid unnecessary tight tolerances, confirm material and finish requirements, and use prototypes to validate assembly before committing to higher-volume tooling or production.
Related MTSPi Resources

Categories
Blog CNC Milling & Turning

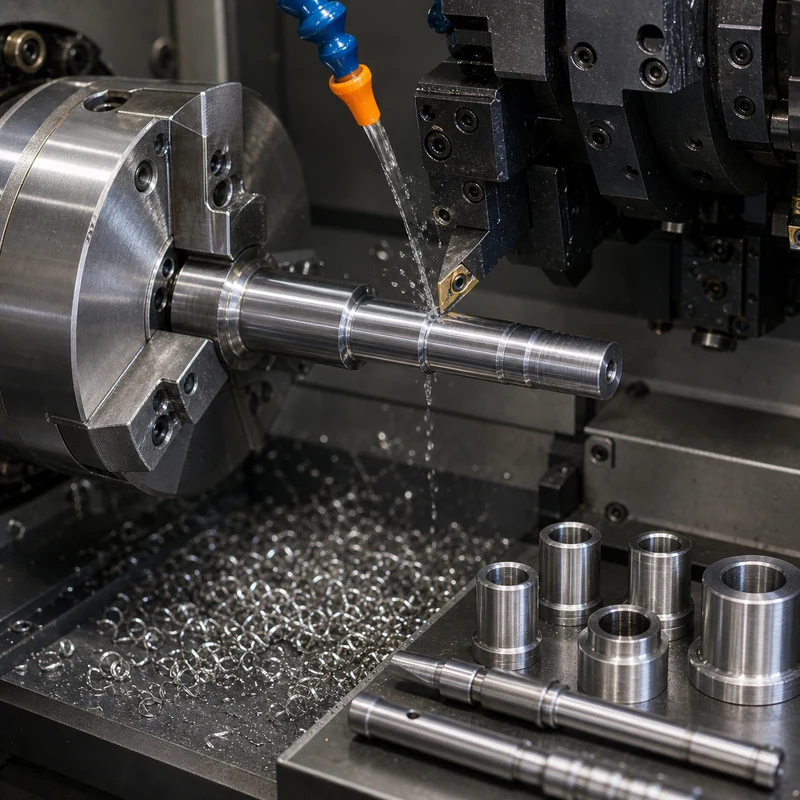
CNC Lathe Guide: Operation, Types, Tools, and Shop Considerations

A CNC lathe rotates a workpiece while cutting tools shape the outside diameter, inside diameter, end face, grooves, threads, and other turned features. The controller follows programmed toolpaths, which makes CNC lathes effective for repeatable shafts, bushings, pins, sleeves, fittings, and cylindrical components.

When a part is mostly round, CNC turning is often more efficient than milling. When the same part also needs flats, slots, cross holes, or off-center features, live tooling or mill-turn machining may reduce secondary setups.

How a CNC Lathe Works

  • The chuck or collet holds the raw stock.
  • The spindle rotates the workpiece at a programmed speed.
  • Tools mounted in a turret move along the X and Z axes.
  • Optional Y-axis, C-axis, live tooling, and sub-spindles add more capability.
  • After machining, the part is inspected against the drawing.

Common Lathe Operations

Operation What It Creates
Facing Flat end surfaces
OD turning Outside diameters and shoulders
Boring Accurate internal diameters
Drilling Centerline holes
Grooving O-ring seats, relief grooves, snap-ring grooves
Threading External or internal threads
Parting Cuts the finished part from bar stock

Types of CNC Lathes

A simple two-axis lathe handles many round parts. A turning center with live tooling can drill or mill features without removing the workpiece. Swiss-type lathes are excellent for tiny slender parts. Vertical lathes may be selected for large heavy workpieces that are easier to support upright.

Machine Type Best Use
2-axis CNC lathe Simple shafts, spacers, bushings, and pins
Turning center with live tooling Turned parts with milled flats or radial holes
Swiss-type lathe Small high-precision bar-fed parts
Mill-turn center Complex parts requiring both turning and milling
Vertical lathe Large discs, rings, and heavy rotational parts

Tooling and Accuracy Factors

Insert grade, tool nose radius, holder rigidity, coolant, spindle condition, and workholding all influence finish and tolerance. For high-precision projects, pair the turning plan with documented inspection. Critical diameters, threads, bearing fits, and concentric features should be measured with appropriate gauges or CMM methods.

Choosing a Lathe Shop

A good lathe shop should understand both production efficiency and design intent. Send 3D models, 2D drawings, material requirements, finish notes, quantity, and inspection expectations. The earlier these details are available, the easier it is to avoid unnecessary cost.

Related MTSPi Resources

FAQ

What parts are best for CNC lathes?

Round or cylindrical parts such as shafts, bushings, pins, sleeves, spacers, threaded fittings, and valve components.

Can a lathe make square features?

A basic lathe cannot, but a turning center with live tooling or a mill-turn machine can add flats, slots, and off-center holes.

What affects CNC lathe cost?

Material, tolerance, geometry, setup time, tooling, inspection, finishing, and quantity all affect cost.

Categories
Blog CNC Milling & Turning

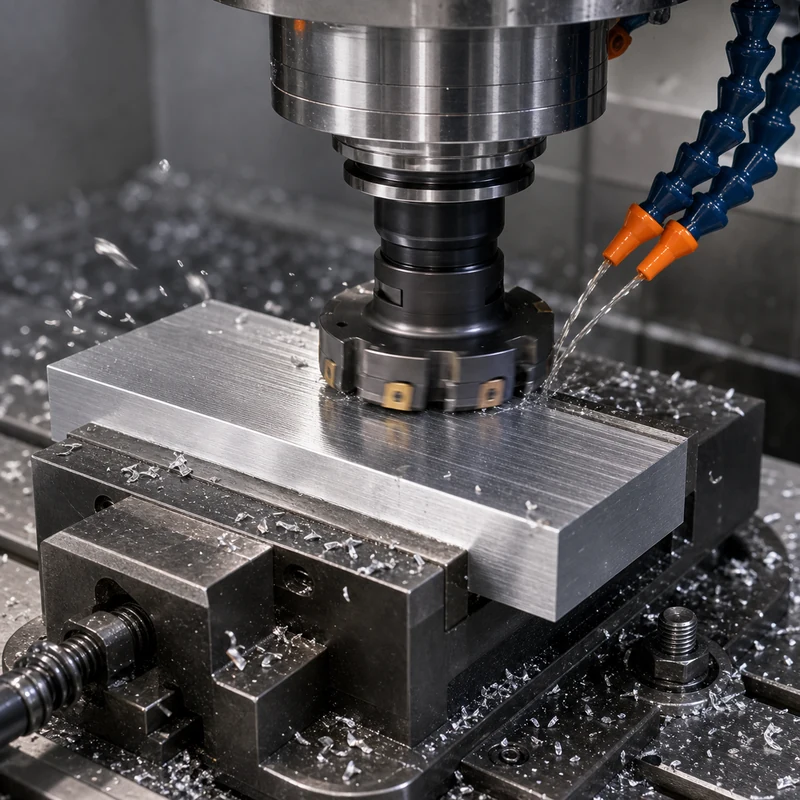
Plain Milling Explained: Process, Cutters, Uses, and Setup Tips

Plain milling, also called slab milling, is a milling operation used to create flat surfaces with a cutter whose axis runs parallel to the workpiece surface. It is a practical choice when a shop needs a broad face, datum surface, base plate, or shoulder to be made flat and consistent.

Although modern CNC milling services use many toolpaths, plain milling remains useful because it removes material efficiently and can produce reliable flatness when the machine, fixture, cutter, and feed settings are stable.

What Happens During Plain Milling

The workpiece is clamped to the machine table, and a cylindrical cutter removes material as the table feeds the part beneath it. Multiple teeth engage the workpiece, so chip load, cutter width, spindle speed, and rigidity all influence finish quality.

  • The cutter axis is parallel to the surface being cut.
  • The operation is often used for large flat faces and datum preparation.
  • Horizontal mills are common for heavy plain milling, while CNC machining centers may use related strategies for smaller work.
  • A finishing pass can improve surface roughness after rough stock removal.

Common Cutter Choices

Cutter Type Best Use Typical Result
Light-duty plain cutter Aluminum, brass, plastics, light finishing Smoother finish with lower cutting force
Heavy-duty plain cutter Steel plates, cast iron blocks, roughing Higher material removal but rougher surface
Carbide cutter Harder alloys and production jobs Better tool life and speed
HSS cutter General low-load work Lower cost and easier sharpening

Setup Steps That Matter

A successful plain milling operation starts before the spindle turns. The part must be clamped securely, the cutter must be aligned, and the operator should check that chips can clear the cut. Poor fixturing usually shows up as chatter, tapered surfaces, or inconsistent finish.

  • Choose cutter width based on the machined face and available spindle power.
  • Set a conservative depth of cut when machining hard materials.
  • Use coolant or air blast when chips build up around the cutter.
  • Measure the first part before continuing with the batch.

Plain Milling Compared With Other Milling Operations

Operation Tool Orientation Typical Use
Plain milling Cutter axis parallel to surface Flat surfaces, broad faces, base planes
Face milling Cutter axis perpendicular to surface Fast facing on vertical machining centers
End milling Tool cuts with end and side edges Slots, pockets, profiles, contours
Profile milling Tool follows a 2D or 3D path Shaped edges and complex surfaces

Materials and Tolerance Expectations

Aluminum and brass are generally easier to mill because chips clear well and cutting forces are moderate. Stainless steel and titanium require more attention to heat, tool coating, and feed. For precision work, combine stable milling with the inspection process needed for the part drawing.

Related MTSPi Resources

FAQ

Is plain milling the same as face milling?

No. Plain milling uses a cutter axis parallel to the surface, while face milling normally uses a cutter axis perpendicular to the surface.

What causes chatter in plain milling?

Loose fixturing, excessive depth of cut, poor cutter condition, long overhang, or aggressive feed can cause vibration.

Can plain milling be used for prototypes?

Yes, especially when a prototype needs accurate flat reference faces or squared stock.

Categories
Blog CNC Milling & Turning

CNC Swiss Machining Guide: How It Makes Small Precision Parts

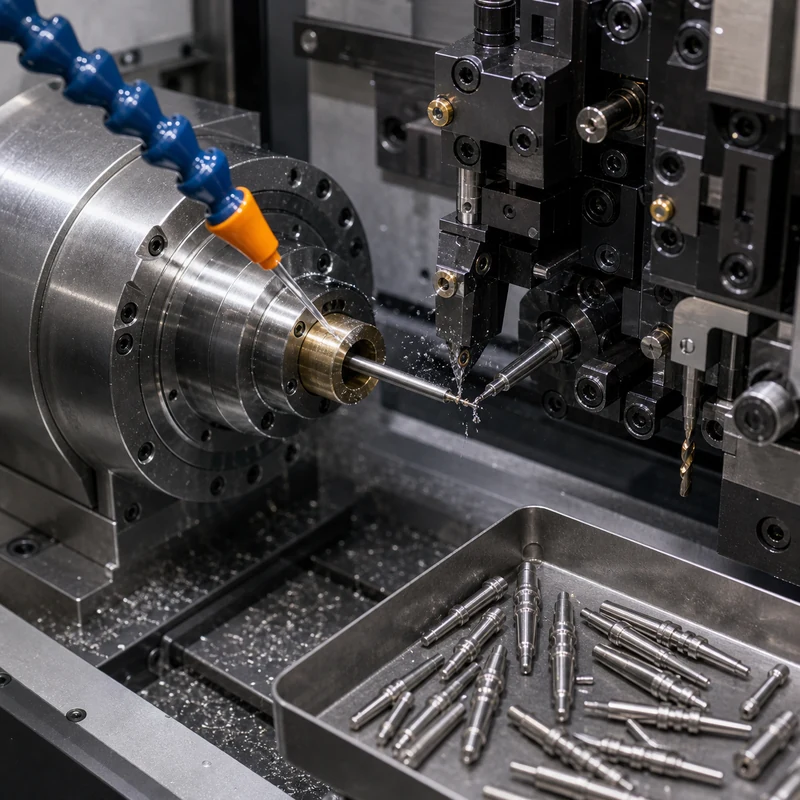
CNC Swiss machining is built for small parts that need tight concentricity, fine details, and repeatable production. Instead of holding a long bar far away from the tool, a Swiss-type lathe supports the material close to the cutting zone with a guide bushing. That simple difference helps reduce deflection and makes the process valuable for pins, shafts, connectors, medical components, and other slender parts.

For buyers comparing precision turning options, Swiss machining is usually worth considering when the part is small, long compared with its diameter, or filled with cross holes, grooves, flats, threads, and micro features. MTSPi can review drawings early and suggest whether a Swiss-type machining route or a conventional turning setup is more efficient.

How CNC Swiss Machining Works

A Swiss machine feeds bar stock through a sliding headstock. The guide bushing supports the workpiece near the cutting tools, while turning tools, drills, and live milling stations remove material in a programmed sequence. Many Swiss machines also use a sub-spindle, so the back side of the part can be completed before cutoff.

  • The bar is supported very close to the cutting point, which limits vibration on thin sections.
  • Turning, drilling, slotting, milling, threading, and cutoff can often happen in one cycle.
  • Automatic bar feeding makes the process strong for repeat parts and longer production runs.
  • Because several tools are available at once, fewer secondary setups are usually required.

Where Swiss Turning Performs Best

Part Requirement Why Swiss Machining Helps
Small diameter shafts and pins The guide bushing keeps slender stock stable during cutting.
Medical screws, sleeves, and miniature fittings Fine features can be produced with strong repeatability.
Electrical contacts and connectors High-volume bar-fed production reduces handling and variation.
Parts with radial holes or flats Live tooling can add features without moving the workpiece to another machine.

Design Notes for Better Results

Swiss machining rewards clean drawings. Identify critical diameters, true position requirements, thread callouts, material grade, surface finish, and any features that must align with each other. Avoid putting extremely tight tolerances on every dimension; reserve them for functional areas, because unnecessary precision can raise cost without improving performance.

  • Use generous corner radii where the design allows.
  • Keep deep micro holes realistic for tool length and chip evacuation.
  • Confirm whether burr-free edges are required after cutoff, cross drilling, or slotting.
  • For long thin parts, discuss straightness expectations before production.

Swiss Machining vs Conventional CNC Turning

Factor Swiss-Type Turning Conventional Turning
Best part size Small, slender, high-detail components Shorter or larger turned parts
Material support Guide bushing near cutting tools Chuck or collet support farther from the tool
Typical setup Multiple tools and possible sub-spindle Simpler tool arrangement
Main advantage Precision on tiny complex parts Flexible and economical for many general turned parts

Inspection and Finishing

For critical components, inspection should match the risk of the part. Diameter checks, thread gauges, optical measurement, and CMM inspection may all be used depending on geometry. If the part needs anodizing, passivation, or plating, coordinate machining allowances with the surface treatment plan before cutting begins.

Related MTSPi Resources

FAQ

Is Swiss machining only for tiny parts?

It is strongest on small and slender parts, but the right choice depends on diameter, length, features, tolerance, and quantity.

Can Swiss machines cut stainless steel?

Yes. Stainless steel, aluminum, brass, titanium, and many plastics can be machined, with tooling and speeds adjusted to the material.

When should I avoid Swiss machining?

For large, simple, short parts, a conventional CNC lathe may be faster and less expensive.

Categories
CNC Milling & Turning

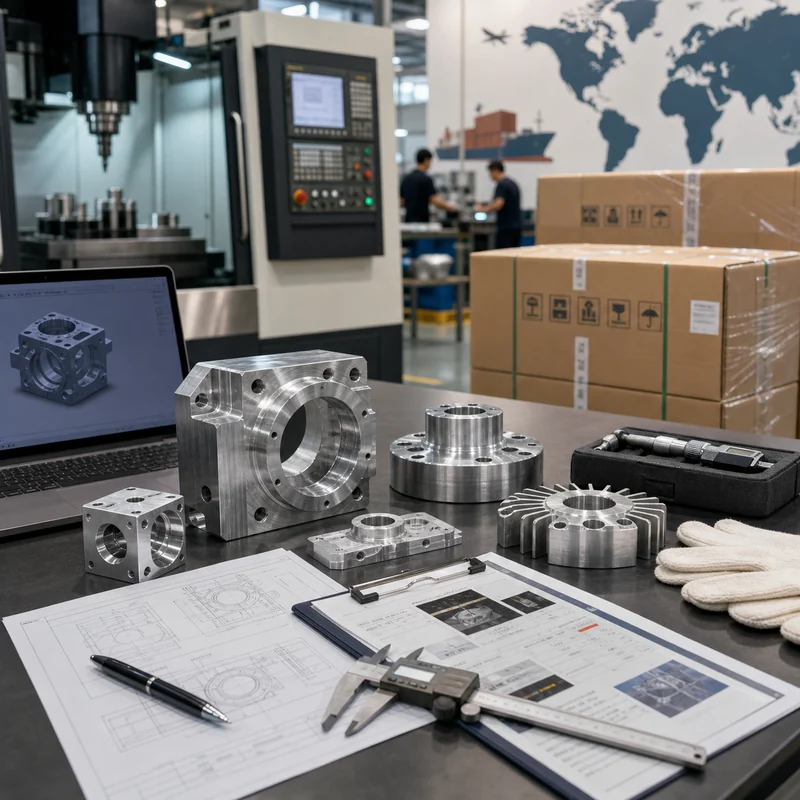
Importing CNC Machined Parts from China: RFQ, Samples, QC and Shipping

import CNC machined parts from China is a key search topic for buyers who need reliable custom parts, accurate dimensions, practical material advice, and clear supplier communication. Before sending a drawing or placing an order, buyers should understand the process, cost drivers, tolerance requirements, material options, lead time, inspection needs, and the questions that separate a capable machine shop from a weak supplier.

Prepare a Clear RFQ

Send 3D files, 2D drawings, material, quantity, tolerance, finish, inspection requirements, delivery address, and target lead time.

Buyer Notes

For a smoother quote, prepare a 3D model, 2D drawing, target material, order quantity, surface finish, tolerance requirements, and any critical assembly information. Clear specifications reduce delays and help the supplier identify manufacturability risks early.

Request Samples First

Samples help verify material, dimensions, finish, assembly fit, packaging, and communication before bulk production.

Buyer Notes

For a smoother quote, prepare a 3D model, 2D drawing, target material, order quantity, surface finish, tolerance requirements, and any critical assembly information. Clear specifications reduce delays and help the supplier identify manufacturability risks early.

Quality Control

Use clear drawings, inspection reports, sample approval, pre-shipment inspection, and written standards to reduce risk.

Buyer Notes

For a smoother quote, prepare a 3D model, 2D drawing, target material, order quantity, surface finish, tolerance requirements, and any critical assembly information. Clear specifications reduce delays and help the supplier identify manufacturability risks early.

Shipping and Packaging

Precision parts should be protected from scratches, corrosion, moisture, mixing, and impact during international shipping.

Buyer Notes

For a smoother quote, prepare a 3D model, 2D drawing, target material, order quantity, surface finish, tolerance requirements, and any critical assembly information. Clear specifications reduce delays and help the supplier identify manufacturability risks early.

FAQ

How do I import CNC machined parts from China?

For import CNC machined parts from China, the right answer depends on part geometry, material, tolerance, surface finish, quantity, and end-use requirements. A complete RFQ helps the supplier give a useful recommendation.

Is China good for CNC machining?

For import CNC machined parts from China, the right answer depends on part geometry, material, tolerance, surface finish, quantity, and end-use requirements. A complete RFQ helps the supplier give a useful recommendation.

How do I request a CNC machining quote from China?

For import CNC machined parts from China, the right answer depends on part geometry, material, tolerance, surface finish, quantity, and end-use requirements. A complete RFQ helps the supplier give a useful recommendation.

How can I avoid quality problems with overseas CNC suppliers?

Check the supplier’s machining capability, material experience, inspection process, communication quality, sample policy, lead time, and export packaging.

Practical Checklist Before Ordering

  • Confirm material grade, dimensions, tolerance, and surface finish.
  • Share both 3D files and 2D drawings when possible.
  • Identify critical features that affect fit, sealing, strength, or assembly.
  • Ask about sample lead time, MOQ, inspection reports, and packaging.
  • Compare quotes by specification, not only by unit price.

Conclusion

A good CNC machining decision balances design, material, tolerance, cost, lead time, and supplier capability. Buyers who prepare complete files and ask the right technical questions usually receive more accurate quotes, better parts, and fewer production surprises.

Categories
CNC Milling & Turning

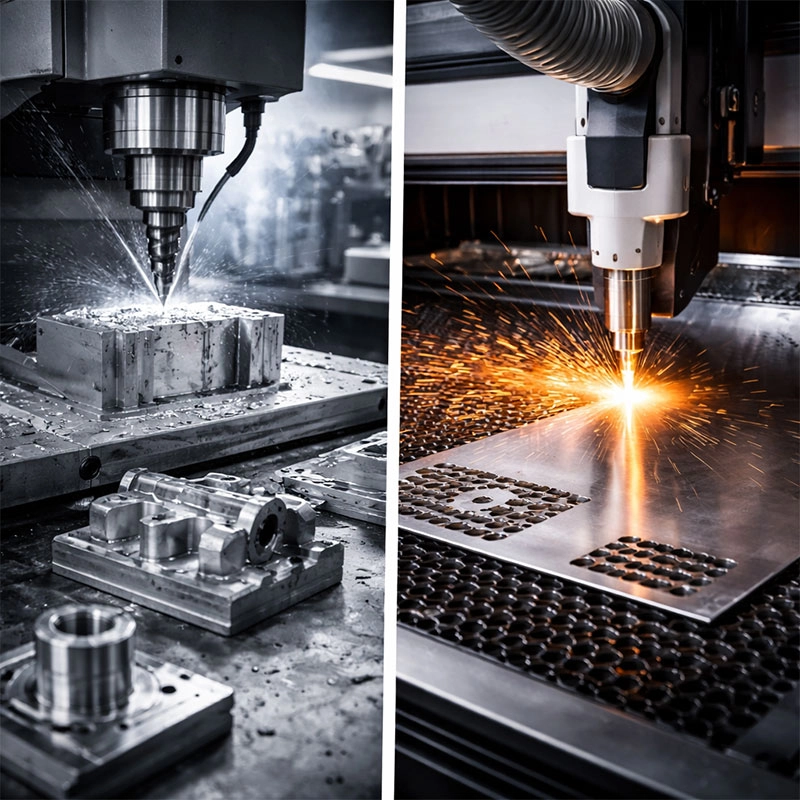
CNC Milling vs Manual Milling: Which is Right for Your Project?

Choosing between CNC machining and manual machining is a fundamental decision in manufacturing. This guide breaks down the key differences in precision, cost, and skill requirements to help you select the best milling process for your specific project needs, whether it’s a one-off prototype or high-volume production.

Understanding the Basics

Let’s start by getting familiar with our two main players. At its heart, the debate between CNC vs manual milling is about how we control the cutting tool that shapes a block of material into a finished part. Think of it like the difference between driving a car yourself and using a sophisticated autopilot system.

What is Manual Milling?

Manual milling, or conventional milling, is the hands-on, traditional approach. A skilled machinist directly operates the machine using handwheels and levers to control the movement of the workpiece and the cutting tool. It’s a tactile process where the operator’s experience, feel, and judgment are everything. They make real-time decisions about feed rates, depth of cut, and tool changes. This method is fantastic for quick, one-off jobs, repairs, or when you need to “make it work” with a personal touch. You might also hear it called knee mill or bridgeport milling operations, named after classic machine styles.

What is CNC Milling?

CNC milling, short for Computer Numerical Control milling, is the modern counterpart. Here, the machinist’s role shifts from direct operator to programmer and supervisor. They write code (often G-code) that instructs the machine’s computer on every single movement. The CNC machine then executes these instructions with incredible consistency. This process is central to subtractive manufacturing and is a cornerstone of automated machining. It’s perfect for producing identical parts over and over, or for creating highly complex geometries that would be nearly impossible to make by hand. For a deeper dive into the programming side, you can check out this resource on G-code fundamentals.

Head-to-Head Comparison

Now, let’s put them side-by-side. When you’re weighing manual machining vs CNC machining, several key factors will guide your decision. It’s not about which is universally better, but which is better *for you*.

Precision and Complexity

This is often the deciding factor. CNC milling machines excel here. They can hold tolerances within thousandths of an inch (or even tighter) repeatedly, part after part. They effortlessly create complex 3D contours, intricate pockets, and precise holes. Manual milling relies on the operator’s skill and measuring tools; while a master machinist can achieve high precision on a manual mill, it’s more time-consuming and difficult to maintain across multiple parts. So, if your project asks “how to achieve tight tolerances,” CNC is usually the answer.

Production Speed and Volume

Think about your batch size. For a single part or a very small run, a manual mill can be faster. There’s no programming time—you just set up and start cutting. However, for any kind of volume, CNC wins hands down. Once the program is proven, the machine can run unattended for hours, producing parts much faster than a human ever could. This makes CNC the go-to for high volume production.

Cost Considerations

Cost isn’t just about the machine price tag. Manual mills are significantly cheaper to purchase and maintain. However, CNC milling services factor in programming time and setup, which adds cost upfront. For low quantities, this can make manual more economical. But for larger runs, that upfront cost gets spread over many parts, making CNC more cost-effective per unit. You also have to consider labor costs over time.

Skill and Labor

The skills required are different. Manual milling demands years of hands-on experience to develop the “feel.” It’s a craft. CNC milling requires skills in computer-aided design (CAD), computer-aided manufacturing (CAM) software, and an understanding of machining principles to write efficient, safe code. Finding and training a traditional manual machinist can be challenging today, while the industry is increasingly geared toward CNC machining processes.

Flexibility and Setup

Need to make a quick change or adjustment on the fly? The manual mill offers immediate flexibility. You can see a problem and correct it instantly. Changing a program on a CNC machine, however, requires stopping, editing the code, and potentially re-proving the toolpath. For prototyping or one-off modifications, that hands-on control can be a huge advantage.

Making the Right Choice for Your Project

So, how do you decide? Let’s match the technology to typical project scenarios. I often tell people to start by asking: “What is the primary goal for this part?

When to Choose Manual Milling

Choose a manual mill when you’re dealing with low volume milling or truly unique pieces. It’s ideal for:
– Quick prototypes where form is more important than ultra-tight tolerance.
– Repair work or modifying existing parts.
– Educational settings where learning the fundamentals of cutting forces and tool behavior is key.
– Simple, flat, or squared parts that don’t require complex programming.
If your shop already has the skilled talent and the project is a simple bracket or a repair job, firing up the bridgeport mill is often the most sensible path.

When to Choose CNC Milling

Opt for CNC when precision, complexity, or volume are priorities. It’s the best fit for:
– Parts with complex geometries, curves, or 3D surfaces.
– Production runs where every part must be identical.
– Materials that are difficult to machine, where consistent parameters are crucial.
– Projects requiring extremely tight tolerances.
– Situations where you have a digital CAD model ready to go.
For insights into designing parts specifically for this process, look at guidelines for design for manufacturability (DFM).

Common Misconceptions Cleared Up

Let’s tackle a few myths I hear all the time. First, “CNC does everything automatically.” Not quite! A skilled person is still essential for programming, tool selection, fixture design, and monitoring. Second, “Manual milling is obsolete.” Far from it! Many job shops thrive with manual machines for specific tasks. Finally, “CNC is always more expensive.” As we saw, for one-off parts, the programming cost can make manual the cheaper option. The real answer to benefits of CNC over manual depends entirely on context.

Conclusion and Final Thoughts

In the end, the choice between CNC and manual milling isn’t a battle with one winner. It’s about selecting the right tool from your manufacturing toolbox. Manual milling offers unparalleled hands-on control and simplicity for small jobs. CNC milling delivers unbeatable precision, repeatability, and efficiency for complex or high-volume work. Many successful machine shops actually use both, leveraging the strengths of each. My advice? Honestly assess your project’s requirements for precision, quantity, complexity, and budget. That assessment will clearly point you toward the milling method that is right for *your* project.

Categories
CNC Milling & Turning

Unlock the Secret to Perfectly Finished Sandblasting CNC Parts

Achieving a flawless finish on your machined components often hinges on one crucial step: sandblasting. This guide explores how abrasive blasting transforms CNC parts, enhancing their appearance, durability, and performance. We’ll walk you through the process, benefits, and best practices to help you unlock superior results for your projects.

What Exactly is Sandblasting for CNC Parts?

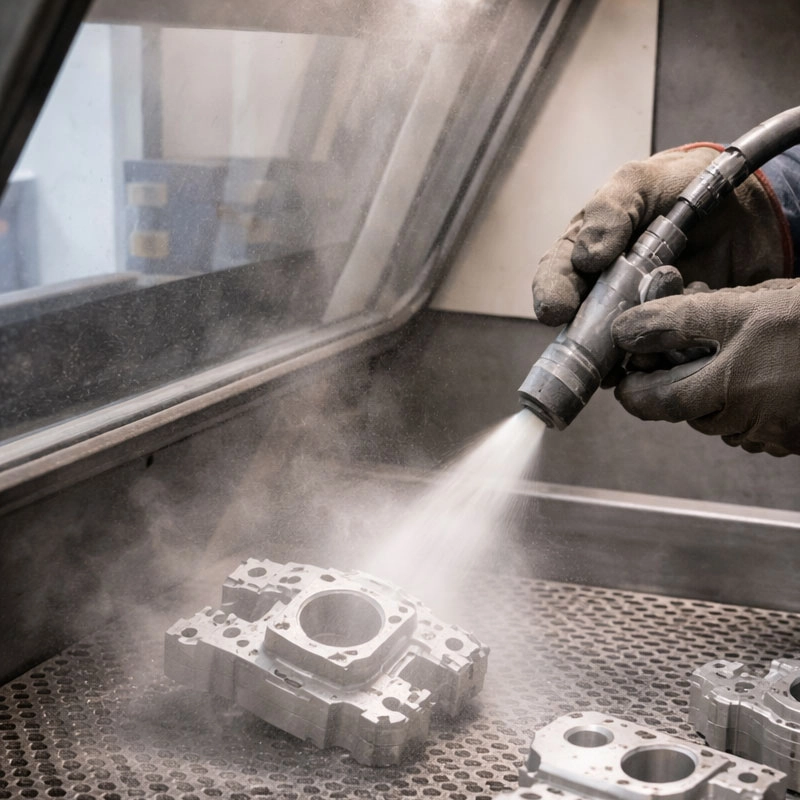
Let’s start with the basics. When we talk about sandblasting CNC parts, we’re really describing a surface treatment process. Think of it as giving your precision-machined components a thorough, high-pressure shower—but instead of water, we use tiny abrasive particles. This technique, also known as abrasive blasting or media blasting, is a game-changer for finishing CNC machined components. It’s that essential final touch that takes a part from “functionally good” to “visually and technically excellent.

The Simple Science Behind the Blast

So, how does it work? Imagine you’re cleaning a dusty patio. A strong jet of air or water does a decent job. Now, imagine adding fine sand to that stream—it scrubs much more effectively. That’s the core idea! In a controlled cabinet or room, abrasive media is propelled at high velocity onto the surface of your CNC metal parts. This action meticulously cleans, textures, and prepares the metal. It’s perfect for tasks like deburring CNC parts or creating a uniform matte finish. The key is choosing the right media, from glass beads for a smooth, peened surface to aluminum oxide for aggressive cleaning.

Why You Should Consider Abrasive Blasting

You might wonder why this extra step is worth it. Well, the benefits go far beyond just looks. First, it’s the ultimate preparation. Any leftover oil, scale, or minor imperfection from the CNC milling or turning process is removed. This creates a perfectly clean, active surface that’s ready for the next stage, whether that’s painting, powder coating, or anodizing. Secondly, it can actually strengthen the part by inducing beneficial compressive stresses on the surface. Let’s break down two major advantages.

The Foundation for Perfect Coatings

If you’ve ever had paint chip or peel off a metal part, poor surface preparation was likely the culprit. Abrasive finishing for machined parts solves this by creating a microscopic “anchor profile” on the metal. This rough texture gives coatings something to grip onto mechanically, dramatically improving adhesion and longevity. It’s the unsung hero that ensures your beautiful powder coat doesn’t flake off after a year of use. For a deep dive on surface prep standards, the SSPC: The Society for Protective Coatings is an excellent resource.

More Than Just a Pretty Surface

While function is key, we can’t ignore form. Surface finishing for CNC components via blasting produces a consistent, attractive matte texture that hides minor tool marks and creates a professional, uniform appearance. It’s often the final touch for consumer products, architectural metalwork, or custom automotive parts. This process answers common search queries like how to finish CNC aluminum parts by providing a solution that is both practical and visually appealing.

Your Step-by-Step Guide to the Blasting Process

Ready to see how it’s done? The process for CNC part sandblasting services is quite logical. First, the parts are thoroughly cleaned to remove cutting fluids and grease—blasting over oil just spreads it around! Next, they are placed in a blast cabinet. The operator then selects the appropriate media and pressure. Using a nozzle, they direct the abrasive stream evenly across the part’s surface, often holding it at different angles to ensure complete coverage. After blasting, the parts are cleaned again to remove any residual media dust. Finally, they are often treated immediately with a rust inhibitor or sent directly for coating. The entire post processing CNC parts workflow is designed to protect that freshly prepared surface.

Pitfalls to Avoid for a Perfect Finish

Even with a great process, things can go sideways. A common mistake is using too high a pressure or the wrong abrasive type. For instance, using a coarse, angular media on soft aluminum can actually distort thin features or change critical dimensions—something you never want after precise CNC machining. Another pitfall is inconsistent movement, leading to an uneven, blotchy texture. And perhaps the biggest error is delaying the next step. A freshly blasted surface is highly reactive and can begin to oxidize (rust) quickly, especially with steel. The golden rule? Have your coating or protection process lined up right after blasting. For authoritative information on material compatibility and standards, check out ASTM International.

Bringing It All Together

So, what’s the secret to perfectly finished sandblasted machine parts? It’s understanding that this isn’t just a cosmetic add-on, but a critical engineering step that bridges manufacturing and final application. It combines careful preparation, the right choice of abrasive media, and a controlled, consistent technique. By integrating abrasive blasting of machined parts thoughtfully into your project workflow, you significantly boost the quality, durability, and appearance of your components. It’s the definitive answer for achieving a professional, durable finish that truly does justice to the precision of your CNC work.

Categories
CNC Milling & Turning

3 Axis vs 5 Axis CNC: Which is Right for Your Project?

Choosing between a 3-axis and a 5-axis CNC machine is a common crossroads in manufacturing. This guide breaks down their core differences in a friendly way, helping you understand which multi-axis machining center aligns with your project’s complexity, budget, and timeline.

Comparing 3-Axis and 5-Axis Machining Capabilities

Let’s start with the basics. Think of axes as the directions in which the cutting tool or the workpiece can move. A standard 3-axis CNC milling machine moves in three linear directions: left/right (X), forward/backward (Y), and up/down (Z). It’s incredibly reliable for machining parts with relatively simple geometries. On the other hand, a 5-axis CNC machine adds two rotational axes (typically called A and B), allowing the cutting tool to approach the workpiece from virtually any direction in a single setup. This is the heart of simultaneous 5-axis machining.

How They Work: The Core Difference

Imagine you’re carving a detailed statue. With a 3-axis approach, you’d have to manually reposition the block multiple times to reach all the curves and undercuts—this is like needing multiple setups. A 5-axis setup is like having a robotic arm that can smoothly rotate the tool around the block, accessing those complex angles without stopping. This fundamental difference in movement is what drives all the other comparisons in CNC milling.

Where Each CNC Machine Shines: Practical Use Cases

So, when should you use each type? I like to think of the three axis CNC as the dependable workhorse. It’s perfect for machining 2.5D features, flat surfaces, pockets, holes, and simple contours. If you’re producing panels, brackets, or basic molds, a 3-axis is often the most cost-effective and straightforward choice. The 5 axis milling machine, however, is your go-to for complex, organic shapes. It excels at aerospace components (like turbine blades), intricate medical implants, sophisticated automotive parts, and complex sculptural forms. The ability to machine five sides of a part in one go (5-sided machining) is a massive time-saver and improves accuracy by eliminating setup errors.

How to Choose: Matching the Machine to Your Project

This is the big question: 3 axis vs 5 axis which is better for you? There’s no single “best” answer—it’s all about fit. We suggest you start by looking at your part’s design. Are there deep pockets, undercuts, or surfaces that aren’t parallel to the standard axes? If yes, 5-axis becomes attractive. Next, consider your budget. A 5-axis machine has a higher initial cost and often requires more expensive programming and tooling. For lower-volume or simpler projects, that investment might be hard to justify. Finally, think about time. A 5-axis can dramatically reduce cycle times and manual handling for complex parts, potentially offsetting its higher hourly rate.

Key Questions to Ask Before You Decide

To make your decision easier, ask yourself: What is the geometric complexity of my part? What is my total production volume? What is my tolerance and surface finish requirement? Do I have the technical expertise for multi-axis programming? Answering these will point you toward the right CNC machining process. For many, a hybrid approach works best: using 3-axis for most operations and reserving 5-axis for only the most complex features.

Clearing Up Common CNC Misconceptions

Let’s tackle a few myths head-on. First, “5-axis is always better.” Not true! Using a 5-axis mill for a simple flat plate is overkill—like using a sports car to haul lumber. Second, “3-axis machining is obsolete.” Absolutely not! It remains the backbone of the industry for a vast majority of components. Third, “5-axis is impossibly difficult to program.” While it’s more complex, modern CAM software has made it far more accessible. A final tip: don’t assume you must buy a machine. Many job shops offer both services, so you can test the waters with a 5-axis project without the capital outlay. You can learn more about machining fundamentals from authoritative sources like Engineering.com.

Making Your Final Decision

Choosing between 3-axis and 5-axis CNC machining ultimately comes down to your specific part, budget, and goals. For simplicity, speed on straightforward jobs, and lower cost, the trusted 3-axis path is often perfect. For unparalleled capability on complex, contoured parts where precision and reduced setups are critical, the power of 5-axis is worth the investment. My friendly advice? Start with a clear understanding of your part’s needs. If you’re still unsure, consult with an experienced machinist or a machine shop that offers both—they can provide invaluable guidance tailored to your unique CNC manufacturing project. Remember, the right tool for the job makes all the difference.

Categories
CNC Milling & Turning

What Is Swiss Type Machining? Your Friendly Guide to Precision

Ever wondered how tiny, complex parts for watches or medical devices are made with such incredible precision? That’s often the work of Swiss type machining. This friendly guide will walk you through what Swiss screw machining is, why it’s so valuable for precision manufacturing, and how it works in a way that’s easy to understand.

Understanding Swiss Type Machining: A Detailed Overview

Let’s start with the basics. Swiss type machining, often called Swiss screw machining or using a Swiss lathe, is a specialized form of CNC turning. Its origins are exactly where the name suggests: the Swiss watchmaking industry, where crafting tiny, flawless components was a necessity. Unlike a conventional lathe where the workpiece is fixed and the tool moves, a Swiss screw machine uses a moving guide bushing. The bar stock slides through this bushing, getting support right next to the cutting tool. This simple-sounding difference is the secret to its superpower: exceptional stability and accuracy, especially on long, slender parts.

The Core Principle: How a Swiss Lathe Works

Imagine you’re trying to sharpen a very long, thin pencil. If you hold it at the very end, it will wobble and flex. But if you support it with your fingers close to the tip, you get a clean, precise point. That’s the essence of Swiss-type CNC machining. The guide bushing acts like your supporting fingers, drastically reducing vibration and deflection. This allows for intricate machining operations—like drilling, milling, and threading—on parts that would be too flimsy for a standard CNC lathe. You might hear experts refer to this as sliding headstock turning, which is just another way to describe the same brilliant process.

The Value of Swiss Machining for Precision Work

So, why go through this extra setup? The benefits are a game-changer for specific projects. First and foremost is extreme precision and tight tolerances. We’re talking about holding tolerances within a few microns consistently. This is non-negotiable for industries like medical device manufacturing (think bone screws or surgical tool components) and aerospace, where a tiny flaw can have big consequences. Second, it enables complete machining in one setup. A Swiss-style lathe often has multiple tool stations and live tooling, meaning it can perform turning, milling, and cross-drilling all without an operator moving the part to another machine. This boosts efficiency and, crucially, maintains perfect alignment. If you’re searching for high-volume precision turned parts, this process is often the most cost-effective solution.

Practical Advice: When to Choose Swiss CNC Machining

You don’t need a Swiss machine for every job. Think of it as a specialist tool in your workshop. We recommend you consider Swiss screw machining when your part design has these characteristics: it’s long and slender (with a length-to-diameter ratio that’s high), it requires extremely tight tolerances and a superb surface finish, or it needs multiple, complex secondary operations. A classic example is a small shaft with cross-holes, grooves, and threads. Using a conventional lathe for this could mean multiple setups and more room for error. With a Swiss lathe, it’s often one smooth, automated process from bar stock to finished part. For a deeper dive into the capabilities of modern CNC lathes, you can check out this resource from Modern Machine Shop.

Clearing Up Common Misconceptions

Let’s tackle a few myths head-on. A common one is that Swiss-type CNC machining is only for making screws. While it excels at that, its use has expanded far beyond. Today, it produces connectors, pins, nozzles, and countless other components. Another misconception is that it’s always slower than standard turning. For simple parts, yes, a conventional lathe might be faster. But for complex components, the ability to complete everything in one cycle often makes Swiss machining the faster overall choice. Finally, some believe it’s prohibitively expensive. For prototyping a single simple part, that might be true. But for production runs of complex, precision components, the reduced labor, scrap, and secondary processing make it incredibly economical.

Wrapping Up: Is Swiss Machining Right for Your Project?

In summary, Swiss type machining is a precision powerhouse perfect for long, slender, and complex parts that demand the highest accuracy. It’s the go-to method in industries where failure is not an option. When evaluating your next project, ask yourself: Does my part have challenging geometry? Are the tolerances extremely tight? Is the material delicate or the part prone to deflection? If you answered yes, then exploring Swiss screw machine services could be your best next step. It’s a fascinating corner of the CNC world that turns manufacturing challenges into reliable, high-quality solutions.

Categories
CNC Milling & Turning

What Is 5-Axis CNC Machining? Your Friendly Guide to How It Works

Welcome! If you’ve ever wondered how complex parts for airplanes or medical devices are made, you’re in the right place. This guide breaks down 5-axis CNC machining in simple terms, explaining how it works and why it’s such a game-changer for creating intricate, high-precision components.

Understanding the Fundamentals of 5-Axis Machining

Let’s start at the beginning. You might be familiar with a basic drill press that only moves up and down—that’s essentially one axis. 5-axis CNC milling is a massive leap from that. Think of it as giving a cutting tool the freedom to approach a workpiece from almost any angle. This capability is central to modern multi-axis machining and is what sets it apart from more common 3-axis methods.

What Are These “Axes” Anyway?

It’s simpler than it sounds! The three linear axes are straightforward: X (left to right), Y (front to back), and Z (up and down). A 5-axis CNC machine adds two rotational axes, typically called A and B or A and C. The A-axis rotates around the X-axis, and the B-axis rotates around the Y-axis. This rotation allows the cutting tool to tilt and swivel, making contact with the workpiece from directions that were previously impossible without manually repositioning it. This is the core of simultaneous 5-axis machining.

How It Works & The Value It Brings

So, what does this mean for making things? The benefits are huge and answer the common search for benefits of 5-axis CNC. Imagine you’re sculpting a detailed model out of clay. If you can only work from the top, you’ll have to constantly stop, turn the model, and try to match up your cuts. A 5-axis machine is like having a magical tool that lets you smoothly carve from the side, underneath, and at compound angles without ever letting go.

The Magic of a Single Setup

One of the biggest advantages is reduced setup time. In traditional machining, a complex part might need to be clamped down in five different positions to machine all its sides. Each setup introduces potential error and takes time. With a 5-axis system, the part is fixed once, and the machine’s head and table do all the moving. This not only speeds up production but also dramatically improves accuracy.

Tackling Complex Geometries with Ease

This technology shines when creating parts with complex contours and undercuts. Industries like aerospace rely on it for turbine blades and structural components with organic shapes. The medical field uses it for precise orthopedic implants and surgical tools. Even the automotive and mold-making industries benefit from the ability to create sleek, aerodynamic, or intricately detailed forms in one go. It’s the go-to solution for high precision machining of sophisticated parts.

Getting Started: Practical Advice for Your Projects

If you’re considering 5-axis machining services for a project, here’s some friendly advice. First, have a clear 3D CAD model—this is non-negotiable. The machine’s computer (the CNC) needs that digital blueprint. Second, communicate closely with your machining partner. Discuss the part’s function, tolerances, and material. Sometimes, a feature that looks tricky might be easy for a 5-axis machine, and vice-versa. A good partner can help optimize your design for manufacturability. You can learn more about the principles of CNC from resources like the Engineering.com platform.

Clearing Up Common Misconceptions

Let’s bust a few myths! A common one is that 5-axis CNC machining is always the best and fastest choice. Not necessarily. For a simple flat bracket with holes, a 3-axis machine is faster and more cost-effective. The 5-axis capability is for complexity. Another myth is that it’s impossibly expensive. While the machines are a significant investment, the total cost for your part might be lower due to reduced labor, setup time, and improved accuracy leading to less waste. It’s about the total value, not just the hourly rate.

Wrapping It All Up

In a nutshell, 5-axis CNC machining is a powerful manufacturing process that uses two extra rotational axes to machine complex parts from nearly any direction in a single setup. It’s the secret behind many of the advanced, high-performance components we rely on today. Whether you call it multi-axis milling or 5-axis CNC fabrication, the goal is the same: to create precise, intricate parts more efficiently. For the latest standards and technical insights, referring to authoritative sources like ASME (The American Society of Mechanical Engineers) is always a great idea. I hope this friendly guide has helped demystify how it all works!

Request A Quote

We'll Send You Back with Price Immediately!

DEC 1-31

XMAS SPECEIL

Up to

40% off

What Is 5-Axis CNC Machining? Your Friendly Guide to How It Works

We'll Send You Back with Price Immediately!