Categories
CNC Materials

ABS vs Nylon Machining: Which Material Wins for Your CNC Project?

Choosing between ABS and Nylon for your CNC machining project can be tricky. Both are fantastic engineering plastics, but they shine in different areas. This friendly guide breaks down their properties, machining quirks, and ideal uses to help you pick the perfect material for your part.

Getting to Know ABS and Nylon

Hey there! So you’re planning a CNC project and the material choice has come down to ABS plastic versus Nylon. It’s a common crossroads. Think of it like choosing between a reliable sedan and a rugged off-road vehicle—both will get you there, but the best ride depends on the terrain. Let’s meet our contenders properly before we pit them against each other in a machinable plastics comparison.

What is ABS Plastic?

ABS, or Acrylonitrile Butadiene Styrene, is like the friendly, all-around workhorse of the plastic world. You’ve definitely held it—it’s the same stuff used in LEGO bricks, car dashboards, and protective cases. Its popularity in CNC machining plastics comes from its great balance. It’s tough, has good impact resistance, and is relatively inexpensive. It also machines beautifully, leaving a nice, smooth surface finish that’s easy to post-process. For more on its general properties, you can check out this resource from Ensinger Plastics.

What is Nylon (Polyamide)?

Nylon, known technically as Polyamide or PA, is the tough, resilient athlete. Originally famous for stockings, it’s now a superstar in engineering for its strength, wear resistance, and flexibility. In the world of CNC machining nylon, you’ll often hear about grades like Nylon 6 and Nylon 66. It’s the go-to for parts that need to endure friction, bear loads, or operate in tougher environments. However, it has a bit of a reputation for being “thirsty”—it absorbs moisture from the air, which can affect machining and final part dimensions.

Head-to-Head: Key Properties for Machining

Alright, let’s put them side-by-side. When you’re comparing ABS vs Nylon for CNC, you’re really looking at a trade-off between impact toughness and mechanical strength. Here’s a breakdown of the key factors that will influence your engineering plastic selection.

Strength & Toughness

This is where their personalities really differ. Nylon is the stronger of the two. It has a higher tensile strength and excellent fatigue resistance, meaning it can handle repeated stress and strain without failing. It’s fantastic for gears, bearings, and structural components. ABS, while strong, excels in toughness and impact resistance. It can take a sudden shock or drop better than Nylon. So, if your part might get bumped or knocked around, ABS could be your hero. For a deep dive into material data, MatWeb is an excellent database.

Heat & Moisture Resistance

Here’s a big one for functional parts. Nylon generally handles higher temperatures better than ABS. Its heat deflection temperature is higher, so it won’t soften or warp as easily in warm environments. But remember that “thirsty” nature? That absorbed moisture can actually make Nylon softer and less stiff during machining if it’s not pre-dried. ABS is more dimensionally stable in humid conditions but has a lower thermal limit. So, for a part under the hood of a car? Lean Nylon. For a housing in a climate-controlled room? ABS is fine.

Wear and Chemical Resistance

If your part involves sliding, rubbing, or any kind of friction, Nylon is the undisputed champion. Its natural lubricity and wear resistance are why it’s the classic choice for bushings, rollers, and wear pads. It also resists oils, fuels, and many solvents quite well. ABS has decent chemical resistance to some acids and alkalis but doesn’t like hydrocarbons (like gasoline) and can be scratched more easily. So, for a durable plastic part that needs to slide smoothly, Nylon wins every time.

The CNC Machining Process for Each

Now, how do they behave on the machine? Both are considered very machinable plastics, but they have their own quirks. A good machinist knows these tricks, which can affect the cost and quality of your final part.

Machining ABS: Tips and Tricks

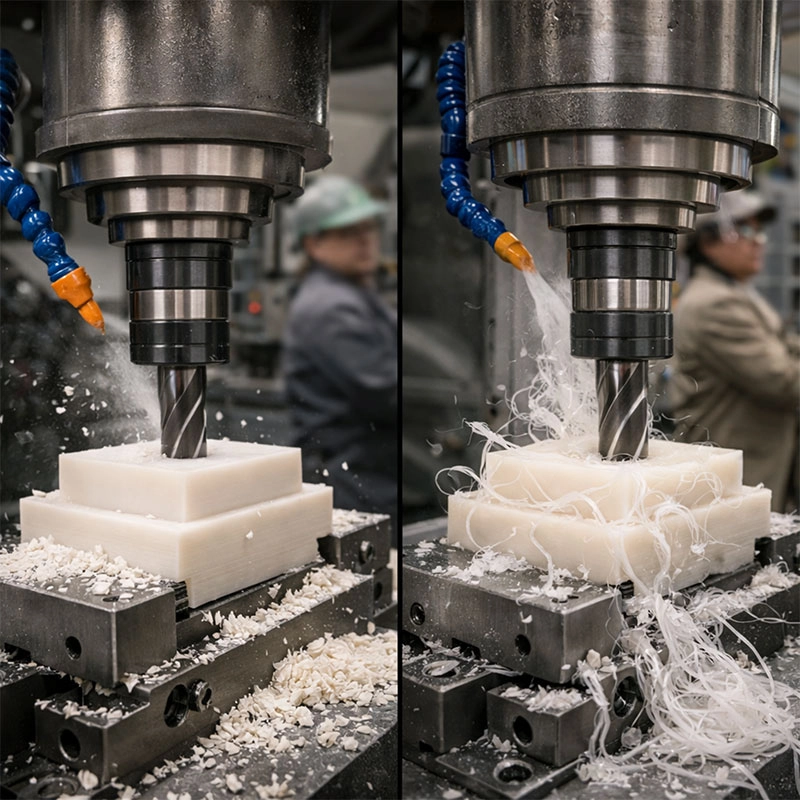
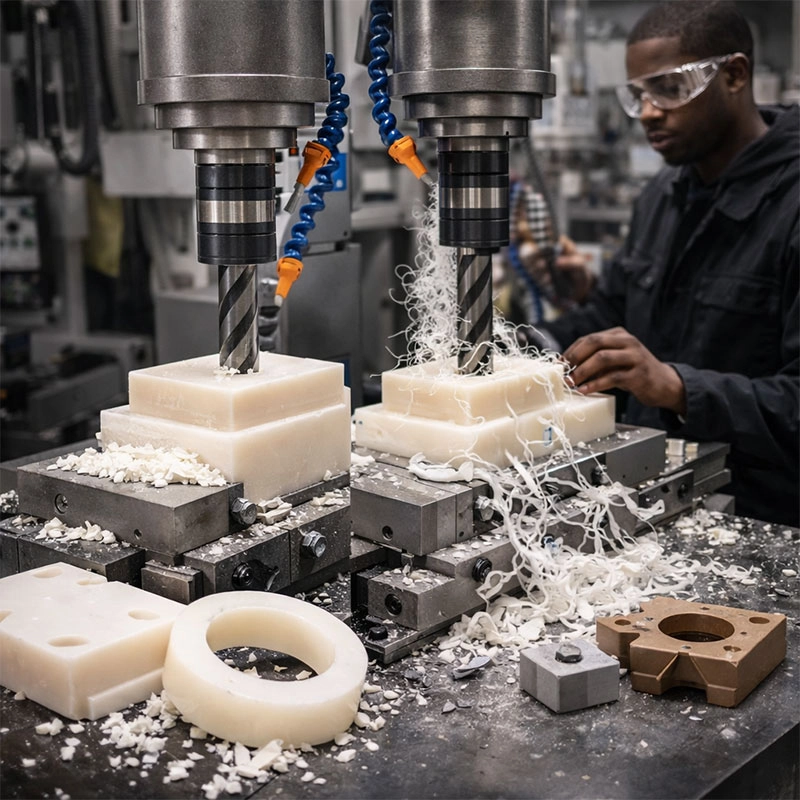
Machinists often describe ABS as “forgiving” and “easy to work with.” It cuts cleanly, produces manageable chips (not long, stringy ones), and allows for high feed rates. You get a great surface finish right off the tool, and it’s easy to sand, glue, or paint afterward. The main watch-out is heat. Too much localized heat from aggressive cutting can melt or gum up the plastic. Using sharp tools, proper coolant (often compressed air is enough), and the right speeds and feeds keeps everything smooth. It’s a top pick for prototype machining because of this ease.

Machining Nylon: Handling the Challenges

CNC machining Polyamide requires a bit more finesse. The two big challenges are moisture and flexibility. As we mentioned, nylon should be pre-dried before machining to ensure dimensional stability and prevent bubbling or a poor surface finish. Secondly, because it’s somewhat flexible, it can deflect or vibrate during cutting if not properly supported, leading to inaccuracies. Using very sharp tools with high rake angles and secure workholding is key. The payoff is worth it—you get a strong, durable part with excellent wear properties.

Choosing Your Winner: Application-Based Advice

So, who wins the ABS versus Nylon machining battle? The answer, as you’ve probably guessed, is: “It depends on your project!” Let’s make it simple with some real-world scenarios.

Choose ABS Plastic Machining when: Your priority is good impact resistance, a lower cost, and excellent machinability. It’s perfect for prototypes, enclosures, housings, consumer product parts, and models that need a nice painted finish. Think of a custom dashboard panel, a jig or fixture for assembly, or a protective cover.

Choose Nylon CNC Material when: You need high mechanical strength, wear resistance, and fatigue endurance. It’s the ideal candidate for functional, moving parts like gears, bearings, bushings, pulleys, and insulators. If your part will face friction, constant load, or a slightly tougher environment, Nylon is your material.

My final piece of friendly advice? Talk to your CNC machining partner early. Describe the function, environment, and stresses your part will face. A good shop can guide you through this plastic material comparison and help you select the right stock material to ensure your project is a total success. Happy making!
Categories
CNC Materials

Your Ultimate Guide to Plastic CNC Machining Success

Welcome to your go-to resource for plastic CNC machining! This guide breaks down everything from material selection to finishing techniques, helping you understand the process and achieve high-quality, precise plastic parts. Whether you’re new to CNC or looking to refine your skills, you’ll find practical advice here.

Why Choose CNC for Plastic Parts?

If you’re exploring plastic part fabrication or polymer machining, you might wonder why CNC is such a popular choice. Think of it like a highly skilled sculptor, but one that uses digital instructions to carve plastic with incredible accuracy. Unlike injection molding, which is great for huge volumes, CNC milling of plastics is perfect for prototypes, custom one-off pieces, or low to medium production runs. It gives you the freedom to make design changes quickly without expensive molds. The result? Parts with tight tolerances, excellent surface finishes, and complex geometries that are hard to achieve with other methods.

Picking the Right Plastic for Your Project

This is where your guide to machining plastics really starts. Not all plastics are created equal for machining! Picking the wrong one can lead to melted edges, poor finishes, or a part that just doesn’t hold up. Here’s a quick rundown of some common players:

ABS is a tough, all-rounder that machines nicely and is easy to glue and paint. Polycarbonate (PC) is incredibly strong and clear, but it can be a bit grabby on tools. Acrylic (PMMA) gives you that crystal-clear, glass-like finish but is brittle and can chip. For parts needing low friction and high wear resistance, Acetal (POM/Delrin) is a star performer. And for extreme chemical resistance or high temperatures, engineers often turn to PEEK or PTFE (Teflon). My advice? Always chat with your material supplier or machinist about your part’s function—they can point you to the perfect fit.

Key Considerations Before You Start Machining

Jumping straight into CNC plastic fabrication without a plan is like baking without a recipe. A few upfront thoughts make all the difference. First, consider your part’s design. Sharp internal corners? They might need a special tool. Very thin walls? They could vibrate or break during cutting. Sharing a detailed 3D model with your machinist helps them spot these issues early. Also, think about the final look and feel. Do you need a glossy finish, or will a matte texture work? Specifying this early guides the entire machining process for polymers.

Your Tooling and Cutting Strategy

The tools and how we use them are crucial in precision plastic machining. We generally use sharp, polished tools designed for plastics. Why sharp? Dull tools generate more heat through friction, and heat is the enemy—it can soften the plastic and ruin your cut. High spindle speeds with slow feed rates often work well, as they produce smaller chips that carry heat away. Using compressed air or mist coolant (never a flood of liquid that could swell the material) is key for temperature control. It’s a delicate balance, but getting it right means clean cuts and happy parts.

Workholding and Temperature Control

How you hold the plastic block still is just as important as the cutting. Since plastics are softer and more flexible than metal, we need gentle but secure fixturing. Vacuum tables are fantastic because they distribute holding force evenly without distorting the material. Sometimes, custom soft jaws or adhesive methods are used. The goal is always to prevent vibration and movement without crushing the part. And remember that temperature control we mentioned? Keeping everything cool prevents the plastic from expanding, which ensures your final dimensions are spot-on. For more on material properties, resources like Boedeker Plastics offer great technical data sheets.

A Step-by-Step Look at the CNC Process for Plastics

Let’s walk through a typical CNC machining plastic guide process. It starts with your CAD model, which gets translated into machine instructions (G-code) by CAM software. The machinist then secures a block of your chosen plastic to the machine bed. The first cuts are usually roughing passes—these quickly remove large amounts of material, leaving a little extra. Then, finishing passes come in with finer tools and precise movements to hit the exact dimensions and surface quality. Finally, the part is carefully detached, deburred (removing any sharp edges), and often goes through a secondary finishing process like sanding or polishing. It’s a methodical dance between machine, material, and machinist.

Common Pitfalls and How to Avoid Them

Even with a great plastic machining tutorial, things can go sideways. A common issue is melting or gumming. This usually points to excessive heat from dull tools, too slow spindle speed, or inadequate cooling. The fix? Sharpen or change your tools and optimize your speeds and feeds. Another headache is chipping, especially on brittle plastics like acrylic. Using climb milling techniques and very sharp, single-flute cutters can make a world of difference. Finally, dimensional inaccuracy often stems from the plastic expanding due to heat or from improper fixturing. Allowing the material to cool between passes and using the right workholding solve most of this. The key is to start with conservative settings and adjust as you learn how the specific material behaves.

Wrapping Up Your Plastic Machining Journey

I hope this comprehensive guide to CNC machining plastics has been helpful! Mastering plastic CNC machining is about understanding the unique personality of plastics—how they react to heat, force, and cutting tools. It blends science with a bit of practical artistry. Start with a suitable material, design for manufacturability, use sharp tools with a smart cutting strategy, and control your environment. Don’t be afraid to ask for advice from experienced machinists; their hands-on knowledge is invaluable. With these tips, you’re well on your way to turning your plastic part ideas into successful, high-quality realities. Happy machining!

Categories
CNC Materials

Overcoming 5 Common Titanium CNC Machining Difficulties

Titanium is a fantastic material, but machining it can feel like a tough puzzle. Its unique properties, while beneficial for the final part, create specific hurdles during the CNC process. Let’s walk through the common challenges and, more importantly, practical ways to solve them for a smoother, more efficient workflow.

Managing Extreme Heat and Tool Wear

If you’ve ever worked with titanium, you know heat is public enemy number one. Unlike aluminum, titanium has very low thermal conductivity. This means the heat generated at the cutting edge doesn’t get carried away by the chips or the workpiece; it stays right there, concentrating on your tool. This rapid heat buildup is the main culprit behind accelerated tool wear and premature failure. It’s one of the most talked-about titanium machining problems in any shop.

Your Coolant Strategy is Key

To beat the heat, you need a proactive cooling plan. A high-pressure, high-volume flood coolant system is non-negotiable. It needs to deliver coolant directly to the cutting zone to effectively remove heat and flush away chips. For deep cavity milling or drilling, through-tool coolant is a game-changer. Also, consider the coolant type; some shops find success with specialized oils or emulsions formulated for tough alloys. The goal is to keep everything as cool as possible from start to finish.

Dealing with High Strength and Low Conductivity

Titanium’s excellent strength-to-weight ratio is why we use it, but it demands respect during CNC machining titanium alloys. Its high strength requires significant cutting forces, which stresses both the tool and the machine. Coupled with the low thermal conductivity we just discussed, you have a scenario that demands robust, rigid setups. A flimsy fixture or a machine with low torque will struggle. Ensuring maximum rigidity in your workpiece clamping, tool holder (like a hydraulic or shrink-fit holder), and the machine itself is critical to handle these forces and prevent deflection.

Preventing Workpiece Galling and Built-Up Edge

Here’s a sticky situation—literally. Titanium has a tendency to gall, meaning it can weld itself to the cutting tool during the process. This leads to built-up edge (BUE), which degrades your surface finish and can cause tool chipping. To combat this, use sharp, premium-grade tools with coatings like AlTiN (Aluminum Titanium Nitride) that reduce friction and adhesion. Maintaining a consistent, appropriate feed rate is also vital; too slow, and the tool rubs instead of cuts, increasing heat and the chance of galling. It’s a delicate balance to avoid issues with titanium milling.

Controlling Vibration and Chatter

Chatter is that awful ringing sound that leaves a poor surface finish and can damage your tool. Titanium’s elasticity can sometimes induce vibration. The fix goes back to rigidity and toolpath strategy. Use the shortest, stoutest tool possible for the job to minimize overhang. Opt for toolpaths that maintain a constant tool engagement, like trochoidal milling or high-efficiency milling (HEM) strategies, which use lighter radial depths of cut with higher feed rates. This approach reduces sudden load changes and helps keep vibration in check, making your titanium part machining much quieter and more stable.

Achieving a Superior Surface Finish

Getting a beautiful, burr-free finish on titanium isn’t always straightforward. The challenges we’ve covered—heat, galling, chatter—all directly impact the final surface quality. It often feels like the material is “springing back” after the tool passes. To win here, you need to address the root causes and then fine-tune your finishing passes specifically for machining grade 5 titanium (Ti-6Al-4V) or other grades.

Fine-Tuning Your Parameters

For finishing, use a sharp, dedicated finishing tool with a positive rake geometry. Increase your spindle speed slightly and use a light, consistent axial depth of cut. A smaller stepover (like 5-10% of the tool diameter) can produce a remarkably smoother finish. Sometimes, a final, very light “spring pass” can help clean up any material that deformed elastically. For more in-depth technical data on tool geometries and speeds/feeds for specific alloys, resources like Modern Machine Shop offer valuable, peer-reviewed guidance. Remember, patience in the finish pass pays off with a part that looks as good as it performs.

Categories
CNC Materials

Your Ultimate Aluminum CNC Machining Guide: Expert Tips

Welcome to your go-to resource for mastering aluminum CNC machining. This guide is packed with practical advice to help you understand the process, choose the right materials, and apply expert techniques for superior results in your projects.

Essential Techniques for Precision Aluminum CNC Machining

Let’s dive right into the core of aluminum CNC machining. You might be wondering what makes machining aluminum different from steel or titanium. Well, its excellent machinability is a huge plus, but to get those perfect, burr-free parts, you need a solid game plan. Think of it like cooking a delicate dish—the right ingredients and techniques make all the difference.

Choosing the Right Aluminum Alloy

Not all aluminum is created equal! The first step in any CNC machining aluminum project is picking the suitable grade. For instance, 6061 is the all-rounder, fantastic for prototypes and general parts. If you need something stronger and more precise for aerospace applications, you might look at 7075. And for parts that need great finishing, like consumer electronics, 5052 is a superb choice. It’s like choosing between different types of wood for a carpentry project; each has its best use. You can learn more about material properties from trusted sources like the ASM International.

Tooling and Speeds & Feeds Tips

Here’s a tip from my own workshop experience: sharp, polished tools are your best friend for machining aluminum parts. Dull tools create heat and pressure, leading to poor surface finishes. For speeds and feeds, aluminum loves high spindle speeds and aggressive feed rates. A common mistake is going too slow, which can cause the tool to rub instead of cut, building up heat. Don’t be afraid to push the parameters a bit—just ensure your setup is rigid to handle it.

Why Aluminum CNC Machining is a Top Choice

So, why is aluminum CNC fabrication so popular across industries? The benefits are pretty compelling. First, aluminum is lightweight yet strong, which is a golden combination for automotive and aerospace components. Second, its thermal and electrical conductivity makes it ideal for heat sinks and enclosures. Finally, its natural corrosion resistance means parts last longer with less maintenance. Whether you’re working on a custom bike frame or a complex drone component, aluminum offers a balance of performance and practicality that’s hard to beat.

Practical Advice for Your Machining Projects

Now, let’s talk about applying this knowledge. A great guide to CNC machining aluminum isn’t just about theory; it’s about actionable steps you can take today to improve your workflow and part quality.

Smart Fixture and Workholding Design

Aluminum is relatively soft, so it can easily deform if clamped too tightly. We recommend using soft jaws machined to the part’s contour for a secure, even grip. For thin-walled parts, consider using strategic support or even vacuum tables. Good workholding is the unsung hero of precision aluminum milling—it ensures everything stays put so your tools can do their best work.

Mastering Chip Control and Coolant Use

Managing chips is critical in precision aluminum machining. Long, stringy chips can wrap around tools, cause scratches, and even stop production. Using tools with high flute counts and proper chip breakers helps create small, manageable chips. And don’t forget coolant! A good flood coolant does more than just cool; it lubricates and flushes chips away. For some operations, a simple air blast with a mist might suffice. The goal is to keep the cutting zone clean and temperature-controlled.

Common Pitfalls and How to Avoid Them

Even with a great CNC aluminum processing guide, it’s easy to stumble into a few common traps. One big one is ignoring thermal expansion. Aluminum expands with heat, so a part machined to perfect dimensions at room temperature might be out of spec if it gets too hot during cutting. Plan your operations to manage heat, and let parts cool before final precision cuts. Another pitfall is improper tool path strategies. Climb milling is generally preferred for aluminum as it produces a better finish and puts less stress on the tool. Taking the time to program efficient tool paths pays off in part quality and tool life.

Wrapping Up Your Machining Journey

I hope this walkthrough has shed some light on the art and science of aluminum CNC machining. Remember, success comes from combining the right material knowledge with sharp tools, smart programming, and attentive practices. It’s a skill that grows with every part you make. Start with these expert tips, keep learning from each project, and you’ll be producing fantastic, high-quality aluminum components in no time. Happy machining!

Categories
CNC Materials

Master Stainless Steel CNC Machining: 5 Essential Tips for Success

Working with stainless steel on a CNC machine can be rewarding but tricky. This guide shares five practical tips to help you master stainless steel CNC machining, improve your results, and avoid common headaches. We’ll cover everything from tool selection to managing heat effectively.

Choose the Right Tools and Coatings

One of the most common questions I get is about CNC machining stainless steel and which tools to use. The wrong choice here can lead to rapid tool wear and poor surface finishes. For success in precision stainless steel machining, you need tools that are up for the challenge. Carbide end mills are typically your best bet because they handle the hardness and heat better than high-speed steel. Look for tools specifically designed for difficult-to-machine materials.

Tool Geometry Matters

It’s not just about the material; the shape of the tool is crucial. For machining 304 stainless steel or tougher grades like 316, use tools with a positive rake angle. This design shears the material more efficiently, reducing cutting forces and heat generation. A robust core and variable helix design can also help dampen vibrations, which is a big plus when working with this tough metal.

Don’t forget about coatings! A good coating acts like a shield. AlTiN (Aluminum Titanium Nitride) or TiAlN coatings are fantastic for stainless steel fabrication as they provide excellent heat resistance and lubricity, allowing you to run tools at more productive parameters. Think of it as putting a high-performance, heat-resistant jacket on your tool.

Dial in Your Speeds and Feeds

Finding the sweet spot for your spindle speed and feed rate is where the art meets the science. Running too slow can cause the tool to rub and work-harden the material, making it even tougher to cut. Running too fast generates excessive heat and wears out your tool prematurely. For effective stainless steel CNC tips, a good starting point is to use a moderate surface speed (SFM) and a consistent, appropriate chip load.

My advice? Start conservative and work your way up. Many machinists find that a slightly higher feed rate with a controlled depth of cut works better than a light, fast cut. This technique, often called “climb milling,” helps pull the chip away from the workpiece and can lead to a better finish. Remember, the goal is to make a chip that carries the heat away, not leave it in your part or tool.

Master Heat Management and Cooling

Heat is public enemy number one in CNC milling stainless steel. If you don’t manage it, you’ll face warped parts, dimensional inaccuracy, and destroyed tools. The key is to remove heat from the cutting zone as quickly as possible. A high-pressure coolant system is incredibly effective here, as it penetrates the cutting zone to cool the tool and flush chips.

If flood coolant isn’t an option, consider using an air blast with a mist coolant system or even specialized cutting fluids formulated for stainless. The lubrication is just as important as cooling to prevent built-up edge on your tool. For some operations, like drilling deep holes, a through-tool coolant delivery system can be a game-changer, ensuring the tip of the drill stays cool and lubricated. You can learn more about advanced cooling techniques from resources like the Modern Machine Shop website.

Prioritize Rigid Workholding

Stainless steel fights back. The cutting forces are significant, and any flex or movement in your setup will lead to chatter, poor surface finish, and tool breakage. This is a fundamental tip for machining stainless that can’t be overstated. Ensure your workpiece is clamped as securely as possible. Use vises in good condition, consider step clamps for larger plates, and always use parallels or custom fixtures to maximize contact and stability.

Also, check the rigidity of your machine itself. A massive, well-maintained machining center will handle stainless far better than a light-duty benchtop mill. Minimizing overhang on your tool holder is another simple trick—get that end mill as close to the spindle nose as you can to reduce vibration.

Achieve Proper Chip Control

The chip tells the story of your cut. In ideal stainless steel part machining, you want to see a tightly curled, silver-colored chip. A long, stringy chip is a problem—it can wrap around your tool, scratch the workpiece, and become a safety hazard. It also means your parameters might be off.

To break chips effectively, you might need to adjust your feed rate, depth of cut, or use tools with chip-breaker geometries. Sometimes, a pecking cycle when drilling or a different tool path strategy for milling can make all the difference. Good chip control ensures a safer workspace, protects your part, and is a sign you’ve got your CNC processing of stainless dialed in correctly. For in-depth technical data on material properties and machining guidelines, the ASM International materials information society is an excellent resource.

Categories
CNC Materials

Overcome 5 Common Brass CNC Machining Challenges Easily1

Working with brass on a CNC machine is generally a pleasure, but it’s not without its unique hurdles. From material softness to stubborn burrs, these issues can slow you down. This guide walks you through five typical brass machining problems and offers practical, easy-to-implement solutions to keep your projects running smoothly.

Tackling Material Softness and Galling

One of the first things you’ll notice about brass is how soft and “gummy” some alloys can feel. This softness is great for machinability, but it can lead to a frustrating issue called galling, where the material sticks to the cutting tool. Think of it like cutting soft cheese with a dull knife—it just smears and sticks. This build-up on the tool edge creates poor surface finishes and can even cause tool failure.

Choosing the Right Brass Grade

The key here is material selection. Not all brass is created equal! For CNC machining brass parts, leaded brass alloys like C36000 are often the top choice. The small amount of lead acts as a lubricant, significantly reducing the chance of galling and giving you those beautiful, broken chips we love. If you’re dealing with brass CNC difficulties like built-up edge, switching to a free-machining grade can feel like a miracle.

Managing Burr Formation and Removal

Ah, burrs. Those pesky, sharp edges left behind after cutting. Because brass is ductile, it tends to deform rather than shear cleanly, leading to prominent burrs. This is a classic challenge in brass CNC milling and turning. While you can’t eliminate them entirely, you can minimize them. We recommend using sharp tools with positive rake angles and higher cutting speeds. Sometimes, a simple change in your tool path strategy to ensure a clean exit can make a world of difference in reducing deburring brass components time later.

Mastering Chip Control and Evacuation

Good chip control is the secret to efficient machining. Long, stringy chips are a nightmare—they can wrap around your tool, scratch your part, and clog up the works. The goal is to create small, manageable “C” shaped chips. You can achieve this by playing with your feeds and speeds. A higher feed rate often helps break chips more effectively. Also, never underestimate the power of a good coolant or compressed air blast to keep the cutting area clear. For deep pockets or intricate precision brass machining, effective chip evacuation is non-negotiable to prevent recutting chips and tool damage.

Optimizing Tool Selection and Wear

Using the wrong tool is like trying to screw in a nail—it just creates more problems. While brass is soft, it can still cause rapid tool wear if you’re not careful, especially with abrasive alloys like silicon brass. The main problem with machining brass often boils down to tool life. You want tools that stay sharp.

Why Geometry and Coatings Matter

For end mills, choose ones with sharp edges and polished flutes to prevent chip adhesion. Coatings like TiN (Titanium Nitride) or even uncoated, sharp carbide tools work excellently. According to resources like Modern Machine Shop, the high lubricity of brass means you often don’t need the super-hard coatings used for steel. Focus on sharp geometry and a good surface finish on the tool itself to overcome these CNC brass manufacturing issues.

Achieving a Consistent Surface Finish

You want your brass parts to look as good as they function, right? Inconsistent finishes, tiny scratches, or visible tool marks can ruin a perfect part. This often ties back to the previous challenges: galling, chip recutting, or a worn tool. To get that mirror-like shine, start with the sharpest tool possible. Use higher spindle speeds and moderate feed rates. Sometimes, a final light finishing pass with a fresh tool is all it takes. And remember, the right cutting fluid isn’t just for cooling; it helps produce a cleaner cut and a better final appearance on your machined brass components.

Categories
CNC Materials

Your Ultimate CNC Machining Materials List & Guide

Choosing the right material is one of the most critical decisions in any CNC machining project. This guide will walk you through the essential materials list, from metals and plastics to more exotic options, explaining their properties, uses, and how to select the best one for your application. Think of it as your friendly workshop companion for material selection.

Why Your Material Choice is a Game-Changer

Hey there! Let’s talk about something fundamental. When you’re planning a project, whether it’s a custom bike part or a prototype for a new gadget, the CNC machining materials list you start with sets the stage for everything. It’s not just about what’s available; it’s about matching the material’s personality—its strength, weight, cost, and how it behaves under the tool—to your vision. Picking the wrong one can lead to parts that wear out too fast, cost too much, or simply don’t work. I like to think of it as choosing the right ingredient for a recipe. Get it right, and the final product is a masterpiece.

The Metal Machining Guide: From Common to Exotic

Metals are the backbone of many machined parts, prized for their strength and durability. Your CNC material selection guide isn’t complete without a deep dive into these workhorses. From the lightweight champion aluminum to the tough stalwart steel, each brings something unique to the table. Let’s break down the most common metals you’ll encounter and some you might consider for special jobs.

Aluminum Alloys: The Go-To Favorite

If you’re looking for a material that’s easy to machine, lightweight, and has good strength, aluminum alloys are often the first stop. Grades like 6061 and 7075 are superstars in the CNC metals list. 6061 is incredibly versatile and cost-effective, perfect for automotive parts, frames, and consumer goods. 7075, on the other hand, is much stronger (comparable to many steels) and is a top choice for aerospace components. You might find that for most general-purpose projects, starting with an aluminum alloy is a safe and smart bet.

Stainless Steel: For Strength & Shine

When you need corrosion resistance and serious strength, stainless steel enters the chat. It’s a key part of any comprehensive machining materials database. Grades like 304 (general purpose) and 316 (with even better corrosion resistance, great for marine environments) are widely used. Machining stainless can be tougher on tools than aluminum—it’s harder and generates more heat—but the result is a part that can withstand harsh conditions and look great doing it. Think medical instruments, food processing equipment, or architectural details.

Other Essential Metals

Your guide to CNC materials should also include these other key players. Mild Steel (like 1018) is inexpensive and easy to machine, ideal for non-critical structural parts. Titanium is the high-performance option: incredibly strong, lightweight, and biocompatible, but challenging and expensive to machine—common in medical implants and aerospace. Brass and Copper offer excellent electrical conductivity and machinability, making them perfect for electrical components and decorative fittings. Don’t forget Tool Steels (like D2 or A2), which are hardened for making, well, tools and dies themselves.

Plastics & Polymers: Lightweight & Versatile

Plastics aren’t just cheap substitutes; they’re engineering materials in their own right. A complete CNC machining materials list must cover plastics, which offer benefits metals can’t, like electrical insulation, transparency, and often lower cost. They’re generally easier on cutting tools, too. When you’re searching for the best plastics for CNC machining, you’ll typically split them into two camps: engineering-grade and commodity-grade.

Engineering Plastics

These are the high-performers. POM (Acetal/Delrin) is famously stiff, has low friction, and machines to a beautiful finish—great for gears and bearings. Nylon (PA) is tough, wear-resistant, and has good chemical resistance. Then there’s PEEK, a superstar polymer used in extreme environments (like inside an engine or the human body) due to its incredible thermal and chemical stability. While more expensive, these materials solve specific, demanding problems.

Common Plastics for Machining

For many projects, a standard plastic is all you need. ABS is that familiar, tough plastic used in LEGO bricks and car dashboards; it’s easy to machine and glue. Polycarbonate (PC) is virtually unbreakable and clear, perfect for protective shields or lenses. PVC is cheap and chemical-resistant, often used for pipes and fittings. And PMMA (Acrylic) gives you glass-like clarity and is wonderful for signs, displays, and light fixtures. When building your CNC stock materials list, these are reliable, readily available options.

How to Choose: Your Practical Selection Checklist

With so many options, how do you decide? Let’s make it practical. Instead of getting overwhelmed, run through this simple checklist. Ask yourself: What is the primary function of the part? Does it need to bear load (strength), move (wear resistance), or be exposed to weather (corrosion resistance)? Next, consider the operating environment—temperature, chemicals, moisture. Then, factor in budget and machinability; a cheaper material that’s hard to machine might end up costing more in labor. Finally, think about appearance and regulations (like FDA approval for food contact). I always recommend getting a small sample machined if you’re unsure—it’s the best way to test the real-world performance of your CNC raw material options.

Final Thoughts on Building Your Materials List

Creating your ultimate CNC machining materials list is less about memorizing every alloy and polymer and more about understanding the landscape. Start with the application, let that guide your property requirements, and then match it to the material family. Remember, fantastic resources exist to help. For deep technical data on metals, I often refer to the ASM International website. For plastics, the IDES Plastics Database is an incredible source for property sheets. Don’t be afraid to consult with your machine shop either—their experience is gold. With this guide in hand, you’re well-equipped to make informed choices and bring your best designs to life. Happy machining!

Categories
CNC Materials

Can CNC Machine Brass? 5 Expert Tips for Perfect Results

Absolutely! Brass is one of the most machinable metals for CNC processes. Its excellent properties make it a favorite for precision parts, but achieving flawless results requires specific know-how. This guide dives into why brass is so suitable for CNC milling and turning and shares five practical tips to help you get perfect finishes every time.

Expert Strategies for CNC Machining Brass Successfully

If you’re wondering, “can a CNC mill handle brass?” or “is brass good for CNC machining?”, you’re in the right place. I’ve worked with this material for years, and I can tell you it’s a joy when you get it right. The key is understanding its personality. Unlike tougher metals, brass is relatively soft and free-machining, which means you can often run your machines faster. But that softness also means it’s easy to mar the surface or get unwanted burrs. Let’s walk through the essentials to turn your brass CNC projects from good to great.

Why Brass is a CNC Machining Superstar

Before we jump into the tips, let’s talk about why brass, or copper zinc alloy, is such a popular choice. Its machinability rating is high, often used as a benchmark against other metals. This makes operations like CNC milling brass and CNC turning brass highly efficient. The chips break cleanly, tool wear is minimal, and you can achieve fantastic surface finishes. It’s no wonder it’s used for everything from intricate electrical connectors to beautiful architectural hardware.

Key Material Properties for Machining

Not all brass is the same. The most common type you’ll encounter is C36000, known as “free-cutting brass.” It contains a small amount of lead, which gives it those superb chip-breaking qualities. If you’re looking for a lead-free option for precision brass parts, alloys like C38500 or C46400 (Naval Brass) are excellent alternatives, though they may require slight adjustments to your machining parameters.

Tip 1: Master Your Tool Selection

Choosing the right cutter is half the battle. For machining brass on a CNC mill, sharp, polished flutes are your best friend. I highly recommend using uncoated or polished carbide end mills. The sharp edge shears the material cleanly without rubbing, which prevents built-up edge and gives you that smooth finish. For drills, standard HSS or carbide drills work well, but ensure they have a sharp point angle (around 118-135 degrees) for clean entry.

Tip 2: Dial in Speeds and Feeds

Here’s where many folks get tripped up. Because brass is soft, there’s a temptation to run slow. Actually, you want high surface speed and a moderate to high feed rate. A slow feed can cause the tool to rub instead of cut, generating heat and work-hardening the surface. A good starting point is a high RPM with a chip load per tooth that ensures you’re taking a healthy bite. Always refer to your tool manufacturer’s data, but don’t be afraid to push the limits a bit—brass can usually handle it!

Tip 3: Manage Coolant and Chip Control

You might ask, “do I need coolant for brass machining?” Often, you can get away with an air blast or mist coolant, which is perfect for clearing chips. The real goal is chip evacuation. Those beautiful, broken chips can quickly re-cut and scratch your part’s surface if they aren’t cleared away. Using compressed air or a coolant mist directed at the cut keeps everything clean and cool. For deep pocket milling or drilling, a flood coolant can help, but it’s not always necessary.

Tip 4: Secure and Stable Workholding

Brass is ductile, so it can flex or vibrate if not held firmly. This vibration, or chatter, will ruin your surface finish and dimensional accuracy. Use sturdy vises, proper step clamps, or even soft jaws machined to fit your part’s contour. The goal is maximum contact and rigidity. A little extra time setting up your workholding pays off massively in the quality of your final CNC machined brass components.

Tip 5: Don’t Forget Post-Processing

Your part might look perfect off the machine, but a few post-processing steps can make it shine—literally. Deburring is crucial. A hand deburring tool, a vibratory tumbler, or even a specific brass CNC machining service that offers tumbling can remove those tiny sharp edges. For a brilliant finish, you can polish it. A great resource for understanding finishing options is the Copper Development Association website, which has extensive information on copper alloys.

Common Mistakes to Avoid with Brass

Let me share a quick story. A friend once complained about poor tool life while fabricating brass parts. Turns out, he was using a coated end mill designed for steel. The coating wasn’t needed and actually reduced performance. The lesson? Don’t overcomplicate it. Also, avoid letting the tool dwell in the cut, as this can cause unwanted marking. And finally, always account for brass’s higher thermal expansion compared to steel when holding tight tolerances on larger parts.

So, can you CNC machine brass? You bet! With its superb machinability and these focused tips on tooling, parameters, and handling, you’re set up for success. Remember, start with a free-machining grade like C360, use sharp tools, run them fast and confidently, and keep those chips moving. Happy machining!

Categories
CNC Materials

Can CNC Machine Titanium? 5 Expert Tips for Success

Absolutely, CNC machines can process titanium, but it’s a challenging material that demands respect and specific know-how. Success lies in understanding its unique properties and adapting your machining strategy accordingly. This guide will walk you through five essential expert tips to help you machine titanium parts effectively and efficiently.

Understanding Titanium’s Machining Nature

Before we dive into the tips, let’s get to know our material. Titanium isn’t your average metal. It’s incredibly strong yet lightweight, and it has excellent corrosion resistance—properties that make it a superstar in aerospace, medical implants, and high-performance automotive parts. However, these same benefits are what make titanium machining so tricky. People often ask, Is titanium hard to machine? and the short answer is yes, but it’s absolutely doable with the right approach. The key is to think of it not as a harder steel, but as a unique material with its own rules.

Key Challenges and Material Properties

The main hurdles in CNC milling titanium come from its material science. Titanium has a low thermal conductivity, meaning the heat generated during cutting doesn’t dissipate into the chip or the workpiece easily. Instead, it concentrates on the cutting tool edge, leading to rapid wear. It’s also prone to work hardening and can gall or weld to the tool if you’re not careful. Understanding these titanium alloy machining challenges is your first step toward conquering them. For a deep dive into titanium’s material properties, resources like the ASM International handbook are invaluable.

Tool Selection and Geometry Are Paramount

You wouldn’t use a butter knife to carve hardwood, right? The same logic applies here. For machining titanium on a CNC, your tool choice is critical. We strongly recommend using carbide end mills specifically designed for high-temperature alloys. Look for tools with a sharp, polished cutting edge and a geometry that promotes strong shearing action and efficient chip evacuation. Coatings like AlTiN (Aluminum Titanium Nitride) can provide an extra layer of thermal protection. Remember, a slightly more expensive tool that lasts longer and performs better will save you money and headaches in the long run compared to a standard tool that fails quickly.

Mastering Cutting Parameters and Techniques

This is where the art meets the science. The golden rule for how to CNC titanium is to maintain a consistent, controlled chip load. You want to avoid letting the tool rub or dwell in the cut, as this generates excessive heat. We suggest using lower cutting speeds (SFM) than you would for steel, but with a higher feed rate and a conservative depth of cut. This “high feed, light cut” strategy keeps the tool engaged in productive cutting, carries heat away in the chip, and minimizes the time the tool spends in contact with the workpiece. It’s a balancing act that prevents work hardening and extends tool life dramatically.

Workholding, Coolant, and Chip Control

A flimsy setup is your worst enemy when processing titanium with CNC. Titanium parts can vibrate or deflect under cutting forces, ruining surface finish and accuracy. Ensure your workpiece is clamped as rigidly as possible. Next, flood coolant is non-negotiable—and not just any coolant. Use a high-quality, high-pressure coolant aimed directly at the cutting zone to combat heat and flush chips away. Effective chip control is vital; long, stringy titanium chips can re-cut themselves and damage the part or tool. Proper parameters and toolpaths should produce small, broken chips, which are much safer and easier to manage.

Post-Machining: Handling and Inspection

Your job isn’t over when the spindle stops. Titanium parts, especially thin-walled features common in aerospace CNC machining, can retain residual stresses. Handle them carefully to avoid bending. A thorough inspection is crucial. Check for any signs of smearing, galling, or micro-cracks, particularly along edges. Deburring needs a gentle touch—aggressive methods can induce stress. Finally, consider post-processing like stress relieving or specific surface treatments if required by the application. Taking these final steps ensures the quality and integrity of your meticulously machined titanium component.

Categories
CNC Materials

Can CNC Machines Cut Aluminum? 5 Essential Tips for Success

Absolutely! CNC machines are exceptionally well-suited for cutting aluminum. It’s one of the most popular materials in the machining world due to its excellent machinability, strength-to-weight ratio, and versatility. This guide will walk you through why aluminum is a machinist’s friend and share five key tips to ensure your projects are a success, from choosing the right tools to perfecting your finish.

Mastering Aluminum Machining with CNC Technology

If you’re wondering, “can a CNC machine cut aluminum?” or “is aluminum good for CNC machining?”, let me put your mind at ease. The answer is a resounding yes! In fact, milling aluminum on a CNC router or machining center is a fundamental process in workshops everywhere. The real question isn’t *if* you can do it, but *how well* you can do it. Aluminum’s properties make it a dream to work with compared to tougher metals, but to get those clean, precise, and efficient results, a little know-how goes a long way. Think of it like driving a high-performance car; it’s capable of amazing things, but you need to understand the controls to get the best ride.

Tip 1: Select the Right Aluminum Alloy for Your Project

Not all aluminum is created equal. Your first step to success is picking the correct grade. Choosing the wrong one can lead to poor surface finishes, tool wear, or even a part that doesn’t meet its strength requirements. It’s the foundation of your entire CNC aluminum fabrication process.

Understanding Common Alloys

You’ll often hear machinists talk about series like 6061, 7075, or 5052. Here’s a quick breakdown: 6061 aluminum is the most common general-purpose alloy. It’s highly weldable, has good corrosion resistance, and offers great all-around machinability, making it perfect for prototypes, brackets, and frames. For high-stress applications like aerospace components, 7075 aluminum is the go-to. It’s much stronger but also harder to machine. So, ask yourself: do I need maximum strength or easier machinability? Your answer will guide your aluminum material selection.

Tip 2: Optimize Your Cutting Tools and Parameters

This is where the magic happens. Using the wrong tool or running it too slow or fast is the most common pitfall. Proper setup here directly answers the search for “best tools for milling aluminum” and ensures efficient aluminum CNC milling.

Tool Selection is Key

For aluminum, you generally want sharp, polished flutes that help chips slide away easily. Carbide end mills are the standard. I often recommend a 3-flute end mill for a great balance of material removal and finish. For roughing, a tool with a variable helix can really help reduce vibration. And don’t forget about coatings! An uncoated or ZrN (zirconium nitride) coated tool often works better than the standard TiAlN used for steel, as it reduces the material’s tendency to stick to the tool.

Dialing in Feeds and Speeds

Running your spindle too slow can cause the tool to rub instead of cut, building up heat and loading up with material. Too fast, and you risk deflection or breaking the tool. A good starting point is to use a feeds and speeds calculator. Remember, aluminum likes high spindle speeds and high feed rates. This creates thin, easy-to-evacuate chips and carries heat away. It might feel counterintuitive at first, but a more aggressive cut can often give you a better finish and longer tool life.

Tip 3: Master Chip Control and Evacuation

In aluminum work, the chips are your enemy if they’re not managed. Recutting chips is a primary cause of poor surface finish and tool failure. Good chip evacuation is non-negotiable for quality precision aluminum machining.

You can help this process along. Using compressed air or a coolant mist directed at the cut can blast chips out of the way. For deep pocket operations, consider using a toolpath strategy like trochoidal milling or high-efficiency milling (HEM), which keeps the tool engaged consistently and helps break chips into manageable pieces. It’s like keeping your work area clean while you build a model—it prevents mistakes and makes everything smoother.

Tip 4: Use Effective Cooling and Lubrication

While aluminum dissipates heat well, the cutting zone can still get very hot. The right coolant or lubricant serves two main purposes: it cools the tool and workpiece, and it prevents aluminum from welding itself to the cutting edges of your tool (a problem called built-up edge or BUE).

For many hobbyists or smaller shops, a simple flood coolant or a robust mist system works wonders. If you’re using a CNC router without a full enclosure, a spray bottle with a dedicated aluminum cutting fluid or even isopropyl alcohol can be effective for light work. The goal is to keep things cool and slippery. Resources from organizations like the Society of Manufacturing Engineers (SME) offer deeper dives into metalworking fluids.

Tip 5: Secure Your Workpiece and Minimize Vibration

Aluminum is relatively soft, which means it can flex and vibrate during aggressive cuts. This chatter shows up as visible marks on your part and can damage your tools. A rigid setup is your best defense.

Use sturdy vises, clamps, or even specialized fixtures to hold your stock. For thin-walled parts, consider using soft jaws machined to the part’s contour for maximum support. Also, ensure your machine itself is on a solid foundation. Taking the time to get a rock-solid setup might seem tedious, but it pays off with a mirror-like finish and dimensional accuracy that makes your CNC aluminum parts look professionally made.

Wrapping Up Your Aluminum CNC Journey

So, can you machine aluminum on a CNC? Without a doubt. By focusing on these five areas—choosing the right alloy, optimizing your tools and speeds, managing chips, using coolant, and ensuring a rigid setup—you’ll transform from simply cutting aluminum to mastering it. Every project is a chance to learn and refine your process. Start with a forgiving alloy like 6061, apply these tips, and you’ll be producing clean, precise, and strong aluminum components in no time. Happy machining!

Request A Quote

We'll Send You Back with Price Immediately!

DEC 1-31

XMAS SPECEIL

Up to

40% off

Can CNC Machines Cut Aluminum? 5 Essential Tips for Success

We'll Send You Back with Price Immediately!