Categories
Blog CNC Materials

Aluminum Symbol: Al Meaning, Common Confusions, and Alloy Codes

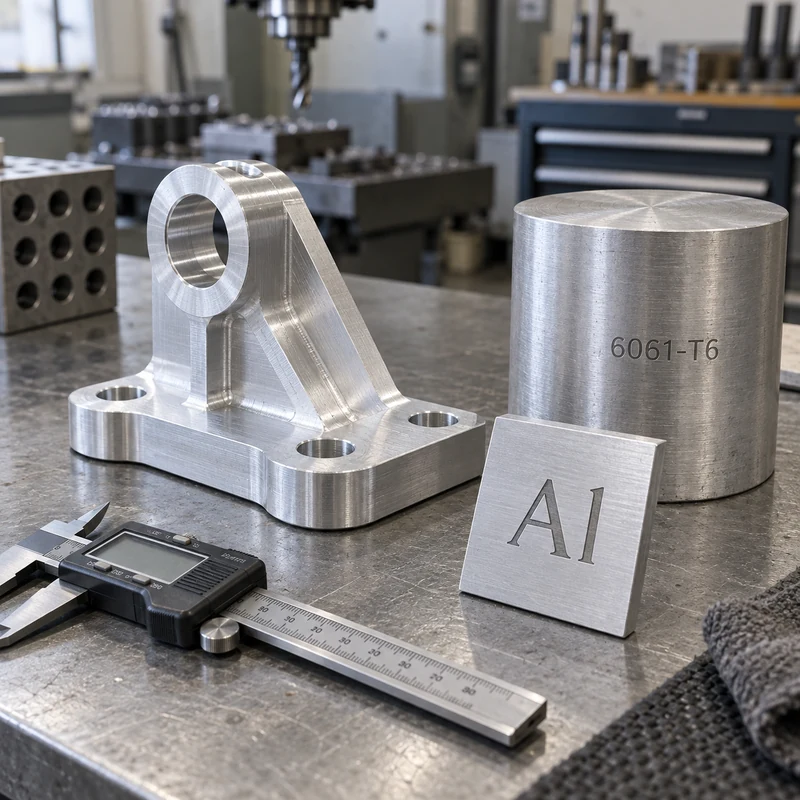
The chemical symbol for aluminum is Al: an uppercase A followed by a lowercase l. Its atomic number is 13. Aluminum and aluminium are names for the same element and use the same symbol. In chemistry, Al identifies the element; in manufacturing, an alloy and temper such as 6061-T6 provide additional information needed to specify a material.

Aluminum Symbol and Element Facts

Item Meaning
Chemical symbol Al
How to read it Capital A, lowercase letter l; not capital I
Element names Aluminum / aluminium
Atomic number 13, the number of protons
Relative atomic mass Approximately 26.98
Periodic table position Group 13, Period 3
Common oxidation state +3

The atomic number and atomic mass answer different questions. The number 13 identifies the element through its proton count. The value around 26.98 describes relative atomic mass; it is not an alloy number, a strength rating, or a density. For broader material properties, see how aluminum behaves as a metal.

Al, AL, AI, Al3+, and Al2O3: What Is the Difference?

Small typographic differences can change the meaning of a label. The second character in Al is the lowercase letter found at the start of the word light. A font with clear letter shapes helps distinguish it from an uppercase I.

Notation What it represents How to interpret it
Al The chemical element aluminum Correct capitalization for the element symbol
AL May be an abbreviation or label in a document Not the standard chemical symbol; read the document legend
AI Capital A followed by capital I Not the symbol for aluminum
Al3+ An aluminum ion carrying a +3 charge The superscript describes charge, not three aluminum atoms
Al2O3 Aluminum oxide A compound containing aluminum and oxygen in a 2:3 atomic ratio
6061-T6 An aluminum alloy and temper designation A material condition, not a chemical formula

In a formula, a subscript indicates the relative count of atoms. A superscript charge indicates an ion’s electrical charge. Neither notation identifies a machining grade. Aluminum oxide is also chemically different from metallic aluminum, so its properties should not be substituted for those of an aluminum workpiece.

Does Aluminium Have a Different Symbol?

No. The spelling aluminum is common in American English, while aluminium is common in British English and many other regions. Both use Al. An international drawing should nevertheless identify the governing material standard, because common element names do not establish equivalence between regional alloy specifications.

How to Read an Aluminum Material Callout

Consider the illustrative note Aluminum alloy 6061-T6. It contains three levels of information:

  1. Aluminum alloy identifies the material family.
  2. 6061 identifies an alloy designation. In the wrought aluminum system, the 6xxx family is associated with magnesium and silicon as major alloying additions.
  3. T6 identifies a temper: solution heat-treated and artificially aged.

The four digits are not a percentage formula. Do not read 6061 as a statement of aluminum purity. Similarly, T6 does not mean six percent of another element, a six-hour treatment, or a universal strength value. Mechanical properties must be checked for the specified product form, thickness, and applicable specification.

A different temper can change the engineering behavior of the same alloy. T651 adds a defined stress-relief condition to the heat-treatment description. Substituting one condition for another should be reviewed against the drawing rather than accepted because both names begin with 6061.

Why “Material: Al” Is Not Enough for a CNC Quote

Imagine two suppliers receive a bracket drawing with only the note “Al.” One quotes a readily available general-purpose alloy, while the other assumes a higher-strength grade. The quotes now describe different materials. Even if the dimensions match, the strength, cost, finishing response, and documentation may differ.

A clearer RFQ identifies the alloy, temper, stock form where relevant, applicable material specification, and certificate requirements. Keep finish and dimensional requirements explicit too. A compact review checklist is:

  • Which alloy and temper are required?
  • Which product specification applies to the purchased stock?
  • Are substitutions permitted, and who approves them?
  • Which dimensions must be checked after finishing?
  • Is material certification or lot traceability required?

Use the engineering materials overview to explore material choices, and supply those decisions with the model and drawing when requesting machining of a precision bracket or housing. A chemical symbol alone cannot define acceptance criteria.

Keep Pure-Aluminum Data Separate From Alloy Data

Reference tables often give pure aluminum a density of approximately 2.70 g/cm3 near room temperature and a melting point near 660°C. These are useful element facts. An engineering alloy can have a different density and a melting interval rather than the same single melting point.

Likewise, there is no single strength or hardness that applies to every part labeled aluminum. Alloy composition, temper, processing, temperature, and product form matter. For a weight estimate, use an appropriate density for the specified grade. For a load calculation, use the applicable design data and material condition rather than an element-summary table.

A Practical Label-Reading Example

Suppose a supplier labels a billet “6061-T6” while the inspection sheet lists Al among the detected elements. The billet label identifies the claimed alloy and condition; the element result identifies chemistry. These records answer different questions. An elemental reading alone does not establish temper, and a handwritten stock label does not replace the required certificate.

For receiving inspection, compare the purchase order, drawing revision, material certificate, and stock identification. Resolve discrepancies before machining. This is where understanding the difference between an element symbol and an alloy designation becomes useful beyond a chemistry definition.

Frequently Asked Questions

Is the aluminum symbol Al or AI?

It is Al, with a lowercase l. AI, using an uppercase I as the second character, is not the chemical symbol for aluminum.

Does Al always mean pure aluminum?

Al is the element symbol. On a product label or engineering document it may indicate the aluminum material family, so check the alloy, temper, and specification before assuming purity.

Is aluminum oxide the same material as aluminum metal?

No. Al identifies aluminum, while Al2O3 is aluminum oxide, a compound with different properties. Its subscript numbers describe composition, not an alloy grade.

Can I order a machined part by specifying Al only?

That leaves the material definition incomplete. Provide an alloy and temper or describe the requirements and request a material recommendation for approval before production.

Technical basis: PubChem aluminum element data, the Aluminum Association alloy-designation overview, and published aluminum temper definitions. Worked procurement examples are illustrative.
Categories
Blog CNC Materials

Aluminum Extrusion Profiles: Shapes, Tolerances, and CNC Finishing

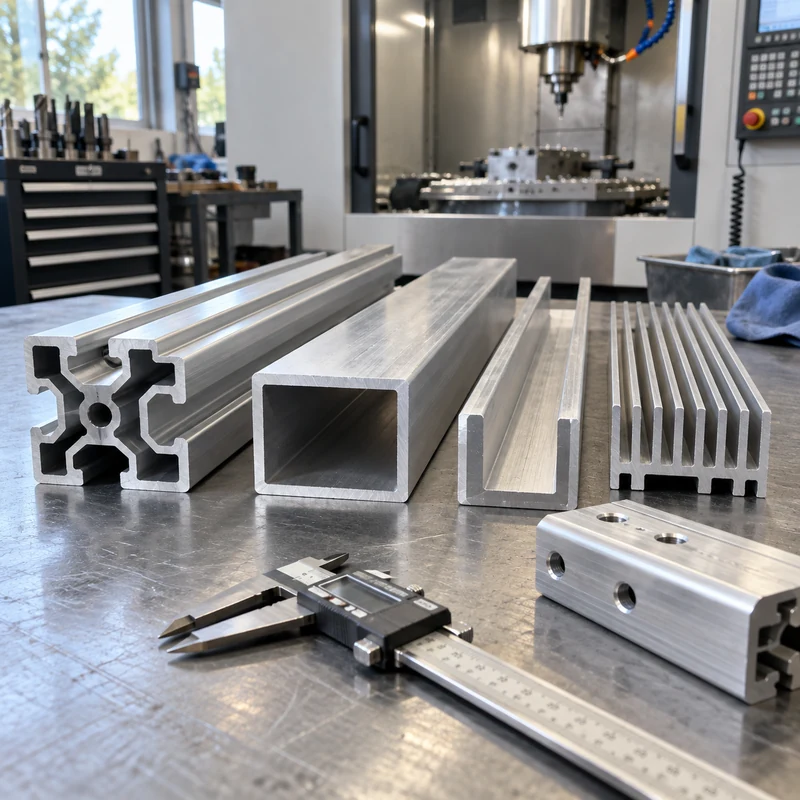
An aluminum extrusion profile is a continuous section used to build rails, frames, enclosures, heat sinks, and many other components. Selecting one requires more than matching an outline in a catalog. The section must carry the load, accept the intended fasteners, remain practical to manufacture, and leave enough material for any precision machining.

Quick answer: Start with the assembly interfaces and load direction, then choose the section, alloy and temper, extrusion tolerances, and finishing sequence. Extrusion creates the repeated cross section; CNC machining adds local holes, pockets, accurate end faces, and other features that change along the length.

Profile Shapes and Their Practical Tradeoffs

Section Useful function What to check before ordering
T-slot framing Adjustable brackets, guarding, and equipment frames Actual slot dimensions, nut engagement, compatible hardware, joint rigidity
Angle or open channel Edges, guides, supports, and simple brackets Loading direction, twisting, mounting access, exposed edges
Hollow tube Lightweight frames and protected internal space Wall thickness, internal access, joining method, drainage
Finned section Thermal-management components Fin spacing, airflow, base flatness, attachment to the heat source
Custom enclosure Integrated rails, cover interfaces, and mounting features Tooling cost, cover fit, machining stock, finish buildup

Extruders also classify sections as solid, hollow, or semi-hollow. Those classifications concern die geometry, including enclosed or partially enclosed spaces. A narrow opening can make an apparently simple shape difficult to produce. Ask the extruder to confirm the classification and feasibility rather than assigning it solely from appearance.

Use Stiffness and Joint Behavior to Select the Section

Two rails with similar outside dimensions can perform differently because the metal is distributed differently. For a simple beam under the same load and support conditions, bending deflection depends on elastic modulus and the section’s second moment of area. Turning a rectangular section through 90 degrees can therefore change deflection substantially.

For a machine frame, inspect the joints as carefully as the beams. A stiff rail attached through a slipping bracket may still allow poor positioning. Obtain the supplier’s section properties, model the real support conditions, and include the connection details. Do not select a larger rail merely because it looks more substantial.

Specify Alloy and Temper Together

6063 is commonly considered for complex profiles and appearance-sensitive applications; 6061 is often considered when strength and subsequent machining matter. Neither alloy name alone defines the finished performance. Temper, section thickness, manufacturing route, and any later thermal operations also matter.

Request the specified alloy and temper on the purchase order and material documentation. Where a design depends on a minimum mechanical property, use the applicable product specification rather than a generic internet value. Compare the requirements with your broader engineering material options before finalizing the drawing.

Keep Extrusion Tolerances Separate From Machined Tolerances

Profile dimensions, straightness, twist, cut length, and end squareness are separate requirements. A cross section that passes a dimensional check at one end can still cause assembly trouble over a long length. Establish the final assembly datums and identify which characteristics are controlled by extrusion and which require machining.

For example, an enclosure may accept ordinary extrusion variation on its outer walls while requiring an accurately machined connector opening. Dimension that opening from functional mounting datums, not from a decorative surface that varies between extrusion lots. This distinction makes the drawing easier to quote and inspect.

Design the Section for Secondary CNC Work

Relatively balanced walls and smooth transitions help the extrusion process. For downstream machining, also reserve accessible clamping areas and sufficient stock on precision faces. A thin lip may deform under a vise even though it was easy to extrude. Consider a supporting fixture or revised clamping location before increasing cutting pressure.

  • Place local features where drills and milling cutters can reach them.
  • Check that a tapped hole has enough engagement after finishing.
  • Allow an inspection probe or gauge to reach critical features.
  • Identify surfaces that must remain free of clamp marks.
  • Discuss the machining sequence when substantial material removal could release distortion.

The comparison of extrusion and CNC machining is useful when deciding whether to start from a profile or machine the entire part from stock.

Check Hardware Fit After Surface Treatment

A nominal frame series is not a complete hardware specification. Confirm the groove opening, internal seat, nut dimensions, screw length, and access for assembly. Parts from different systems can look compatible without sharing those details.

Specify whether fit requirements apply before or after coating. Anodizing or another finish can change functional clearances, and masked areas may be needed. Agree on visible-surface acceptance and sample approval with the surface finishing requirements, especially where adjacent components must match.

Compare Total Cost With a Simple Break-Even Model

Compare complete delivered components, including the die, material, cutting, machining, finishing, inspection, and scrap. A custom section can save downstream work, but those savings must repay the tooling and qualification effort.

Illustrative calculation, not a quotation: if custom tooling costs $2,400 and the resulting section saves $6 per finished component, the tooling-only break-even quantity is 400 components. Add qualification costs and any minimum-order inventory before making the purchase decision. Obtain both routes against the same drawing revision.

What to Include in an RFQ

Provide the cross-section drawing, finished length, quantity, alloy and temper, critical tolerances, finish, assembly interfaces, and expected annual demand. Separate raw-profile requirements from the finished-part drawing. Include a model for local machined features and clarify ownership of any custom die.

Frequently Asked Questions

Can extrusion create holes at specific positions along a rail?

Discrete cross holes and local pockets generally require secondary operations. Extrusion produces the continuous section; their locations must be defined on the finished-part drawing.

Is a custom profile always cheaper than a standard section?

No. It depends on tooling, order quantity, purchased material, and the operations it removes. A standard section can remain preferable for uncertain demand or frequent revisions.

Should every surface have a tight tolerance?

No. Apply tight controls to functional interfaces and justify them through the assembly. Unnecessary precision increases cost without necessarily improving performance.

Categories
Blog CNC Materials Manufacturing Process Comparisons Quality & Tolerances

Injection Molding Melt Temperature Guide: Materials, Settings, and Defect Control

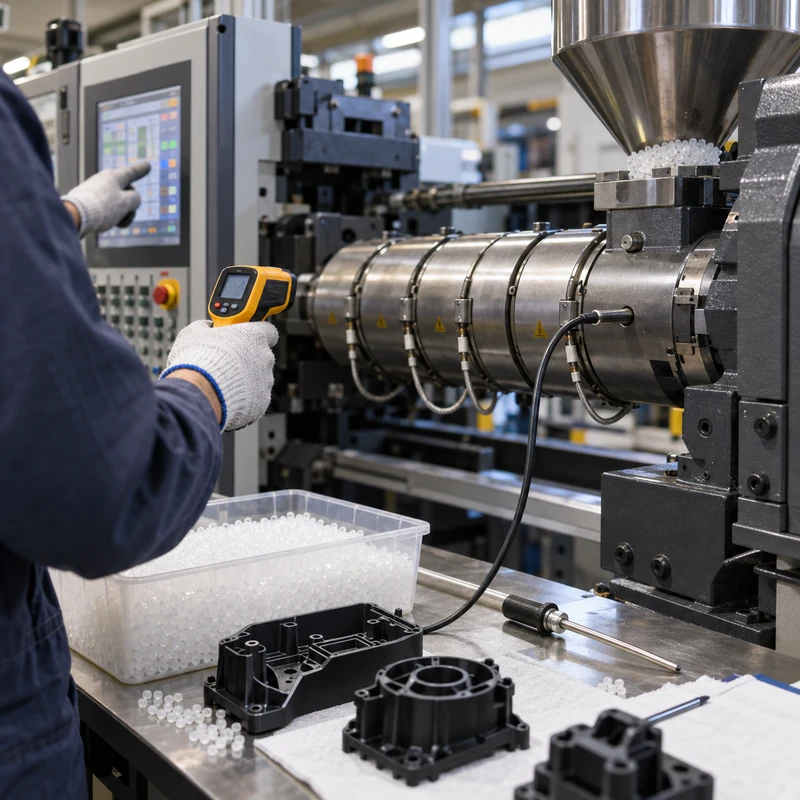
Injection molding melt temperature controls viscosity, cavity filling, weld lines, surface replication, shrinkage, molecular orientation, and degradation. It is related to barrel-zone settings but is not identical to the displayed heater temperatures.

The correct range depends on polymer grade, additives, moisture, residence time, shear, screw design, machine size, part geometry, and mold temperature. Material supplier data is the starting point, followed by an approved process window.

Quick Answer

Use the resin manufacturer’s grade-specific range, dry the material correctly, measure actual melt when needed, and establish a stable window rather than one nominal number. Change temperature only after considering speed, pressure, back pressure, residence time, and mold conditions.

Comparison at a Glance

Factor Option A Option B
Low melt temperature High viscosity, short shots, weak weld lines Increase within approved window and verify drying
High melt temperature Degradation, gas, discoloration, flash Reduce heat or residence and check shear
Barrel display Shows zone control, not actual melt Verify with purge measurement or validated method
Shear heating Raises polymer temperature during plasticizing and fill Control screw speed and injection speed
Residence time Long exposure can damage resin Match shot size and cycle to machine capacity

Melt Temperature vs Barrel Temperature

Heater bands control barrel zones while the rotating screw generates shear heat. The polymer experiences a thermal history, so actual melt can differ from setpoints. Measure consistently and safely when troubleshooting.

Material Families

Amorphous and semi-crystalline polymers respond differently. ABS, PC, PMMA, PA, POM, PP, PE, PBT, and PEEK each need grade-specific conditions. Filled, flame-retardant, recycled, colored, and medical grades may use different limits.

Drying and Moisture

Hygroscopic materials can hydrolyze at processing temperature, reducing molecular weight and strength even if the part looks acceptable. Confirm dryer temperature, dew point, time, airflow, and material handling.

Defects Linked to Temperature

Low temperature can cause short shots, hesitation, poor knit lines, dull surfaces, and high pressure. Excessive temperature can cause splay, gas, odor, discoloration, flash, sticking, or brittleness. Similar defects can also come from moisture, venting, speed, or mold temperature.

  • Avoid changing several variables at once
  • Record actual conditions and lot
  • Check purge appearance and odor
  • Review residence time and shot utilization
  • Use a structured process study

Building a Process Window

Establish acceptable low and high boundaries for melt, fill speed, pack, cooling, and mold temperature. Validate critical dimensions and appearance across normal variation.

Design and Tooling Interaction

Thin walls, long flow paths, small gates, abrupt thickness changes, weak venting, and poor cooling may force an unnecessarily narrow thermal window. Improve part and mold design instead of relying on hotter material to solve every fill problem.

Quality Documentation

Record resin grade, lot, regrind policy, drying, machine, screw, zone settings, cycle, measured melt, mold temperature, pressure, and inspection results for controlled production.

Frequently Asked Questions

Is melt temperature the same as nozzle temperature?

No. Nozzle temperature is one setpoint; actual melt reflects barrel heating, shear, residence, and heat loss.

Should I use a universal temperature chart?

Charts provide orientation only. Use the exact resin supplier data and validate the process on the actual machine, mold, and part.

What happens if nylon is wet?

Moisture can create splay and hydrolytic degradation during melting, reducing strength. Proper drying and handling are essential.

Related MTSPi Resources

Categories
Blog CNC Materials Guides Manufacturing Process Comparisons

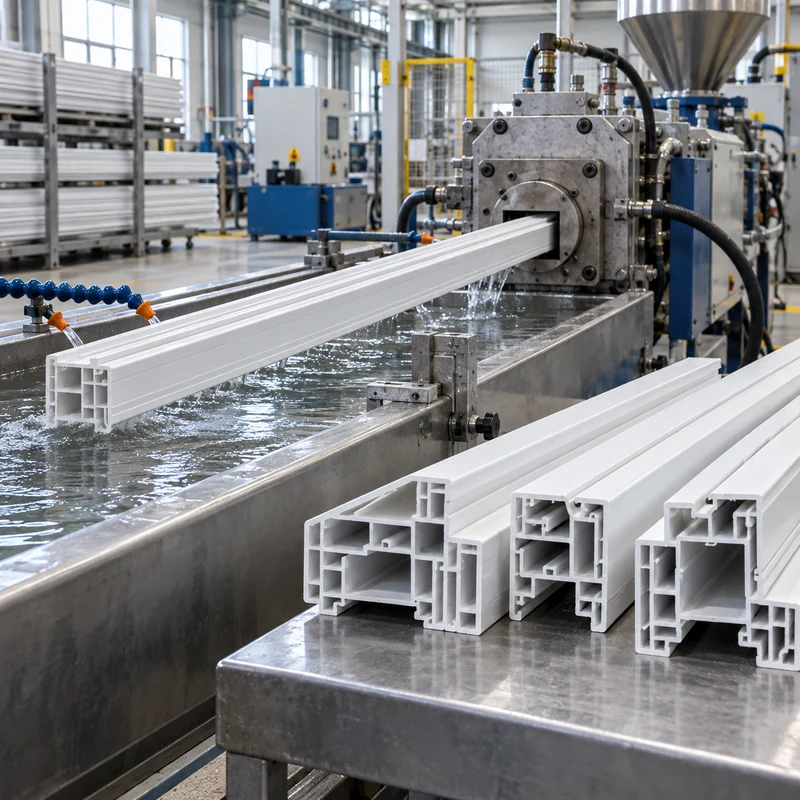
PVC Extrusion Guide: Process, Materials, Design Rules, and Quality Control

PVC extrusion produces continuous rigid and flexible profiles for construction, equipment, electrical, fluid-handling, sealing, and industrial applications. PVC is versatile and cost-effective, but it is thermally sensitive and requires controlled compounding and processing.

This guide explains the full route from compound and die to cooling, haul-off, cutting, inspection, and secondary machining.

Quick Answer

Rigid PVC suits structural profiles, channels, pipe, and housings. Flexible PVC suits seals, sleeves, and cable-related products. Stable results require correct formulation, gentle heat history, balanced die flow, controlled cooling, and inspection after conditioning.

Key Engineering Factors

Factor Practical effect Control method
Compound Stabilizers, impact modifiers, pigments, and fillers change behavior Lock the approved formulation
Heat history Excess temperature can degrade PVC Control barrel, die, screw, and residence time
Profile balance Uneven sections distort during cooling Use balanced walls and calibrated surfaces
Cooling Controls final size and residual stress Maintain consistent vacuum and water conditions
Weathering UV and environment change service life Specify outdoor grade and color requirements

Rigid PVC vs Flexible PVC

Rigid PVC has higher stiffness and is common in profiles, pipe, conduit, and frames. Flexible PVC contains plasticizers and is used for seals, tubing, sleeves, and protective components. Their tooling, shrinkage, hardness, and testing requirements differ.

PVC Extrusion Process

Dry blend or pellets feed the extruder, where the screw conveys, heats, mixes, and pressurizes the compound. The die shapes the melt. Calibration and cooling stabilize it, the haul-off controls speed, and a saw or cutter creates final lengths.

Profile Design Rules

Uniform walls and gradual transitions improve flow. Multi-chamber profiles need webs that remain stable through calibration. Sharp corners, isolated thick masses, and fragile fins increase tooling and process risk.

  • Use radii at internal transitions
  • Balance opposite walls where possible
  • Allow room for calibration tooling
  • Define visible surfaces and texture
  • Identify mating and sealing dimensions

Common PVC Extrusion Defects

Burn marks can indicate degradation or stagnation. Wavy surfaces may reflect unstable output or pull. Bow and twist arise from unbalanced cooling. Die lines, poor gloss, bubbles, and dimensional drift each require process-specific diagnosis.

  • Do not solve every defect by changing line speed
  • Check compound moisture and contamination
  • Inspect die buildup and flow restrictions
  • Confirm cooling and puller alignment

Quality and Testing

Dimensional inspection should include cross-section, wall thickness, bow, twist, cut length, and fit with mating parts. Depending on service, test impact, hardness, color, gloss, weathering, flammability, chemical resistance, or low-temperature behavior.

Secondary Fabrication and CNC Work

PVC profiles can be drilled, routed, milled, punched, welded, bonded, printed, and assembled. Cutting heat and clamping pressure must be controlled to prevent melting, cracking, or deformation.

Sourcing Checklist

Provide a controlled cross-section drawing, CAD data, compound specification, color, surface requirements, expected volume, packaging, cut length, environmental exposure, and test standards. Approve conditioned samples before final tooling release.

Frequently Asked Questions

Does PVC need drying before extrusion?

Requirements depend on the compound and storage. Moisture and contamination should still be controlled even when drying is less demanding than for hygroscopic polymers.

Can recycled PVC be used?

It can be used in suitable products, but formulation consistency, contamination, color, and mechanical requirements must be controlled.

Why does PVC turn yellow or brown?

Discoloration often indicates excessive heat, residence time, shear, or inadequate thermal stabilization.

Related MTSPi CNC Resources

Categories
Blog CNC Materials Guides Manufacturing Process Comparisons

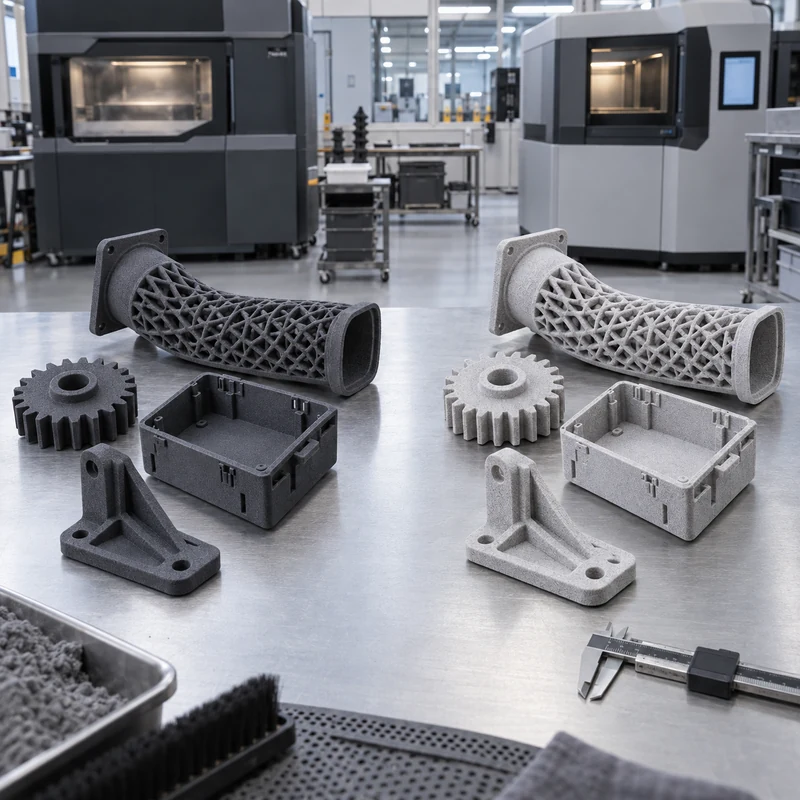
MJF vs SLS: Choosing the Right Nylon 3D Printing Process for Functional Parts

MJF and SLS both build nylon parts inside a powder bed without conventional support structures. That makes both processes useful for complex ducts, housings, clips, brackets, living hinges, lattice features, and low-volume assemblies. The practical differences appear in heat delivery, surface character, dimensional behavior, color, nesting strategy, and supplier workflow.

This MJF vs SLS guide explains those differences for engineers who need functional parts, not just visual models.

Quick Answer

Choose MJF when you want consistent mechanical behavior, fine detail, relatively uniform surfaces, and efficient batches of PA12 parts, especially when dark gray or dyed black is acceptable. Choose SLS when you need broad material availability, flexible build sizes, proven nylon options, or a supplier ecosystem suited to varied quantities and geometries. Test the actual material and orientation when fatigue, snap fits, pressure, or heat matters.

How MJF and SLS Work

SLS scans a laser across each powder layer and sinters the selected cross-section. MJF deposits fusing and detailing agents across the layer, then applies thermal energy. In both methods, surrounding powder supports the part, allowing nested builds and complex shapes without the support marks associated with many resin or filament processes.

MJF vs SLS Comparison

Factor MJF SLS
Energy delivery Fusing agents plus thermal energy Laser scans each cross-section
Typical appearance Graphite gray, often dyed black Natural white or light gray, easily dyed
Surface Fine, relatively uniform powder texture Slightly grainier texture depending on machine
Materials Strong focus on PA12 and selected polymers Broad nylon and specialty-powder ecosystem
Mechanical consistency Often relatively uniform in common PA12 builds Good but orientation and machine still matter
Supports Not normally required Not normally required
Best fit Functional batches and detailed PA12 parts Flexible materials, sizes, and established applications

Material Options

PA12 is the most common comparison material because it balances toughness, stiffness, chemical resistance, and dimensional stability. PA11 offers greater ductility for impact and snap features. Glass-filled nylons increase stiffness but can become less forgiving and more abrasive. TPU-like powders support flexible components, though machine availability and tolerances differ.

Always compare datasheets for the exact machine-material combination. A generic label such as “nylon” is not enough for a load-bearing design.

Accuracy and Dimensional Control

Both processes are suitable for functional prototypes, but neither should be treated like precision CNC machining. Large flat surfaces can warp, thin walls can move, and holes may print undersize. Geometry, orientation, cooling, packing density, and refresh ratio affect results.

  • Add clearance to mating printed parts instead of using nominal CAD fits.
  • Avoid very large unsupported flat panels; use ribs or gentle curvature.
  • Use consistent wall thickness and gradual transitions.
  • Machine or ream critical bores after printing when required.
  • Validate snap fits using the intended material, finish, and orientation.

Surface Finish, Color, and Sealing

Both processes leave a matte powder texture. Bead blasting creates a more uniform appearance. Dyeing is common, especially black. Tumbling or chemical smoothing can improve feel and cleanability but may soften small edges or change dimensions. Unsealed nylon remains somewhat porous, so pressure, fluid, and hygiene applications may need infiltration, coating, or a different process.

Strength and Functional Testing

Printed PA12 can support clips, ducts, covers, fixtures, and many load-bearing prototypes. However, long-term creep, fatigue, temperature, moisture, and chemicals should be considered. Use application loads rather than a single tensile value. Test thin hinges, snap arms, screw bosses, and press fits because these features concentrate strain.

Cost and Lead-Time Drivers

Driver Why it matters
Bounding box Controls how efficiently parts nest in the build
Build height Adds layers and machine time
Part quantity Dense nesting can lower unit cost
Powder refresh Material handling affects operating cost
Cooling Parts may remain in the build for controlled cooling
Finishing Blasting, dyeing, smoothing, and sealing add steps
Inspection Critical dimensions and lot records add labor

Design Recommendations

  • Use ribs and radii to support thin functional structures.
  • Keep escape openings large enough to remove powder from channels.
  • Do not create trapped cavities unless powder retention is acceptable.
  • Use threaded inserts for repeated assembly rather than relying on printed threads.
  • Separate cosmetic and critical dimensional surfaces on the drawing.
  • Mark surfaces that will be machined and provide stock where needed.

When CNC Machining Is the Better Choice

CNC machining is often better when the part needs a specific engineering plastic grade, tight hole or datum tolerances, low surface roughness, transparent material, stable flatness, or traceable stock properties. Printed nylon is excellent for geometry and low-volume function; machined nylon, POM, PEEK, aluminum, or other production materials may be better for final validation.

A Practical Selection Checklist

  • What exact polymer grade is required?
  • Which dimensions control assembly?
  • Will the part see fatigue, heat, moisture, pressure, or chemicals?
  • Does color or surface feel matter?
  • Can all trapped powder be removed?
  • Is the quantity high enough to benefit from dense nesting?
  • Should critical features be CNC finished?

Frequently Asked Questions

Is MJF stronger than SLS?

There is no universal answer. With comparable PA12, MJF often provides consistent properties, but machine settings, orientation, geometry, and finishing matter. Use supplier data and functional testing for critical parts.

Which process gives a smoother surface?

MJF often appears finer and more uniform, while SLS can feel slightly grainier. Both remain matte and benefit from blasting, dyeing, or smoothing when appearance matters.

Can MJF or SLS parts be CNC machined?

Yes. Printed parts can be drilled, tapped, reamed, milled, or fitted with inserts, provided the fixture supports the part and the design includes enough material around the feature.

Related MTSPi CNC Resources

Categories
Blog CNC Materials Guides Manufacturing Process Comparisons

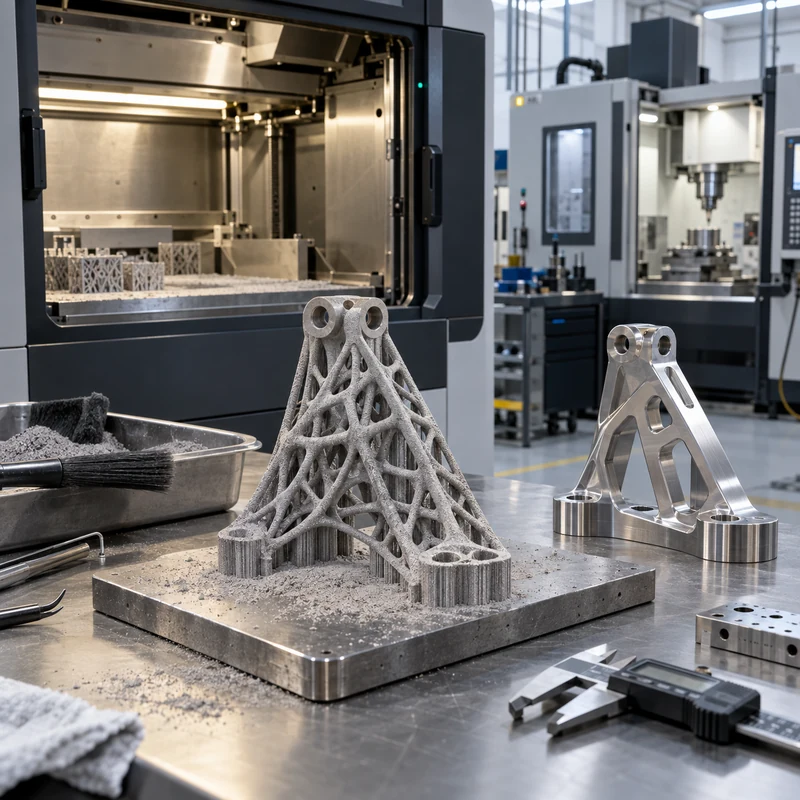
Metal 3D Printing Guide: Processes, Materials, Applications, and CNC Post-Processing

Metal 3D printing creates shapes that are difficult or impossible to machine from solid stock, including internal channels, lattice structures, consolidated assemblies, and topology-optimized parts. It is not a universal replacement for CNC machining. Printed parts commonly require support removal, heat treatment, surface finishing, dimensional inspection, and machining of critical features.

This guide compares the main metal additive processes and explains how to plan a complete production route rather than judging only the printing step.

Metal 3D Printing at a Glance

Process How it works Strength Typical fit
SLM/DMLS Laser fuses metal powder in a bed High after correct processing Complex precision parts and low volumes
EBM Electron beam melts powder in vacuum High Titanium and high-temperature applications
Binder jetting Binder shapes powder before sintering Process-dependent Higher throughput and smaller parts
DED Powder or wire is fed into an energy source High with controlled parameters Repair, cladding, and large near-net shapes

SLM and DMLS

Powder-bed fusion spreads a thin metal powder layer and selectively fuses each cross-section. The method supports complex geometry and fine features, but build orientation, supports, residual stress, powder removal, and scan strategy all affect the result. The terms SLM and DMLS are often used commercially for closely related laser powder-bed processes; the exact machine, material specification, and qualification route matter more than the label.

Electron Beam Melting

EBM uses an electron beam in a vacuum and maintains an elevated build temperature. It is strongly associated with titanium applications. The process can reduce some residual-stress concerns, but surfaces are generally rougher and dimensional finishing may still be required.

Binder Jetting

Binder jetting forms a fragile green part that is later debound and sintered. It can deliver higher throughput because the printhead works across the bed, but sintering shrinkage must be predicted and controlled. Density, distortion, feature size, and material-property requirements determine whether it is appropriate.

Directed Energy Deposition

DED feeds powder or wire into a melt pool. It is useful for adding material to existing components, repairing expensive parts, applying wear-resistant material, and producing large near-net preforms. Resolution is lower than powder-bed fusion, so machining is usually part of the route.

Common Metal Materials

Material Why it is printed Typical post-processing concern
316L stainless steel Corrosion resistance and broad usability Support removal and sealing surfaces
17-4PH stainless steel Strength after heat treatment Heat-treatment condition and final dimensions
AlSi10Mg aluminum Low mass and good printability Porosity, heat treatment, threaded features
Ti-6Al-4V High strength-to-weight ratio Oxygen control, fatigue surface, cost
Inconel alloys High-temperature performance Machining difficulty and residual stress
Cobalt chrome Wear and biomedical applications Qualification and finishing

Design Rules for Printable Metal Parts

  • Use additive geometry only where it creates measurable value.
  • Orient critical surfaces to balance supports, distortion, finish, and build time.
  • Provide escape paths for trapped powder in internal channels.
  • Add machining stock to bores, datums, threads, gasket faces, and bearing seats.
  • Avoid unsupported down-facing surfaces that create roughness or collapse risk.
  • Use gradual transitions to reduce local heat accumulation.
  • Design reference features that can be located during CNC finishing and inspection.

Accuracy, Surface Finish, and Porosity

As-printed accuracy is affected by machine calibration, thermal distortion, orientation, feature size, support strategy, and material. Surface texture varies by upward, vertical, and downward-facing orientation. Internal porosity and lack-of-fusion defects require process control and may require CT scanning or destructive validation for high-consequence parts.

Do not assign CNC-level tolerances to every printed surface. Separate additive surfaces from features that will be machined. This creates a realistic drawing and prevents unnecessary cost.

Why CNC Post-Processing Matters

CNC machining provides repeatable datums and functional interfaces after printing. A typical sequence can include stress relief, separation from the build plate, support removal, rough inspection, heat treatment or hot isostatic pressing, fixture preparation, CNC finishing, deburring, surface treatment, and final inspection.

The fixture plan must account for irregular printed surfaces. Purpose-designed sacrificial pads, cylinders, or tabs can give the machining setup reliable locating and clamping features, then be removed in a later operation.

Cost Drivers

  • Build volume and height, not just part weight.
  • Support material and support-removal labor.
  • Machine occupancy and number of parts nested in a build.
  • Powder type, reuse rules, and traceability.
  • Heat treatment, HIP, testing, and certification.
  • CNC setups, custom fixtures, and inspection.
  • Failed-build risk and qualification samples.

When to Choose Metal Printing, CNC, or a Hybrid Route

Choose metal printing for valuable geometric complexity, internal flow paths, mass reduction, consolidation, or very low-volume shapes. Choose CNC machining for prismatic or rotational parts, predictable tolerances, smooth surfaces, standard materials, and straightforward low-volume production. Use a hybrid route when the printed geometry creates value but interfaces still require precision.

Frequently Asked Questions

Are metal 3D printed parts fully dense?

Qualified powder-bed processes can achieve very high density, but density alone does not prove fatigue performance or absence of critical defects. Process qualification and application-specific testing remain important.

Can threads be printed directly?

Large non-critical threads may be printable, but tapped or CNC-machined threads are generally more predictable for assembly, gauges, sealing, and repeated use.

What should be included on the drawing?

Identify the additive process and material specification, post-processing condition, machined surfaces, datums, critical tolerances, inspection method, surface finish, and any qualification requirements.

Related MTSPi CNC Resources

Categories
Blog CNC Materials Manufacturing Process Comparisons

Aluminum Gravity Casting: Process, Design Rules, and CNC Finishing Options

Aluminum Gravity Casting: Process, Design Rules, and CNC Finishing Options is a practical manufacturing question because the answer affects cost, lead time, material behavior, inspection, and the path from prototype to production. For MTSPi CNC customers, the key is not simply naming a process, but understanding how the process connects with machined parts, fixtures, tolerances, surface requirements, and final assembly.

This guide explains aluminum gravity casting from an engineering and purchasing point of view. It is written for product developers, mechanical engineers, sourcing teams, and buyers who need clear decisions rather than generic process descriptions.

Quick Answer

Use aluminum gravity casting for medium-volume aluminum parts with cast-friendly geometry and functional strength needs. Use CNC finishing for critical dimensions that casting alone cannot hold reliably.

Key Differences at a Glance

Point Option A Option B
Shape creation Mold forms near-net geometry Material is removed from stock
Best use Repeated cast shapes with moderate complexity Tight features, prototypes, precision interfaces
Tolerance Moderate before machining Tight when setup is controlled
Surface Cast texture or finished after processing Machined texture or specified finish
Tooling Mold required Fixtures and cutting tools required

How the Process Choice Affects Real Parts

A manufacturing method should be selected around the feature that actually controls function. Cosmetic surfaces, hidden support features, threads, bores, sealing faces, heat-transfer areas, and assembly datums do not carry the same risk. When those requirements are mixed together without priority, quotes become inconsistent and production becomes harder to control.

The safest workflow is to define the part requirement first, then match the process. A printed prototype may answer shape questions, a molded sample may answer appearance questions, and a CNC machined sample may answer tolerance, material, and functional questions. Many successful projects use more than one method before the final design is locked.

Design and Manufacturing Considerations

  • Keep wall thickness transitions gradual to reduce shrink and hot spots.
  • Add machining allowance on critical surfaces.
  • Avoid isolated heavy sections unless feeding and cooling are designed.
  • Define which surfaces are as-cast and which are CNC machined.
  • Plan datum strategy before mold tooling is finalized.

Cost, Lead Time, and Risk Factors

Cost is driven by setup, tooling, material, machine time, inspection, finishing, and revision risk. A low unit price is not always the lowest project cost if it creates rework later. For prototypes and low-volume orders, flexibility can be more valuable than a process with a lower theoretical unit cost.

  • Use standard materials and standard feature sizes when they do not weaken the design.
  • Separate critical tolerances from general dimensions so the supplier knows where to focus.
  • Confirm surface finish and cosmetic requirements before production begins.
  • Avoid late changes to mounting holes, connector openings, datum faces, and threaded features.
  • Send CAD files and 2D drawings together when tolerances, threads, or finishes matter.

Quality Checks Before Production

A good quality plan checks the features that influence assembly and performance. Depending on the part, this may include dimensional inspection, thread gauges, surface roughness, flatness, perpendicularity, burr control, coating thickness, visual appearance, and fit with mating parts.

When This Topic Matters for CNC Buyers

aluminum gravity casting matters when a team is comparing prototype routes, validating a design, replacing a weak supplier, or trying to reduce manufacturing cost without damaging function. The best choice is usually the process that answers the current engineering question with the least unnecessary risk.

MTSPi CNC Engineering Notes

MTSPi CNC supports precision CNC milling, turning, rapid prototyping, low-volume production, finishing, and inspection for custom parts. If your project uses molding, casting, welding, PCB assemblies, or 3D printing, CNC machining can still be important for datums, holes, threads, sealing faces, fixtures, and production-ready prototypes.

Frequently Asked Questions

Can this process replace CNC machining?

Sometimes it can replace CNC for non-critical geometry, but CNC is often still needed when tight tolerances, real engineering material, threads, flat sealing faces, or precise mating features are required.

What files help MTSPi CNC review a project?

STEP or STP files are useful for geometry. A 2D drawing is important for tolerances, materials, threads, surface finish, inspection requirements, and notes that are not obvious from the CAD model.

How do I reduce manufacturing risk?

Define critical features, avoid unnecessary tight tolerances, confirm material and finish requirements, and use prototypes to validate assembly before committing to higher-volume tooling or production.

Related MTSPi Resources

Categories
Blog CNC Materials

Face Milling vs Peripheral Milling: Differences and Selection Guide

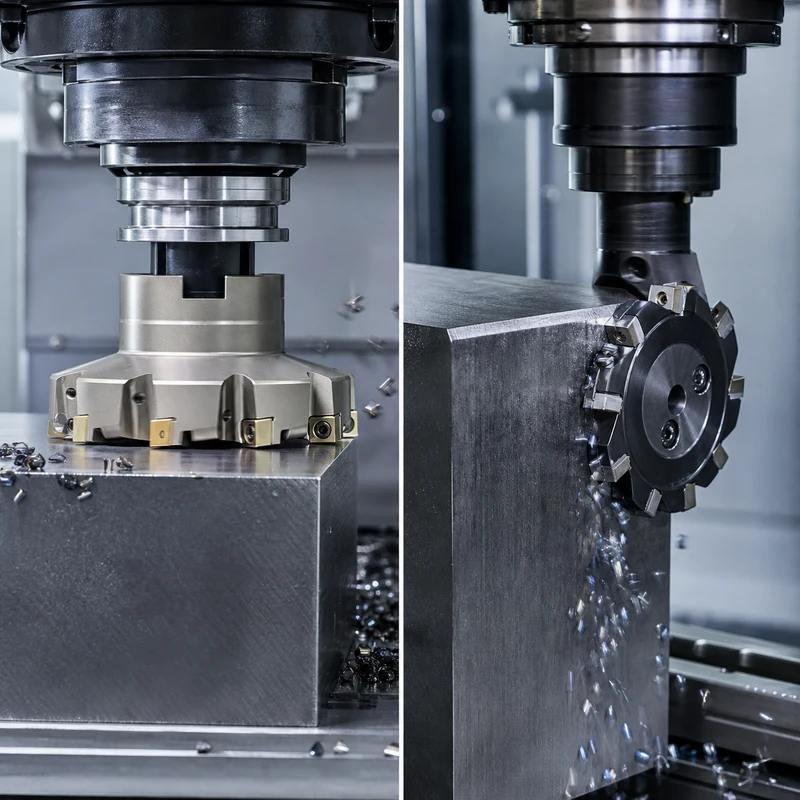
Face milling and peripheral milling describe where a cutter does most of its work. In face milling, cutting edges across the tool face create a surface generally perpendicular to the spindle axis. In peripheral milling, teeth around the cutter circumference generate a surface generally parallel to that axis.

The distinction affects cutter choice, machine orientation, chip thickness, surface texture, workholding, and tool access. Many real parts use both methods in separate operations.

Face Milling vs Peripheral Milling at a Glance

Factor Face milling Peripheral milling
Primary cutting edges Face and outer inserts Teeth around circumference
Generated surface Usually perpendicular to spindle axis Usually parallel to spindle axis
Typical task Large flat faces and datum planes Sides, shoulders, slots, and long edges
Common cutter Indexable face mill or shell mill End mill, slab mill, or side-and-face cutter
Surface marks Sweeping arcs across the face Lines following cutter travel and tooth engagement
Machine demand Spindle power and stable axial support Arbor/tool rigidity and controlled radial load

How Face Milling Works

A face mill spans a broad area and removes stock with multiple inserts. The cutter is normally wider than the intended pass, although large surfaces may need overlapping passes. Lead angle, radial engagement, insert geometry, and cutter position determine force direction and chip thickness.

Face milling is commonly used to establish the first reference plane on plate, square a block, finish a flange, or prepare a sealing face. For consistent results, the machine spindle must be correctly aligned and the work fully supported.

How Peripheral Milling Works

Peripheral cutters engage with teeth on their outside diameter. A vertical machining center often performs this action with an end mill along a wall; a horizontal mill may use a slab or side-and-face cutter on an arbor. The method is effective for shoulders, profiles, deep straight sides, and slots.

Tool stick-out and radial deflection are central concerns. A long end mill may bend away from the work, causing taper, chatter, or a dimensional step. Short tools, balanced radial engagement, and staged finishing passes improve control.

Climb and Conventional Direction

Both methods may use climb or conventional milling. In climb milling, chip thickness starts high and falls toward zero; this often improves finish and tool life on rigid CNC equipment. Conventional milling starts near zero chip thickness and can rub before cutting, but it may be useful with certain manual-machine backlash conditions or unstable surface scale. Machine condition and workholding determine the safe choice.

Choosing the Right Method

  1. Identify the surface orientation. A broad top face favors a face mill; a vertical wall favors peripheral engagement.
  2. Measure access. Fixtures, clamps, adjacent walls, and spindle reach may eliminate an otherwise ideal tool.
  3. Estimate rigidity. Large cutter diameter increases power demand, while long peripheral tools increase deflection risk.
  4. Plan chip evacuation. Avoid recutting chips, especially in pockets and deep shoulders.
  5. Separate roughing and finishing. Leave predictable stock so the finish pass sees consistent engagement.
  6. Match the tolerance. Flatness, parallelism, perpendicularity, and surface finish need different setup controls.

Tool Selection Variables

  • Material: aluminum benefits from sharp polished geometry; steel and stainless require grade-specific edge strength and heat control.
  • Cutter diameter: a larger face mill covers more width but requires adequate spindle power and clearance.
  • Lead angle: changes axial and radial forces, chip thinning, and exit behavior.
  • Insert pitch: coarse pitch provides chip space; fine pitch increases teeth in cut on stable high-power setups.
  • Tool reach: keep peripheral cutters as short as the geometry permits.

Surface Finish and Accuracy

Face-milled flatness is influenced by spindle tram, insert runout, work support, thermal state, and cutter path. A single high insert may leave witness marks. Peripheral wall accuracy depends strongly on tool deflection, runout, axial depth, radial engagement, and whether finishing occurs in one controlled pass.

Inspection should follow the drawing datum scheme. A cosmetically smooth surface is not automatically flat, parallel, or perpendicular. MTSPi’s quality assurance workflow separates appearance from measurable geometric requirements.

Typical Problems and Corrections

Symptom Likely contributors Practical response
Chatter Weak setup, excessive reach, poor engagement Shorten tool, support work, adjust speed or engagement
Uneven face marks Insert runout or spindle misalignment Inspect seats and tram; use a controlled finish pass
Tapered wall Peripheral tool deflection Reduce radial load and finish at stable depth
Exit burr Ductile material or unsupported edge Change exit direction, geometry, or add edge support
Chip recutting Poor evacuation Improve air/coolant direction and tool path

Design for Efficient Milling

Provide realistic internal radii, make critical shoulders accessible, avoid deep narrow walls where a shorter cutter could work after a design change, and distinguish cosmetic surfaces from precision datums. A CNC milling review can often combine facing and peripheral operations in one stable setup while protecting the relationships that matter.

Frequently Asked Questions

Is an end mill a peripheral cutter?

Yes when its outside flutes cut a side wall. Many end mills can also cut with their end teeth, so one tool may perform both types of engagement.

Which method gives a better finish?

Neither is universally better. The intended surface orientation, cutter condition, runout, rigidity, feeds, and tool path determine finish.

Can a face mill cut a shoulder?

Some face and shoulder mills can produce both a floor and a wall, but cutter geometry and lead angle determine whether a true 90-degree shoulder is possible.

Conclusion

Use face milling to efficiently establish broad planes and peripheral milling to control sides, shoulders, and profiles. The best process often combines both, with each tool selected around surface orientation, access, force direction, rigidity, and inspection requirements.

Related MTSPi Resources

Categories
Blog CNC Materials Quality & Tolerances

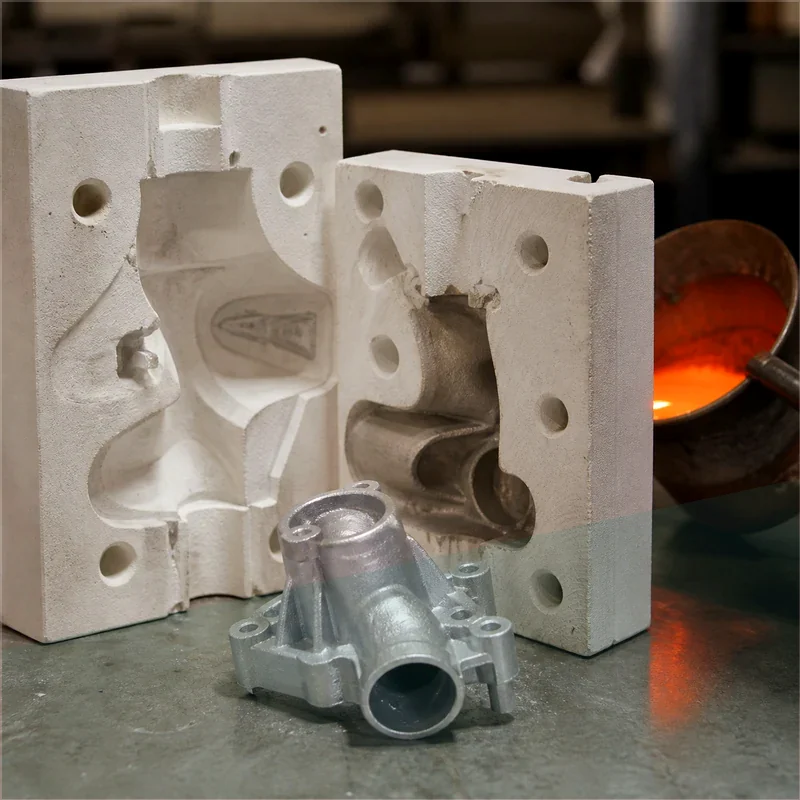
Plaster Mold Casting: Process, Materials, Design, and Machining

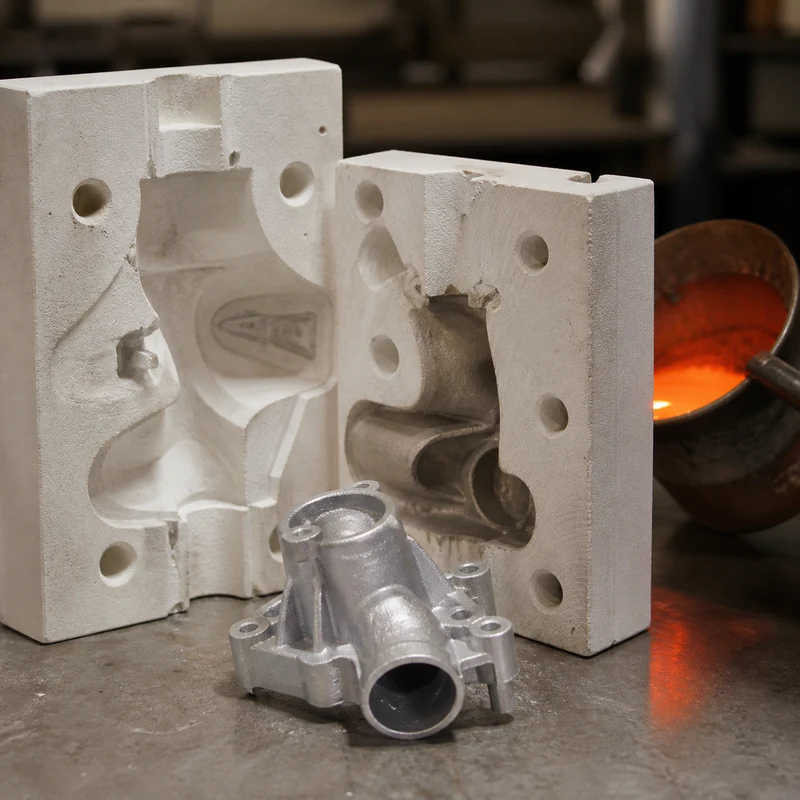
Plaster mold casting is a precision casting route for nonferrous metal parts that need smoother surfaces and finer details than ordinary sand casting typically provides. The process uses a disposable gypsum-based mold formed around a reusable pattern, then dried and filled with molten alloy.

It can reduce machining on housings, covers, impellers, and decorative or low-volume engineering components. Its limitations—slow mold preparation, moisture control, fragile molds, and restricted alloy temperature—must be considered early.

How Plaster Mold Casting Works

  1. Create the pattern. Patterns may be machined, molded, or additively produced and include draft, shrink allowance, gates, and risers.
  2. Mix the slurry. Gypsum binder, water, and refractory or setting modifiers are blended under controlled conditions.
  3. Pour around the pattern. The fluid mix captures small radii, lettering, and surface texture.
  4. Set and remove the pattern. Mold sections are separated carefully to avoid edge damage.
  5. Dry and bake. Free and chemically held moisture must be driven out before metal enters the cavity.
  6. Assemble and pour. Cores and mold halves are located, supported, and filled with a compatible nonferrous alloy.
  7. Break out and finish. The plaster is removed; gates are cut away and critical features are inspected or machined.

Materials and Alloy Compatibility

Aluminum, magnesium, zinc, and selected copper-base alloys are common candidates. Plaster has limited high-temperature capability and low permeability, so the method is generally unsuitable for steel and other very high-temperature alloys. The exact plaster formulation and firing schedule must match the alloy and section thickness.

Design need Typical response Risk to manage
Fine detail Fluid slurry reproduces pattern detail Pattern defects also reproduce
Smooth surface Fine mold particles reduce texture Handling damage can mark the cavity
Thin walls Possible with balanced filling Misrun and premature freezing
Internal passages Use compatible cores Core location and removal
Dimensional control Stable pattern and drying cycle Mold expansion, shrinkage, distortion

Advantages

  • Better as-cast surface than many conventional sand processes
  • Fine lettering, ribs, bosses, and decorative detail
  • Lower tooling cost than permanent metal molds for modest volume
  • Complex shapes that can reduce assemblies and stock removal
  • Near-net geometry that leaves machining only on functional interfaces

Limitations and Defect Prevention

Moisture and Gas

Residual water can generate gas violently during pouring and cause porosity or surface defects. Drying time, mold thickness, oven loading, and storage humidity require documented control.

Low Permeability

Plaster does not vent as freely as coarse sand. Gating, venting, vacuum assistance where appropriate, and a controlled pour rate help displaced air escape.

Mold Fragility

Thin edges and cores can chip during pattern removal or assembly. Generous handling features and protected storage reduce damage.

Longer Lead Time

Setting and drying add hours or days before pouring. The method rewards stable planning more than urgent high-volume output.

Design Guidelines

  • Use uniform sections and gradual transitions to control feeding and hot spots.
  • Add draft where the pattern must withdraw from a rigid mold section.
  • Round junctions to improve flow and reduce stress concentration.
  • Place gates and risers with solidification direction in mind.
  • Leave machining allowance on sealing faces, bearing bores, threaded holes, and datum pads.
  • Define cosmetic zones separately from functional surfaces.

Plaster Casting Compared with Alternatives

Process Best fit Key tradeoff
Plaster mold casting Detailed nonferrous parts at low to medium volume Slow drying and limited alloy temperature
Sand casting Large parts and broad alloy range Rougher surface and larger allowances
Investment casting Intricate shapes and broad alloy capability Higher process complexity and cost
Permanent mold casting Repeat nonferrous production Higher tooling investment
CNC machining Tight features and billet material properties More stock removal on complex shapes

A hybrid route is common: cast the near-net body, then machine interfaces through CNC machining services. This preserves casting economy while establishing reliable datums, bores, threads, flatness, and sealing finishes.

Inspection and Secondary Machining

Incoming castings should be checked for fill, cracks, inclusions, porosity, warpage, and damaged detail. Dimensional inspection should reference stable casting datums before machining. Depending on service, a plan may include radiography, dye penetrant, pressure testing, chemical certification, or mechanical testing.

Machining setups must accommodate draft and variable as-cast surfaces. Purpose-built nests, probing, and datum pads can prevent excess removal. MTSPi’s quality assurance resources help connect casting acceptance criteria to the final machined drawing.

Frequently Asked Questions

Is plaster mold casting the same as investment casting?

No. Plaster casting normally uses a reusable pattern to create mold sections; investment casting builds a ceramic shell around an expendable pattern.

Can it cast steel?

It is primarily a lower-temperature nonferrous process. Steel temperatures exceed the practical range of conventional plaster molds.

Does a plaster-cast part need machining?

Often yes on precision bores, threads, sealing surfaces, and datum faces, even when the general shape is near net.

Conclusion

Plaster mold casting is a useful bridge between rough sand castings and higher-investment precision routes. Success depends on pattern quality, complete drying, suitable alloy selection, balanced feeding, and a clear plan for final machining and inspection.

Related MTSPi Resources

Categories
Blog CNC Materials

Manual Milling: Process, Applications, Accuracy, and CNC Comparison

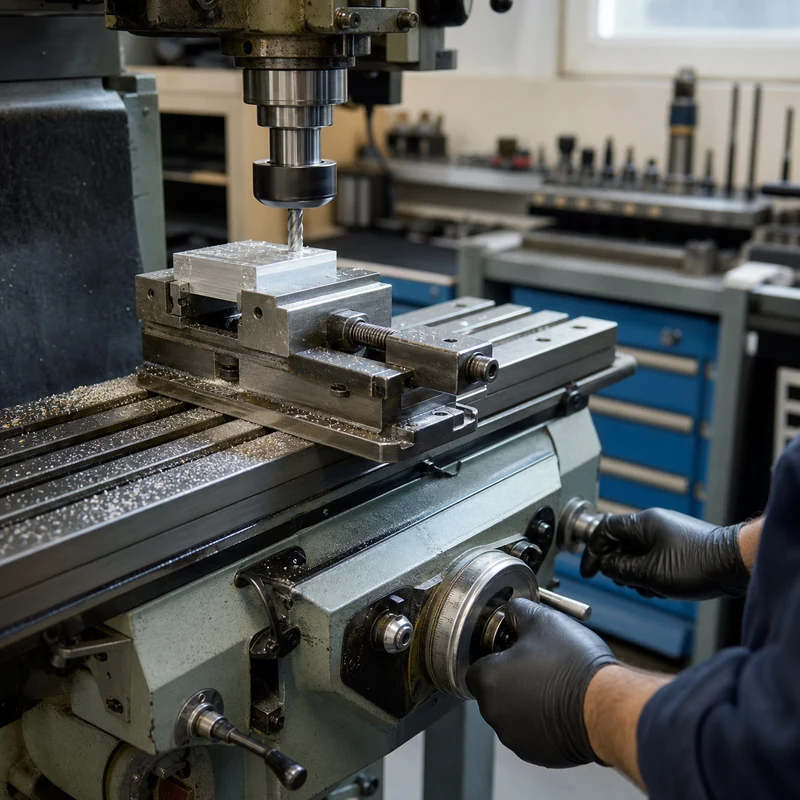
Manual milling remains valuable wherever a machinist needs direct control, quick setup, and immediate feedback. A skilled operator moves the table and spindle with handwheels or power feeds, reads the cut, and adjusts the process without first building a complete CNC program.

It is not a primitive substitute for automation. Used for the right work, a manual mill can be the fastest route to a repair, prototype, fixture detail, or one-off feature. The tradeoff is that repeatability and productivity depend heavily on the operator and the measuring plan.

What Is Manual Milling?

Manual milling removes material with a rotating multi-edge cutter while the operator controls motion along the machine axes. Most shop machines are vertical knee mills, although horizontal mills and bed-type machines are also used. The work is secured in a vise, on a fixture plate, or directly to the table.

Element Manual milling approach Engineering implication
Motion control Handwheels, levers, stops, and optional power feed Fast intervention but operator-dependent
Position reference Dials, digital readout, edge finder, indicators Requires deliberate datum control
Tool path Planned and executed by the machinist Ideal for simple, visible features
Repeatability Relies on setup, stops, and technique Best for low quantities
Change response Immediate at the machine Useful in development and repair

Core Machine Components

  • Spindle and head: hold and rotate the cutter; many vertical mills allow speed changes and head positioning.
  • Table and saddle: provide longitudinal and cross travel.
  • Knee or quill: supplies vertical positioning and controlled drilling or boring motion.
  • Vise and fixtures: locate the work while resisting cutting forces.
  • Digital readout: displays axis position and reduces dependence on dial counting.

A Practical Manual Milling Workflow

  1. Review the drawing. Identify datums, stock allowance, critical features, surface finish, and inspection points.
  2. Plan the setup. Choose stable reference faces and keep the work supported without obstructing tool access.
  3. Prepare stock. Saw oversize, remove burrs, and establish clean locating surfaces.
  4. Align the work. Indicate the vise or part, find an edge, and establish the coordinate origin.
  5. Select tooling and speed. Match cutter geometry, diameter, speed, feed, and coolant to the material.
  6. Rough then finish. Leave a controlled allowance before the final pass.
  7. Inspect in stages. Verify datums and critical dimensions before removing the setup.

Common Operations

Manual mills handle facing, slotting, side milling, drilling, countersinking, reaming, boring, chamfering, and simple contour work. An edge finder and digital readout make hole patterns practical, while a rotary table or dividing head extends the machine to arcs and indexed features.

Where Manual Milling Works Best

  • Repairing a damaged surface, keyway, or mounting pattern
  • Producing a single fixture bracket, soft jaw, stop, or gauge component
  • Making simple prototypes while dimensions are still changing
  • Adding a secondary feature to an existing part
  • Training machinists to understand chip formation, workholding, and datum control

Manual Milling vs CNC Milling

Decision factor Manual mill CNC mill
Quantity One-off and very small batches Repeated batches and production
Geometry Simple, open, operator-visible features Complex contours and coordinated motion
Setup investment Low programming overhead Programming, simulation, and proving required
Cycle consistency Varies with operator Highly repeatable after prove-out
Design changes Very quick for simple edits Program and documentation update
In-process attention Continuous operator involvement More automated once stable

Complex profiles, tight positional relationships, and repeated production generally favor CNC milling services. Manual work can still support CNC production by preparing fixtures, modifying soft jaws, or rescuing a simple urgent feature.

Accuracy and Surface Finish

A well-maintained machine in skilled hands can produce precise work, but capability must be proven rather than assumed. Backlash, spindle condition, table wear, thermal drift, tool deflection, and clamping force all matter. Approach critical coordinates consistently, use a finish allowance, and inspect from the same datums defined on the drawing.

Surface finish depends on cutter sharpness, spindle runout, tram, feed uniformity, rigidity, and chip evacuation. A power feed can improve consistency on long finishing passes.

Design and Quoting Guidance

Keep internal corners compatible with standard cutters, provide tool access, avoid unnecessarily deep narrow pockets, and specify tolerances only where function requires them. For a sourcing decision, compare total setup and inspection time rather than machine hourly rate alone. MTSPi can review the model through its machining service workflow and align requirements with its quality assurance process.

Frequently Asked Questions

Is manual milling obsolete?

No. It remains efficient for repairs, tooling, simple prototypes, and low-volume work.

Can a manual mill hold tight tolerances?

Yes within a verified process window, but the machine condition, operator, setup, measurement method, and part geometry determine the result.

When should a job move to CNC?

Move when coordinated geometry, repeat quantity, cycle consistency, or traceable process control outweighs programming and prove-out time.

Conclusion

Manual milling is strongest when adaptability matters more than automation. A sound datum plan, rigid setup, suitable cutter, staged inspection, and experienced operator turn it into a precise and economical production tool for the right scope.

Related MTSPi Resources

Request A Quote

We'll Send You Back with Price Immediately!

DEC 1-31

XMAS SPECEIL

Up to

40% off

Manual Milling: Process, Applications, Accuracy, and CNC Comparison

We'll Send You Back with Price Immediately!